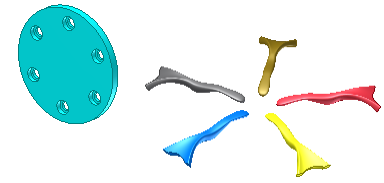
Arrange occurrences of a feature or body into an arc or circular pattern.

Multiply a part feature or body or an assembly feature and arrange the resulting features in an arc or a circle.
To begin, create one or more work or surface features to include in the pattern.
- On the ribbon, click 3D Model tab
 Pattern panel
  Circular
  . In the Circular Pattern dialog box, click Pattern individual features (for parts).
 - In the Circular Pattern dialog box, click Pattern individual features (for parts).
- Click Features. If there are multiple solid bodies in the file, the Solid selection arrow is available. Specify the solid body to receive the feature. The solid body the feature is attached to is selected by default. You can choose to attach the pattern to a different solid, if necessary.
- In the graphics window or model browser, select one or more features or bodies to arrange in a pattern.
- Select a linear edge, work axis, or cylindrical face for the axis (pivot point of angle), about which occurrences are repeated. The axis can be on a different plane from the feature being patterned.
- In Count, enter the number of occurrences in the pattern.
- In Angle, enter the angle:
- Incremental positioning The angle specifies the spacing between occurrences.
- Fitted positioning The angle specifies the total area the pattern feature occupies.
- Optionally, click the Midplane checkbox to distribute the feature occurrences on both sides of the original feature.
- Click Flip to reverse the pattern direction, if needed. If Midplane is selected and there is an even number of occurrences, click Flip to indicate which side gets the extra occurrence.
- Click More to specify the following settings:
- Creation Method Click Optimized to create an optimized pattern, click Identical to create identical features, or click Adjust to terminate features when it encounters a face.
- Positioning Method Click Incremental to space occurrences at the angle specified, or click Fitted to arrange occurrences within the specified angle.
- Click OK.
Note: Patterns created with the Optimized or Identical method calculate faster than the Adjust method. Using Adjust, if it encounters a planar face, the pattern terminates. It can result in a feature with a size and shape that differs from the original.
 Show Me how to create a circular pattern
 Show Me how to create an incremental circular pattern
 Show Me how to adjust a feature pattern to the model
 Show Me how to distribute pattern occurrences evenly around the parent feature
 Show Me how to create a circular pattern without occurrence rotation