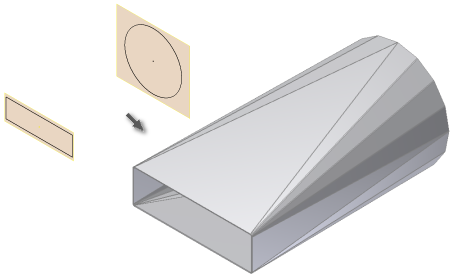
Create a transitional shape from a flat face and a cylindrical bend face using two sketch profiles and approprite options.

- On the ribbon, click Sheet Metal tab
 Create panel
  Lofted Flange . The Lofted Flange dialog box displays.
 - In the graphics window, click the visible sketch geometry that defines the first profile of your Lofted Flange.
- Click the visible sketch geometry that defines the second profile of your Lofted Flange. If Enable/Disable feature preview selected, the Lofted Flange results preview.
- If necessary, on the Lofted Flange dialog box, Shape tab, click Converge. The bend centerlines converge to a point.
- If necessary, select an alternative Facet Control and enter a corresponding control value.
- If necessary, specify a Bend Radius value that differs from the Bend Radius defined in the active Sheet Metal Rule.
- If necessary, on the Unfold Options tab, specify an Unfold Rule that differs from the Unfold Rule defined in the active Sheet Metal Rule.
- Click OK.
Note: To discard any inputs and close the Lofted Flange dialog box, click Cancel at any time.
After you create a Lofted Flange feature using either Die Form or Press Brake, you cannot edit the output option of the feature. You can delete the feature without deleting the profile sketches, and recreate using the alternate output type.