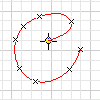
First select a part face or work plane to use as the sketch plane . In an empty file, the sketch plane is preset, and you can start to sketch.
- On the ribbon, click Sketch tab
 Create Panel
  Interpolation Spline
  .
. - In the graphics window, click to set the first point or select an existing point.
- Continue clicking to create more points on the spline.
- Click OK to create the spline and exit the command. Click Apply to create the spline and remain in the spline command.
Note:
Alternatively, you can import points from a Microsoft Excel spreadsheet and automatically create splines or lines through the imported points (see Import Points into Sketches).
Adjust interpolation spline
- To delete the spline without deleting the spline fit points, convert the points to center points.
- To create a spline tangent to a line or arc, with the spline command active, click and drag from an endpoint of the line or arc.
- To edit the position of spline fit points, select the spline, and then click and drag a point. Internal fit points are diamond shaped, end fit points are square.

- Reposition the spline by adding dimensions and constraints to spline fit points, and between the fit points and other geometry.
- Hold down Alt while you drag a spline point to move other nonconstrained spline points to preserve the spline shape. Some points that are constrained do not move.
- To activate a handle, press and drag anywhere on a passive handle, or right-click the handle or a fit point and click Activate Handle.

- To reverse a handle edit, select the spline, right-click, and then click Reset Handle. Uses the handle closest to the cursor location, unless a fit point or handle is selected. Bases the reset on the current spline shape. Does not always change the spline handle back to the original solve state if other handles are modified.
- To reverse all handle edits and restore the spline back to the natural solve state, select the spline, and on the context menu, click Reset All Handles.
- See more options on the context menu.