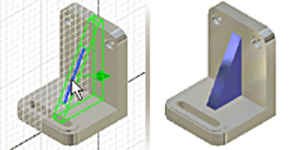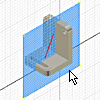
Ribs use an open profile to create a single support shape. The specified thickness is normal to the sketch plane and the material is extruded planar to the sketch.
Tip: Zoom and rotate the part so that you can see the face where the rib is located.

Set the sketch plane and create the profile geometry:
- Optionally, create a work plane to use as the sketch plane. Click 2D Sketch, and then click the work plane or a planar face to set the sketch plane.
- If appropriate, use View Face to reorient the sketch.
- Use commands on the Sketch tab to create an open profile to represent the rib shape.
Next, define the rib direction, thickness, and extent:
- On the ribbon, click 3D Model tab
 Create panel
  Rib
Rib  . Verify that the profile is selected. If not, click it to select.
 - Click
 to set the direction of the rib. Click a Flip direction to specify the direction material is extruded.
 - If there are multiple bodies in the part file, select the Solids selector to choose the participating body.
- In the Thickness box, enter the rib thickness. Click a Flip direction to specify the direction of the rib thickness.
- Click one of the following to set the depth of the rib:
 To Next Terminate the rib on the next face.
  Finite Sets a specific depth. Enter a value.
 - Click OK to create the rib or web.
Note: To create a rib network or web network, sketch multiple intersecting or nonintersecting profiles on the sketch plane, then follow the previous steps.
 Show Me how to create a rib parallel to the sketch plane