The BIM Exchange environment authors (defines) and publishes (exports) IPTs so that you can use them with AutoCAD and Revit. These applications are purpose-built building design and construction systems for documenting Architectural, Structural, Mechanical, Electrical, and Plumbing (MEP) information.
BIM Exchange publishes 2D and 3D IPT design data to an Autodesk Exchange File (.ADSK). In addition, the BIM Exchange application can export Revit geometry natively to a Revit Family (.RFA) file. Multiple Autodesk products can consume an Autodesk Exchange File. BIM Exchange provides models, and their metadata, to a variety of Architectural, Engineering, & Construction (AEC) applications.
Autodesk products, such as AutoCAD and Revit, contain different tools for consuming data. BIM Exchange is an Autodesk Inventor add-in that uses Autodesk Inventor's geometric modeling commands to define models that can be used in other Autodesk products. BIM Exchange has commands for defining connectors, simplifying and recognize model geometry/data, and exporting data to either a .RFA or .ADSK file.
Important: If Revit is a desired outcome it is necessary to utilize the Feature Recognition tools to convert the various types of geometry created in Inventor to match those that are available in the Revit software.
The general workflow for BIM Exchange consists of three main components:
- Simplify
- The process of reducing the complexity of a model by removing components or unnecessary features. Use the Simplified Assemblies command to create envelopes and combine components. Use Shrinkwrap substitute, Level of Detail representations, derived part, and other techniques to simplify a part or assembly before authoring or publishing. Since building engineers need only the details that are relevant to their design, often only the basic 3D shape and connection features are important. When you export a component, it is good practice to keep the .RFA and .ADSK file size as small as possible by simplifying the assembly.
- Author
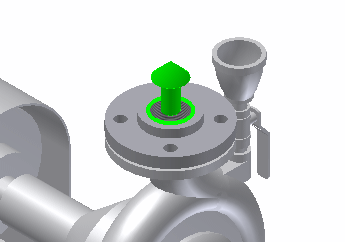
- The process of defining connector objects that indicate how and where things connect. Connector objects are used in MEP applications to define associations between equipment, such as a heat exchanger, and building systems, such as HVAC. Each of the five types of connectors: cable, conduit, duct, electrical, and pipe has a command to create, edit, and delete them. Note: Connectors glyphs are similar to assembly mate constraints in that they indicate a mating face or plane. They do not indiate flow direction. Typically, connectors point away from the host component. Use Direction to reverse connector direction.
Flow direction is defined independently inside of the connector element.
You add connectors by defining their position, orientation, shape, and size. You then select the connection type before applying the connector to the model to use in AutoCAD MEP or Revit MEP. As you add connectors, they appear in the BIM Exchange browser.
- Publish
- The process of verifying and exporting Inventor data to an .ADSK or a .RFA file. The exported file contains geometry, 2D views, connectors, parameters, and other properties. The receiving application imports the data that application supports.
Use Shrinkwrap or Level of Detail representations to simplify the data before exporting to an .ADSK or a .RFA file. If the design consists of a single part, you can simplify by placing the part in an empty assembly file. Then use Shrinkwrap Substitute with the assembly file.
A User Defined Coordinate System (UCS) can be selected in the Export Building Components command. Any UCS defined in the part or assembly is available in Export Building Components command. To facilitate it, the UCS command is available in the BIM Exchange tab. Many architectural applications consider the positive Z direction to be up toward the ceiling where mechanical applications often consider positive Z to be out. It is important to define the proper UCS so that the model imports in the appropriate orientation.
Both Revit MEP and AutoCAD MEP can import ADSK files and the associated data. The application imports only the data that is supported. Data that is not supported is ignored in the file. It is important to remember that if an .ADSK file is utilized it will be unable to be fully modified in the AEC application. For this reason, it is important to follow the workflow outlined below to achieve either an .ADSK or a .RFA file.