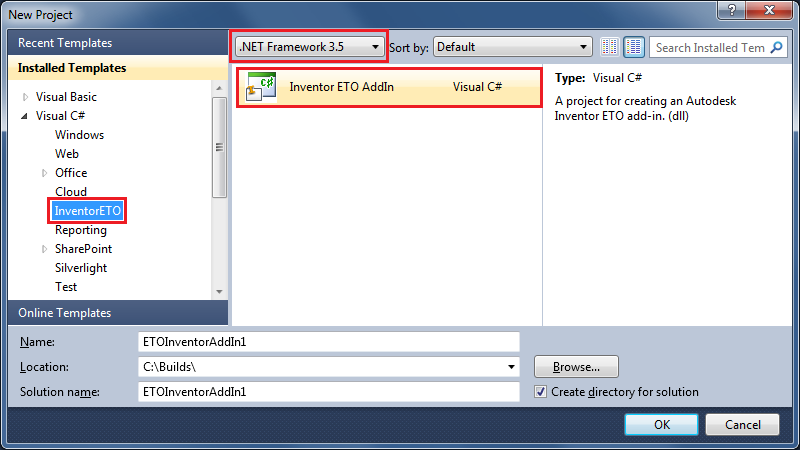
You can add this project to your existing solution or create a new solution. ETO Series Studio allows all your related projects to be in the same solution. You may also select a name for the project. When you are satisfied with your selections, click OK.
You should now have a new Project in your solution. To understand more about the template and how to work with it, view the readme.txt file created with the project. The readme will contain instructions for how to debug the project, manually register the add-in and other useful information. If you are familiar with all of those actions, you can remove the readme.txt from your project.
The image below shows what a user might typically see after creating the Inventor Add-in project.

- Set the project to launch Inventor (or Inventor OEM) on start-up.
- Open project properties.
- Select the "Debug" tab.
- Set the "Start Action" to "Start external program."
- Select <InstallPath>\Inventor.exe (or InventorOEM.exe) as the start-up program.
- Build the Project.
- Start debugging.
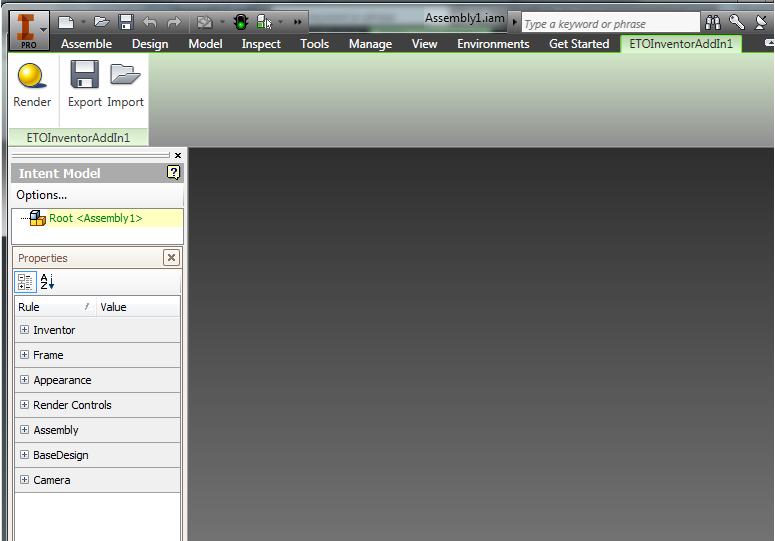
From there, if you build the add-in project and run Inventor, you should see your add-in loaded, along with some sample ribbon bar items. The image below shows the results of running the sample project above.