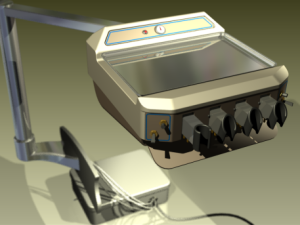
You can use the various Studio commands to give your model a realistic appearance, lighting, and camera positions that highlight the beneficial aspects of your product.
Common Styles Workflow
Regardless of the style type (lighting or scene) there are common aspects to the workflow for creating new styles and editing existing ones.
These commands are typical and accessed from a style context menu.
- New Style Creates a new style using predetermined application defaults.
- Copy Style Duplicates the style and all of its settings.
- Rename Style Edits and highlights the style name so all you need do is enter a new name.
- Export Style Saves the selected style in a formatted XML file so that it can be shared between users.
Measure Command and Frequently Used Values
To use the Measure command or choose from most recently used values, click the arrow associated with the input box and select from the list.
Lights and Cameras
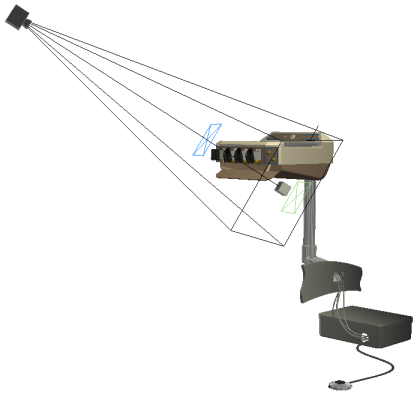
Cameras and Lights have geometric representations that can be used to modify position and location of both the target and source. Their edit behaviors are similar. Light and Camera targets and positions, when selected, can be moved using the triad associated to the selection. Use the ViewCube to adjust the view during the process. The direction line between the source and target is also selectable during edit and enables moving of the light or camera.
The graphical representations of cameras and lights can be turned off to reduce visual clutter in the scene. Changing the visibility does not affect the scene output.
Copy and Paste commands
You can copy and paste cameras and lights using the context menu commands or the standard Copy/Paste commands. The copy is placed next to the original in a selected state ready to move and edit.
You can also edit the target and position elements in the graphics region. Click the target or position glyph, the move triad appears as well as the 3D Move/Rotate dialog box for explicit values.
Lighting Styles
Use Lighting Styles to illuminate scenes. A lighting style is a collection of one or more lights. Set parameters for brightness, color, position, and so on, with the desired result in mind. Inventor Studio provides several lighting styles for your use or you can create new ones.
Scene Styles
A scene style provides the background for your image or animation. Studio provides commands for positioning a ground plane and parameters for shadows and reflection. Additionally, scene styles can use a single color, gradient, or an image for enhancing the rendered image or animation.
Cameras
Cameras are used to establish the viewing angle for the scene. Careful consideration with respect to the viewing angle and camera type improves the rendered image. Cameras can be animated in a variety of ways, such as a camera turntable, animated along a path, and freeform (non-path).
You can create and maintain as many cameras as you want in the scene. Cameras are saved with the model and can be recalled during any Inventor Studio session. Cameras may also be deleted from the scene.
There are two types of cameras, orthographic and perspective. Orthographic cameras are typically used to produce standard and isometric style images. Perspective cameras are used when you want the impression of depth in your image or when the rendered output is combined with a photograph. Use various camera parameters, such as orthographic and perspective, camera roll, zoom, and depth of field to achieve the results you need for your images and animation.
Camera Settings
The zoom angle of the camera, and distance from the target to the position determine the width of the square. The height of the square respects the aspect ratio defined by the stored rendering settings. For example, if the rendered image size is 640 x 480, the height of the square is 3/4 the width. A shape that is a combination of a truncated pyramid and a box is displayed at the position point. The roll marker, a small black vertical line at the middle of the top edge of the view volume square, indicates the up direction of the camera and is also a handle used to adjust the roll angle.
Depth of Field
Depth of field has two parameters, Near and Far, represented as planes. Objects situated between those values are in focus. Objects outside the values become increasingly out of focus the farther they are from the Near/Far values.
You can use the output from one or more cameras, either still or running shots, to compose a video animation. See Video Producer reference.
Local Lights
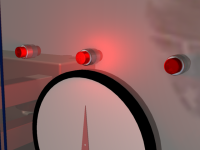
Local lights provide the means to create lighted objects, such as lighted switches, panel lights, and so on. Some limitations apply.
Rendered Image
If the rendered scene is to be combined with a photograph in post edit, then render it using a perspective camera with an angle similar to that in th photograph. Attempt to simulate the lighting conditions and shadow direction as best you can.
To output an image without a background, for compositing with another image, use PNG with the Alpha Channel option turned on. The background will be transparent.
Anti-aliasing
As anti-aliasing quality improves render time increases. Do test renders, setting the value to low or no anti-aliasing. For final renders, use a higher quality anti-aliasing setting.
Render Settings
Render Types
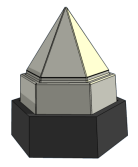
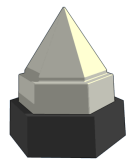
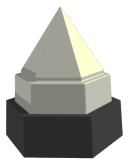
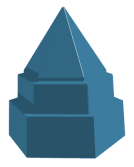
The following examples demonstrate some of the combinations possible with the Illustration Render Type:
 |
Color Fill
Edges
|
 |
Color Fill
Edges
|
 |
Color Fill
Edges
|
 |
Color Fill
Edges
|
 |
Color Fill
Edges
|
 |
Color Fill
Edges
|
 |
Color Fill
Edges
|