In this exercise, you provide styles for some of the layers that have not yet been edited, so that the layers in the map are displayed in color and at the appropriate scales.
Note: The following exercise uses the
standard layer style to configure styles in the Layer Editor. Also available is the
enhanced layer style, which supports compound symbols and composite styles. To change the layer style, click Tools menu

Options
Layer Editor tab. Under Layer Style, select Standard for this exercise. See the Studio User's Guide for instructions on using enhanced styles.
| |
Detailed steps |
|---|
|
|
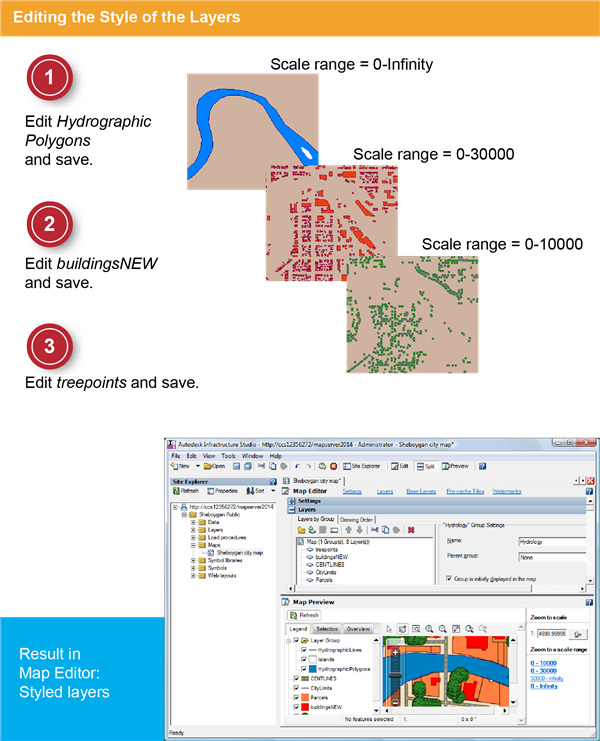
- In the Site Explorer, double-click the layer HydrographicPolygons to open it.
- At the top of the Layer Editor, click Style to bring the Style panel to the top. In the Layer Editor, for Style Of The Geometry, click [...].
- In the Style dialog box, for Fill Foreground Color, select a mid-blue color. For Border Line Color, select a dark-blue color.
- Save and close the resource.
|
|
|
- In the Site Explorer, double-click the layer buildingsNEW to open it.
- In the Style dialog box, for Fill Foreground Color, select a red color. For Border Line Color, select a brown color. For Scale Ranges, edit the To field so that the scale range is from 0-30000.
- Save and close the resource.
|
|
|
- In the Site Explorer, double-click the layer treepoints.
- In the Style dialog box, Width and Height enter 0.1. For Fill Foreground Color and Border Line Color, select a green color. For Scale Ranges, edit the To field so that the scale range is from 0-10000. Note: ten thousand not thirty thousand.
- Save and close the resource.
|