In this exercise, you add more layers to your map, and use the Drawing Order and Layer Group tools to organize them.
| |
Detailed steps |
|---|
|
|
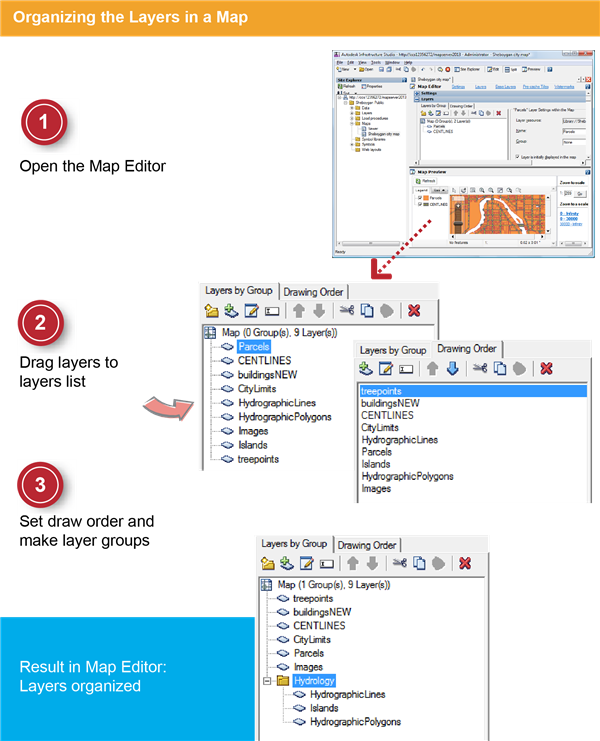
- Double-click Sheboygan City Map in the Site Explorer to open it. If it is already open, click its tab to view it.
|
|
|
- On the Infrastructure Studio toolbar, click Edit to hide the preview panel.
- In the Site Explorer, select the layer buildingsNew and drag it to the list of layers in the Layers panel (CENTLINES and Parcels should already be in the list).
- Repeat to drag the layers shown in the illustration on the facing page to the list.
You should have a list of layers in no particular order, as shown in the illustration.
|
|
|
- Click the Drawing Order tab, then use the arrow buttons to move the layers into the order shown in the illustration, with the layer Images at the bottom and treepoints at the top.
- Click the Layers By Group tab. Right-click in the list and select New Group.
- Name the new group Hydrology and drag the hydrology layers plus Islands into it.
- Save the changes to the map resource.
|