The Curves menu items process entire animation curves.
Animation curves are extrapolated outside the first and last keys of the curve. Curves before the first key and after the last key will be flat (no change in value over time) unless you set the pre and post infinity controls to anything other than constant. You can use these options to automatically generate specific types of repeating animation.
If you want to create editable animation of a repetitious or cyclical nature, you can bake a channel with Infinity turned on.
- Pre and Post Infinity
-
The Pre and Post settings define the behavior of an animation curve before and after the first key of that curve.
- Cycle
-
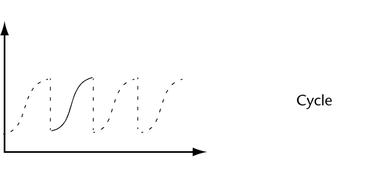
The Cycle setting repeats the animation curve as a copy infinitely.
- Cycle with Offset
-
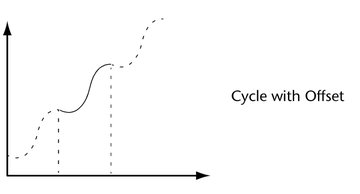
The Cycle with Offset setting repeats the animation curve infinitely, except it appends the cycled curve’s last key’s value to the value of the first key’s original curve.
- Oscillate
-
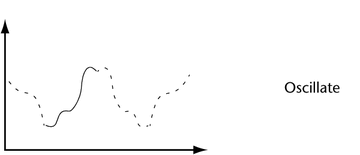
The Oscillate setting repeats the animation curve by reversing its values, and therefore shape, with each cycle, creating an alternating backwards and forwards effect.
- Linear
-
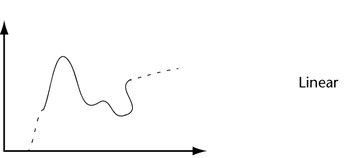
The Linear setting extrapolates the value of the first key using its tangent information. It projects a linear curve infinitely beyond.
- Constant
-
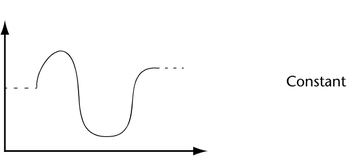
The Constant setting maintains the value of the end keys. This is the default setting for animation curves in Maya.
- Isolate Curve
-
When on, only selected curves display in the graph view area and all other curves are hidden.
For example, to focus on only the Translate Y curves of several objects at once, select either the Translate Y curves in the graph view or the Translate Y channels in the Channel Box, then enable Isolate Curve. All other curves are hidden and you can easily edit the Translate Y curves alone.
- Curve Smoothness
-
This setting controls the smoothness resolution of curves in the graph view. Decreasing the resolution lessens the time to display the graph view.
Note that this setting has no impact on the behavior of animation curves, and it affects only the display of the curves in the graph view.
- Bake Channel
-
This operation calculates a new animation curve for an attribute using the input nodes that contribute to its properties. This is different from the Edit > Keys > Bake Simulation operation. This operation is useful when you want to:
- edit a single animation curve instead of all the contributing attributes that affect the behavior of a single attribute.
- add keys to an existing curve Note: Bake Channel operates only on animation that can be evaluated explicitly. Inverse Kinematics systems cannot be operated on with Bake Channel. To create animation curves from IK, use Edit > Keys > Bake Simulation.
Select Bake Channel >
 to open the Bake Channel Options.
Bake Channel Options window
Time Range
Specifies what keys are baked.
- Time Slider
-
All keys present in the region between the Playback Start and End times in the Time Slider are baked into a new channel.
- Start/End
-
All keys within the specified time range (start time/end time) are baked into a new channel.
- Start Time
-
Specifies the start of the time range. Available only if Start/End is on.
- End Time
-
Specifies the end of the time range. Available only if Start/End is on.
- Sample By
-
Specifies the frequency with which Maya will evaluate the animation and generate keys. Increasing this value decreases how often Maya sets keys for the animation. Decreasing has the opposite effect.
The Sample By value is based on the Time Unit setting. It represents the frequency with which Maya will analyze the object’s animation and generate a key. A value of 1 creates a key at each time unit. Greater values decrease the frequency of generated keys, and smaller values increase the frequency.
- Keep Unbaked Keys
-
This is on by default. This option preserves the keys that are outside the baked time range and only applies to directly connected animation curves.
When turned on, bake simulation does not remove keys that are outside the bake range.
When turned off, only the keys created within the specified time range during the bake will be present on the animation curve after the operation.
- Sparse Curve Bake
-
This option operates only on directly connected animation curves. It produces bake results that create only enough keys to represent the shape of the animation curve.
- Mute Channel
-
Mutes the selected channel.
Mute appears under the current animation channel’s name in the outliner and the muted animation curve appears as a dotted line in the graph view. See also Mute channels.
- Unmute Channel
-
Unmutes the selected (muted) channel. See also Mute channels.
- Template Channel
-
Templates the selected animation channel in the outliner and its corresponding animation curve in the graph view.
When an animation channel is templated, its keys continue to contribute to its object’s overall animation, but its curve and keys in the graph view are no longer selectable. Also, a small icon appears beside the templated channel in the outliner, and the templated channel curve appears gray in the graph view.
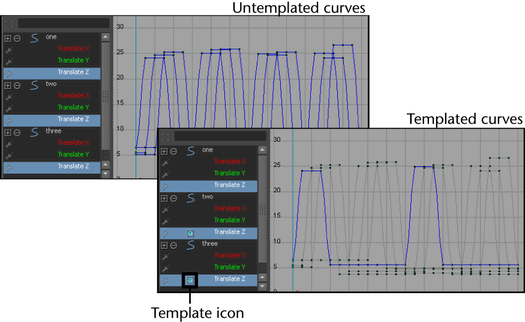
Templating animation channels and their curves is useful when you have several overlapping animation curves with many keys, and you want to edit only one curve, but you need to be able to see all the other curves in the graph view.
- Untemplate Channel
-
Untemplates the selected animation channel in the outliner and its corresponding animation curve in the graph view. When an animation channel is untemplated, its curve and keys in the graph view can once again be selected.
- Pin Channel
-
Pins the selected channel so that its curve displays in the graph area regardless of what is selected. See also Pinning channels.
- Unpin Channel
-
Unpins the selected channel so that its curve displays only when it is selected.
- Change Rotation Interp
-
This menu lets you change the rotation interpolation type of existing curves.
You can change the rotation interpolation type only on rotation channels that have keyframes on all three channels (rotateX, rotateY, rotateZ). In addition, because the rotateX, rotateY and rotateZ channels always share the same interpolation type, changing interpolation for a single channel such as rotateX, will automatically change rotateY and rotateZ as well.
For more information on rotation interpolation, see Animated rotation in Maya.
- Independent Euler
-
Calculates the rotation using three separate angles representing rotations about the X, Y, and Z axes, and an order or rotation. In this mode, the curves that define the rotation for a given node are represented in Euler-angles, interpolation is performed on each curve independently in Euler space, and keyframes may occur at your discretion—they are not synchronized with the other sibling rotation curves at the node. You can also animate a single rotation ordinate. This is the default setting.
- Synchronized Euler
-
Creates curves that have keyframes on sibling curves locked together but with interpolation between keyframes performed in Euler-space.
It’s useful to keep rotation keyframes synchronized because rotation is a composition of the three separate rotate values. Deleting just one key on a curve can have a dramatic and unexpected effect on the interpolation.
- Quaternion Slerp
-
Interpolation is calculated using spherical linear interpolation and does not depend on the tangents of the input curves.
- Quaternion Cubic
-
Interpolation is calculated using quaternion cubic interpolation (Squad) and does not depend on the tangents of the input curves.
- Quaternion Tangent Dependent
-
Interpolation is calculated using quaternion interpolation based on the input curve tangents. For example, if the tangents are linear, Maya uses spherical linear interpolation (Slerp), and if the tangents are clamped, Maya uses cubic interpolation (Squad).
- Simplify Curve
-
Use this operation to remove keys that are not necessary to describe the shape of an animation curve. Excess keys may accumulate on an animation curve as a result of adding keys manually or performing operations such as Bake Channel. You may need to remove keys from an animation curve to reduce the graph complexity and provide larger spans for adjusting curve tangents.
Simplify Curve Options
- Time Range
-
Specifies the time range where the curve is simplified.
- All
-
Simplifies the curve for the entire time range.
- Time Slider
-
Simplifies the curve for the time range defined by the Playback Start and End times of the Time Slider.
- Start/End
-
All keys within the specified time range (start time/end time) are simplified.
- Start Time
-
Specifies the start of the time range. This is available only if Start/End is on.
- End Time
-
Specifies the end of the time range. This is available only if Start/End is on.
- Simplify Method
-
Set one of the following options:
- Classic
-
Removes excess keys using the algorithm used in previous versions of Maya. Use this method on light data sets, such as keyframe animations, which don’t have keys on every frame.
- Dense Data
-
Removes excess keys using an algorithm designed for dense data sets, such as motion capture data, which have a key on every frame. This method may also work well if the Classic method doesn’t give you the desired results.
- Time Tolerance
-
The amount (in seconds) that the timing for the keys is averaged when the selected curve is simplified. The higher the Time Tolerance, the sparser your keys and the less your resulting curve resembles the original curve. The default Time Tolerance is 0.05.
- Value Tolerance
-
The amount (in your current working units) that the values of the keys are averaged when the selected curve is simplified. The default Value Tolerance to 0.01.
- Euler Filter
- Resample Curve
-
Resampling creates a periodic frame rate by placing keys at uniform intervals.
To resample a curve, you select a sampling filter, which is an algorithm defining how the keys in the curve are resampled. Tangent and curve values are ignored. The filter converts animation curves with keys at either uniform or non-uniform intervals to curves with keys at a uniform interval that you specify.
Tip: The resampling filters are designed to reduce the number of keys in dense data curves. It may not produce the desired results when used on curves with few keys.Select Resample Curve >
 to open the Resample Curve Options.
Resample Curve Options window
- Time Range
-
Specifies the range of time in where keys are resampled.
- All
-
Resamples the curve for the entire time range.
- Start/End
-
All keys within the specified time range (start time/end time) are resampled.
- Time Slider
-
Resamples the curve for the time range defined by the Playback Start and End times of the Time Slider.
- Start Time
-
Specifies the start of the time range. This is available only if Start/End is on.
- End Time
-
Specifies the end of the time range. This is available only if Start/End is on.
- Resample Type
-
Specifies the resampling filter, which is an algorithm that defines how the keys in the curve are resampled. Choose one of the following:
- Closest Sample
-
Uses the value of the sample that is closest to the nearest time step.
- Linear Interpolation
-
Uses linear interpolation between two samples closest to the nearest time step.
- Box Filter
-
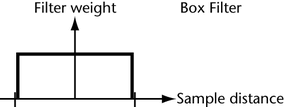
Sums up all the samples in the filter area with an equal weight.
- Triangle Filter
-
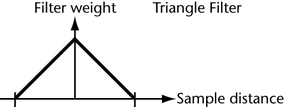
Uses a linear curve that affects the keys so that the least filtering happens at the edges of the sampled area.
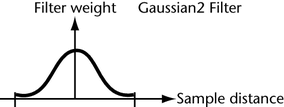
- Gaussian 2
-
Uses a sloped curve that weights the sampling gently at the top of the peak and toward the edge of the sampled area. This is the default.
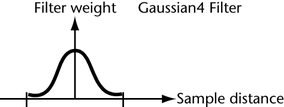
- Gaussian 4
-
Similar to the Gaussian2 filter but with a narrower base.
- Time Step
-
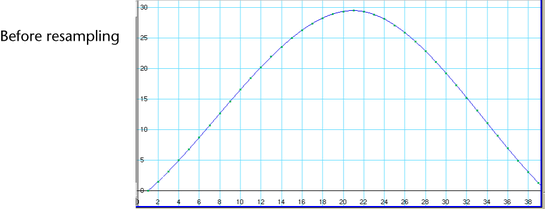
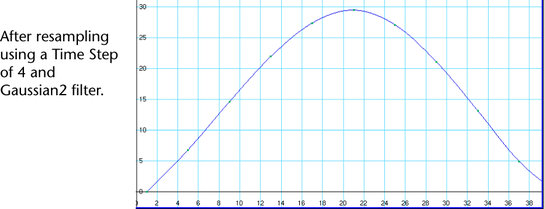
Sets the period for resampling. If you set Time Step to 4, then a key frame will be placed every four frames. Resampling works best when the Time Step period is greater than the frequency of keyframes on the curve.
- Spreadsheet
-
This menu selection lets you edit the values and attributes of the selected animation curves in a spreadsheet format in the Attribute Editor.
- Buffer Curve
-
Select from the following options:
- Snapshot
-
Takes a snapshot of your curve. Use Swap Buffer Curve to switch between your curve snapshot and the current curve. See also View curves while editing.
- Swap Buffer Curve
-
Toggles between the original curve (the buffer curve snapshot or the referenced curve snapshot) and the current, edited curve. Lets you view and play both the curves animations. See also View curves while editing.
- Non-Weighted Tangents
-
The default setting is non-weighted tangents, which provide simple handles for manipulating the tangent’s angle. To change the weighting of an animation curve, use Curves > Weighted to change the curve’s tangent type to weighted.
Note: You cannot mix weighted and non-weighted tangents in the same curve. - Weighted Tangents
-
Weighted tangents represent the amount of influence a tangent’s length has on an animation curve segment. By turning on Free Tangent Weight (see Free Tangent Weight), it is possible to simultaneously edit the influence and angle of the tangent quickly and intuitively. Users of desktop illustration packages will recognize the familiar Bezier-style behavior when in this mode.
Tangent weights are represented by the length of the tangent handle, and editable tangent weights are manipulated by dragging the handle’s length.
Tangents of weighted animation curves have not only an angle but also a weight. The higher the weight of a tangent, the more influence it has on the shape of the curve segment compared with the tangent at the other end of the curve segment.