In this task you will practice various techniques for animating results.
In this task, you will:
- Animate several analysis results.
- Step through animated results.
- Lock animations to compare time related outcomes.
- Use the Loop and Bounce animation feature.
If you have the model from the previous task open, skip the first three steps.
- Click
 then
then  .
. - Open the Postprocessing project you created in the first task of this tutorial.
- Double-click cpu_base in the Project View pane to open the model.
- Select Bulk temperature from the Results list in the Study Tasks pane.
- Click
 , to open the Results tab.
 - Go to the Animation panel (). This panel allows you to display result properties for the duration of the analysis.
Note: Only relevant tools in the Animation panel are activated at one time. Not all results can be animated.
- Click
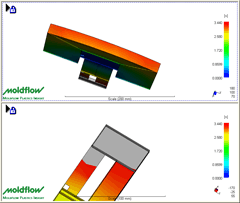
 . A simulation of the bulk temperature is displayed. Note how the cooling of the part after filling is best represented with an animation. The hot runner is also shown to retain most of its heat as expected.
 - Select Fill time from the Results list and view an animation of the fill time.
- Rotate the model to -180 100 70 by entering these values in the Rotation Angles box
 on the Viewpoint panel ().
 - Zoom in on the end of the model.
- Click
 Lock Animation from the Locking panel ().
 - Click
 Split Horizontally.
 - Click in the lower window to make it active and select Fill time from the Results list.
- Rotate the model to -170 -25 55 and zoom in on the tail of the model.
- Click Lock Animation from the Locking panel ().
Note:
- The individual images maintained their orientation because you have locked the animation but not the view of the part.
- Only animations with the same number of screens can be viewed simultaneously.
- Click ().
- Click
 Step Backward twice, and click
  Step Forward once.
The difference in time for the extremities of the model to be filled is illustrated. This could cause overpacking in the first section that is filled.
Instead of moving through the animation one frame at a time, you can quickly jump to the portion of the fill sequence that is of interest.
- Drag the slider bar on the Animation panel to about half way.
The numbers to the right of the slider bar represent the amount of elapsed time this image represents. The total filling time is displayed as the maximum value of the scale range in the Model pane. This shows that it took approximately 3.5 seconds to fill this part.
- Remove the split window and select Fill time in the Study Tasks pane. Use the ViewCube to switch to Front view.
- Click
 (). This will continuously replay the animation from start to finish.
 - Click
 (). This will continuously replay the animation from start to finish and back to start again.
 - Click
 ().
().
Click the Next topic link below to move on to the next task of the tutorial.