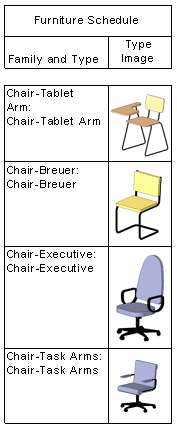
This example illustrates how to include images in a furniture schedule, but you can use the same procedure to include images in other types of schedules.
VIdeo: Creating a Furniture Schedule with Images
- Add furniture elements to the model, for example several types of chairs.
- Select a furniture element in the model, and click Modify | Furniture tab
 Mode panel
 (Edit Family).
 - Open the Family Types dialog, and under Identity Data, click in the Type Image field, and click the browse button to open the Manage Images dialog.
- Click Add, and navigate to the location of the image you wish to associate with this furniture family.
- Select the image, and click Open.
- Click
 (Load into Project) to load the family back into the model and overwrite the existing family and parameters.
 - Repeat steps 2-6 for each furniture family you placed in the model.
- Create a Furniture schedule, and include the Family and Type, and Type Image fields.
- Create a sheet view and place the furniture schedule on the sheet. The furniture images display in the schedule viewport placed on the sheet.
