The Material module from the simple UI reduces dialog boxes to the minimum of applicable settings. It helps inexperienced users to create and assign materials simply and quickly.
Extended drag and drop operations and the preview feature on material assignment saves time on scene setup.
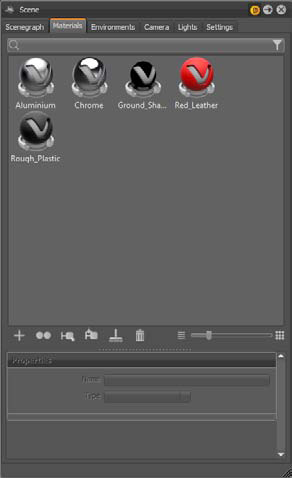
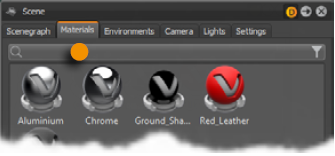
Search field
This search field provides live-search capabilities within the materials module. Entering one character hides all materials beginning with other characters. It is on top of the materials module - below the module tabs. Only single search terms are supported.
Material preview list
Every scene-related material is represented by an icon within the material preview list. Switches, layered, and multipass materials have another smaller icon on lower left corner of the icon.
Click selects a material; right-click opens the context menu. Clicking a selected material enables renaming.
Assign materials by dragging them to objects in the render view. In addition, common features like for example, replacing all occurrences of a material is contained by now.
- Left mouse button: Replaces the material on a single object.
- Middle mouse button: Replaces the material on all objects that are to be replaced by the material assigned.
- Right mouse button: Converts the material to a material switch or multipass material. A pop-up menu lets you choose the desired type. Both materials (before assigned and dragged) are present within the newly created material.
Preview on material assignment is a feature that gives visual feedback before the material is dropped onto an object. This avoids miss-assignment on dragging.
Context menu
The context menu provides commands to create, change, or convert materials or its properties. Once the setup is done, the load and save feature enables the reuse within other scenes. Selection and assignment complete the scope of operation here.
Create (sub menu)

VRED provides lots of different material node types that support you creating every type of material you can imagine. The properties dialog box settings for the different node types are depending on its use case; they are at the bottom of the module.
The creation of photorealistic materials requires sometimes the ability to use custom graphic files for its definition - these graphic files are called textures. Textures can be assigned within the most material types, directly below the material property settings. All usual 2D file formats are supported.
Using textures implies a mechanism that tells the render engine about the position, orientation and scale of an image. All this information is generated automatically in the background on texture assignment within simple UI. Features to change these kinds of settings are accessible from standard UI.
- Name
- A material naming scheme with clear identifiers enables the live-search to find materials within complex scenes or libraries quickly.
- Type
- Change the material node type using the drop-down menu on top of the properties dialog box. All adoptable property settings are adopted automatically.
VRED Material types and its properties
Phong
Phong shading is a historical technique that describes the way a surface reflects light. It generates diffuse reflections from rough surfaces and specular reflections from shiny surfaces - based on the fact that shiny surfaces have small intense specular highlights, while dull surfaces have large highlights that fall off more gradually .
- Diffuse Color
- This attribute defines the base color, the main characteristic of the material. The slider enables changing the brightness; click the color field on the right to open the color chooser. Assigning a texture to the diffuse color, projects it onto the surface. The look representation is a combination of the defined color and the assigned texture.
- Glossy Color
- Sets the material's color for surfaces glossy reflections. The slider enables changing the brightness; click the color field on the right to open the color chooser. Assigning a texture to the glossy channel defines areas in which different gloss intensities appear with help of a texture. The glossy color depends finally on both - the defined color and the possibly assigned texture file.
- Roughness
- The roughness parameter controls light refractions on top of the surface. The higher the value, the more rough is the microscopic structure on top of the surface and the more diffuse are the reflections.
- Bump
- Bump mapping enables the creation of structure to the materials surface. The Bump slider controls the height of that effect. A higher value results in more depth structure. If a texture is assigned to the bump map channel, it is used as a pattern figure on surface illustration. If no texture is assigned, a default noise map is used instead; Structure size affects then scale.
Plastic
Plastic is suitable to simulate shiny or glossy surfaces from objects that are made of synthetic materials.
- Diffuse Color
- This attribute defines the base color, the main characteristic of the material. The slider enables changing the brightness; click the color field on the right to open the color chooser. Assigning a texture to the diffuse color, projects it onto the surface. The look representation is a combination of the defined color and the assigned texture.
- Glossy Color
- Sets the material's color for surfaces glossy reflections. The slider enables changing the brightness; click the color field on the right to open the color chooser. Assigning a texture to the glossy channel defines areas in which different gloss intensities appear with help of a texture. The glossy color depends finally on both - the defined color and the possibly assigned texture file.
- Roughness
- The roughness parameter controls light refractions on top of the surface. The higher the value, the more rough the microscopic structure on top of the surface and the more diffuse the reflections.
- Reflectivity
- Controls the intensity of reflection on the surface. The higher the value the more the influence from environment and objects around.
- Bump
- Bump mapping enables the creation of structure to the materials surface. The Bump slider controls the height of that effect. A higher value results in more depth structure. If a texture is assigned to the bump map channel, it is used as a pattern figure on surface illustration. If no texture is assigned, a default noise map is used instead; Structure size affects then scale.
Triplanar
In difference to all other materials that could have textures assigned, the Triplanar node type enables you to have a custom mapping on different object sides within one material definition. Features to adjust these settings are accessible from standard UI. This type is recommended to create for example, leather, fabric, and diffuse plastic materials.

- Diffuse Color
- This attribute defines the base color, the main characteristic of the material. The slider enables changing the brightness; click the color field on the right to open the color chooser. Assigning a texture to the diffuse color, projects it onto the surface. The look representation is a combination of the defined color and the assigned texture.
- Glossy Color
- Sets the material's color for surfaces glossy reflections. The slider enables changing the brightness; click the color field on the right to open the color chooser. Assigning a texture to the glossy channel defines areas in which different gloss intensities appear with help of a texture. The glossy color depends finally on both - the defined color and the possibly assigned texture file.
- Roughness
- The roughness parameter controls light refractions on top of the surface. The higher the value, the more rough the microscopic structure on top of the surface and the more diffuse the reflections.
- Reflectivity
- Controls the intensity of reflection on the surface. The higher the value the more the influence from environment and objects around.
- Bump
- Bump mapping enables the creation of structure to the materials surface. The Bump slider controls the height of that effect. A higher value results in more depth structure. If a texture is assigned to the bump map channel, it is used as a pattern figure on surface illustration. If no texture is assigned, a default noise map is used instead; Structure size affects then scale.
Reflective Plastic
Reflective Plastic is also suitable to simulate shiny or glossy surfaces from objects that are made of synthetic materials. It adds the ability to have a mirror image reflection of everything around on its surface.
- Diffuse Color
- This attribute defines the base color, the main characteristic of the material. The slider enables changing the brightness; click the color field on the right to open the color chooser. Assigning a texture to the diffuse color, projects it onto the surface. The look representation is a combination of the defined color and the assigned texture.
- Glossy Color
- Glossy Color: Sets the material's color for surfaces glossy reflections. The slider enables changing the brightness; click the color field on the right to open the color chooser. Assigning a texture to the glossy channel defines areas in which different gloss intensities appear with help of a texture. The glossy color depends finally on both - the defined color and the possibly assigned texture file.
- Roughness
- The roughness parameter controls light refractions on top of the surface. The higher the value, the more rough the microscopic structure on top of the surface and the more diffuse the reflections.
- Reflectivity
- Controls the intensity of reflection on the surface. The higher the value the more the influence from environment and objects around.
- Bump
- Bump mapping enables the creation of structure to the materials surface. The Bump slider controls the height of that effect. A higher value results in more depth structure. If a texture is assigned to the bump map channel, it is used as a pattern figure on surface illustration. If no texture is assigned, a default noise map is used instead; Structure size affects then scale.
Reflective Triplanar
This node type provides the triplanar mapping feature in combination with mirror reflections from everything around on its surface.
- Diffuse Color
- This attribute defines the base color, the main characteristic of the material. The slider enables changing the brightness; click the color field on the right to open the color chooser. Assigning a texture to the diffuse color, projects it onto the surface. The look representation is a combination of the defined color and the assigned texture.
- Glossy Color: Glossy Color
- Sets the material's color for surfaces glossy reflections. The slider enables changing the brightness; click the color field on the right to open the color chooser. Assigning a texture to the glossy channel defines areas in which different gloss intensities appear with help of a texture. The glossy color depends finally on both - the defined color and the possibly assigned texture file.
- Roughness
- The roughness parameter controls light refractions on top of the surface. The higher the value, the more rough the microscopic structure on top of the surface and the more diffuse the reflections.
- Reflectivity
- Controls the intensity of reflection on the surface. The higher the value the more the influence from environment and objects around.
- Bump
- Bump mapping enables the creation of structure to the materials surface. The Bump slider controls the height of that effect. A higher value results in more depth structure. If a texture is assigned to the bump map channel, it is used as a pattern figure on surface illustration. If no texture is assigned, a default noise map is used instead; Structure size affects then scale.
Chrome
The Chrome material node type should be used for all kinds of chromic and metallic materials. When more control about scale and orientation of the surface structure is required, it is recommended to use brushed metal instead. Many metal type presets are available within the properties dialog box.
- Metal Type
- High reflective chrome material, aluminum, amorphous carbon, silver, gold, cobalt, copper, chromium, lithium, mercury, nickel, potassium, platinum, iridium, silicon, amorphous silicon, sodium, rhodium, tungsten, vanadium, andiron.
- Reflection Color
- The higher the brightness the higher the reflection on the surface. Black means no reflection; white gives full reflection. Click the color field on the right to open the color chooser; when the chrome reflection is colored, reflected objects are also colored.
- Roughness
- The roughness parameter controls light refractions on top of the surface. The higher the value, the more rough the microscopic structure on top of the surface and the more blurred are the reflections.
Brushed Metal
The brushed metal material node type is able to simulate any type of metal; it gives full control about the scale and orientation of the surface structure. Many metal type presets are available within the properties dialog box.
- Metal Type
- Custom reflectivity, aluminum, amorphous carbon, silver, gold, cobalt, copper, chromium, lithium, mercury, nickel, potassium, platinum, iridium, silicon, amorphous silicon, sodium, rhodium, tungsten, vanadium, and iron.
- Glossy Color
- The higher the brightness the higher the reflection on the surface. Black means no reflection; white gives full reflection. Click the color field on the right to open the color chooser; when the chrome reflection is colored, reflected objects are also colored.
- Brush Mapping
- This Property setting belongs to the brush orientation; planar, radial, and triplanar options are available to generate the desired surface structure.
- Roughness U/V
- The roughness parameter controls light refractions on top of the surface. The higher the value, the more rough the microscopic structure on top of the surface and the more blurred are the reflections. Different values for horizontal and vertical roughness provide every type of refraction behavior that is known from metallic surfaces.
- Size U/V
- Affects scale and direction of the surface structure when no texture is assigned to the bump map channel.
- Bump
- Bump mapping enables the creation of structure to the materials surface. The Bump slider controls the height of that effect. A higher value results in more depth structure. If a texture is assigned to the bump map channel, it is used as a pattern figure on surface illustration. If no texture is assigned, the structure results from property setting Size U and Size V.
Unicolor Carpaint
Generates a single-colored car lacquer material with customizable coating effect on the top of the surface.
- Base Color
- This attribute defines the basic color, the main characteristic of the material. The slider enables changing the brightness; click the color field on the right to open the color chooser.
- Clear Coat Color
- Changing the brightness relays to the reflection intensity of the clear coat effect. It possibly adds a color to the glossy effect of the coated surface.
Metallic Carpaint
A metallic carpaint material got additionally small particles made of metal (flakes) on top of its lacquer layer. Those particles increase the brightness within the angle of incidence. Color and size of flakes is customizable.
- Base Color
- This attribute defines the basic color, the main characteristic of the material. The slider enables changing the brightness; click the color field on the right to open the color chooser.
- Flake Color
- The setting defines the color of the metallic particles on top of the lacquer layer.
- Clear Coat Color
- Changing the brightness relays to the reflection intensity of the clear coat effect. It possibly adds a color to the glossy effect of the coated surface. The checkbox enables you to deactivate the coating effect.
- Roughness
- The roughness parameter controls light refractions on top of the surface. The higher the value, the more rough the microscopic structure on top of the surface and the more diffuse the reflections.
- Reflectivity
- Controls the intensity of reflection on the surface. The higher the value the more the influence from environment and objects around.
- Flake Size
- Belongs to the size of the metallic particles on top of the lacquer layer.
Flipflop Carpaint
This type of carpaint material provides two layers of flakes on top of the base color. Its appearance depends extremely on the viewing angle between surface and observer. The effect is commonly known from show cars and toy cars.
- Base Color
- This attribute defines the basic color. The slider enables changing the brightness; click the color field on the right to open the color chooser .
- Flake One Color
- The setting defines the color of the metallic particles on top of the lacquer layer.
- Flake Two Color
- The setting defines the color of the metallic particles on the second layer of flakes.
- Clear Coat Color
- Changing the brightness relays to the reflection intensity of the clear coat effect. It possibly adds a color to the glossy effect of the coated surface.
- Roughness
- The roughness parameter controls light refractions on top of the surface. The higher the value, the more rough the microscopic structure on top of the surface and the more diffuse the reflections.
- Reflectivity
- Controls the intensity of reflection on the surface. The higher the value the more the influence from environment and objects around.
- Flake Size
- Belongs to the size of the metallic particles on top of the lacquer layer.
Glass
Glass material is used for all different kinds of transparent materials for example, glass, acrylic glass, diamond. It provides furthermore the ability to simulate liquids. Presets help on quick setup.
- Medium
- Presets for all kinds of transparent materials and liquids.
- Transparency
- Changes the level of transparency. A click onto the color field on the right opens the color chooser; it enables changing the base color of the glass material.
- Specular Color
- Sets the material's color for surfaces glossy reflections. The slider enables changing the brightness; click the color field on the right to open the color chooser.
- Reflectivity
- Controls the intensity of reflection on the surface. The higher the value the more the influence from environment and objects around.
- Roughness
- The roughness parameter controls light refractions on top of the surface. The higher the value, the more rough the microscopic structure on top of the surface and the more diffuse the reflections.
Carbon / Carbon 2D
Carbon is a fiber material with typical pattern and coating on the top. It is often used to decrease the weight of sport vehicles to the minimum.
Carbon is a triplanar shader; Carbon 2D is used in case of planar projections.
- Diffuse Color
- This attribute defines the base color of the material. The slider enables changing the brightness; click the color field on the right to open the color chooser.
- Glossy Color
- Sets the material's color for surfaces glossy reflections. The slider enables changing the brightness; click the color field on the right to open the color chooser.
- Clear Coat Color
- Changing the brightness relays to the reflection intensity of the clear coat effect. It possibly adds a color to the glossy effect of the coated surface. The checkbox enables you to deactivate the coating effect.
- Roughness
- The roughness parameter controls light refractions on top of the surface. The higher the value, the more rough the microscopic structure on top of the surface and the more diffuse the reflections.
- Reflectivity
- Controls the intensity of reflection on the surface. The higher the value the more the influence from environment and objects around.
- Pattern
- All typical patterns are included within VRED.
- Pattern Size
- Scales applied pattern.
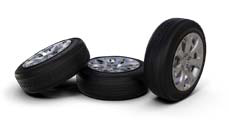
Tire
Tire material supports different textures for rim and profile within one node. Rubber shading rounds off whole thing.
- Diffuse Color
- This attribute defines the base color. The slider enables changing the brightness; click the color field on the right to open the color chooser.
- Glossy Color
- Sets the material's color for surfaces glossy reflections. The slider enables changing the brightness; click the color field on the right to open the color chooser.
- Roughness
- The roughness parameter controls light refractions on top of the surface. The higher the value, the more rough the microscopic structure on top of the surface and the more diffuse the reflections.
- Reflectivity
- Controls the intensity of reflection on the surface. The higher the value the more the influence from environment and objects around.
- Bump
- Bump mapping enables the creation of structure to the materials surface. The Bump slider controls the height of that effect. A higher value results in more depth structure.
- Textures
- Markings textures relating to rim; profile belongs to the pattern of the running surface.
Velvet
The velvet material mimics the reflection behavior of velvet by darkening the regions of an object where the surface points almost directly to the viewer and brightening its edges up (where the surface is viewed at grazing angles).
- Diffuse Color
- This attribute defines the base color. The slider enables changing the brightness; click the color field on the right to open the color chooser.
- Glossy Color
- Sets the material's color for surfaces reflections. The slider enables changing the brightness of the reflections; click the color field on the right to open the color chooser.
- Darkening
- Controls the intensity of the diffuse component. The default value is 1.0; everything greater than 1 darkens the material, a value less than 1 lightens it up.
Woven Cloth
Woven cloth material contains presets for all usual types of fabric. The properties dialogue enables casual users on setting up customized cloth material without using an external image-processing tool for example, Photoshop.
- Cloth Preset
- Various fabric presets are shipped with VRED.
- Diffuse Color
- This attribute defines the base color of the material. The slider enables changing the brightness; click the color field on the right to open the color chooser.
- Yarn Colors
- Enables you to customize the color of the yarns. The sliders changing the brightness; click the color field on the right to open the related color chooser.
- Darkening
- Controls the intensity of the diffuse component. The default value is 1.0; everything greater than 1 darkens the material, a value less than 1 lightens it up.
- Texture Mode
- If the object already contains an UV mapping, UV coordinates are used. Triplanar generates mapping new from scratch.
- Pattern Size
- Adjusts the scale of the fabric pattern.
Line Chrome
The Line Chrome Material is a special variant of the chrome materials for line geometries. This material does not work on triangle based or NURBS geometry.
- Reflection Color
- The Specular Reflection color.
- Use Roughness
- Turns the material to be glossy instead of specular.
- Line Width
- The width of the line geometry.
Measured
VRED supports the usage of measured materials. Those kinds of materials contain inter alia surface reflection information that considers reflection behavior from different viewing angles - it ensures a photo realistic illustration within the render view.

- Measurement
- Loads the BTF measurement file.
- Exposure
- Controls the representation intensity of the measured material. A threshold about 1.0 gives the optimal result.
Measured Carpaint
This material type aligns to the measured material. It additionally enables adjusting the refraction index of the scanned material within its properties.
- Measurement
- Loads BTF measurement.
- Exposure
- Controls the representation intensity of the measured material. A threshold about 1.0 gives the optimal result.
- Fresnel IOR
- Controls the refraction index of the clear coat layer. When loading a BTF measurement it is initialized to the measured refraction index.
Office Color Science (OCS) Material
The Office Color Science (OCS) Material allows you to load BRDF files exported from CI- Navigator. The CI-Navigator is a software system by Office Color Science Co., Ltd. that calculates metallic and pearlescent paint formulations from measurements of given target paint samples. The BRDFs of those measurements and simulations can be exported by CI-Navigator in a VRED compatible BRDF file format (*.pbrdf).
- OCS BRDF
- Loads a BRDF file.
- Exposure
- Controls the representation intensity of the measured material. A threshold about 1.0 gives the optimal result.
- Clearcoat
- Checkbox to disable coating.
Shadow
Shadow material is transparent by default. It is only shaded where precalculated ambient occlusion shadows take place.

- Occlusion intensity
- Controls the intensity of shadowed areas.
- Occlusion Color
- Sets the color for ambient occlusion shadows.
- Shadow Color
- Sets the color for shadows from light sources (like point lights).
Multi Pass
MultiPass materials can display multiple materials in different layers on top of each other. It enables you to setup dirt, promotion labels, and other types of complex materials.

It can be created in two different ways; the first usesdrag and drop assignment within the render view. Right-click opens a dialog box that lets you select Add as Multi Pass. Both materials (before assigned and dragged) are present within the newly created material as different layers. The second creation method is the related create context menu entry. The node is created and all materials that should be present within the layers are also assignable by dragging but this has to be done within the material library itself.
Changing the drawing order of layers could be done within the material editor from standard UI.
Layered
A layered material allows you to stack multiple materials on top of each other. Unlike the multipass material, the order of traversal is determined by the normal of the geometry. This allows it to use the layered material as a two-sided material.
Additionally glass materials are handled in a special way. If two glass materials are added to the layered material the index of refraction of these glass materials are adjusted in a way that allows to use them in glass-on-glass contact situations. If you add more than two glass materials, only the index of refraction of the first and last glass material is considered, all other glass materials get an Index of Refraction of 1.0 and act as a color filter if material density is turned off.
Changing the drawing order of layers could be done within the material editor from standard UI.
Switch
A switch material can contain several materials but only one of them is visible at the same time. The creation is done on the same ways already known from the creation of mutipass or layered materials. Either on dragging within the render view - Create Switch Material mus be selected or by dragging within the material library. If several material variants should be assigned on creation, have them selected and execute the context menu command Create Switch from Selection.
If a switch material is selected the all material variants are present within the Switch Choice section below the library. Click a child material to open its properties. Double-click a child material to activate it.
Light Portal
A light portal is a guide for photons coming from the environment. The bounding box around all light portals in the scene is used as a target for photon emission from an environment. This allows you to limit the photons to certain areas of the scene instead of shooting many more photons.
During still frame antialiasing all light portal materials are set to invisible in raytracing mode.
- Visibility
- Sets the opacity of the material. This is useful for placing the light portal.
Edit (sub menu)
The edit sub menu provides features to replicate materials or to adopt its settings to other existing materials.
- Copy
- Copies the selected material to the system clipboard.
- Paste
- Pastes the clipboard contained material into the library.
- Paste Attributes
- Pastes all settings from clipboard contained material to the selected.
- Duplicate
- Creates an independent copy of the selected material.
- Delete
- Removes the selected material from the library when it's not in use.
- Lock/Unlock
- Avoids any change on the material. Property settings from locked materials are not accessible within the properties dialog box until the material has been unlocked again. The Name of locked materials is illustrated with italic style.
Asset (sub menu)
Asset management module supports the user on the usage of external file references. These files are imported in a referenced way to the material module. Any change on an external file reference will be present within the scene after reloading affected file. Sub menu provides features to reload such file references.
- Unlock to Edit
- Unlocks the referenced material to change settings
- Find in Asset Manager
- Selects the corresponding folder within the file browse tree inside materials tab from the asset manager.
- Reload from Asset Manager
- Reloads related material and adopts updates when changes are made to it. Material can be chosen from appearing window
- Remove Reference
- Removes all references from material and makes it unique. No asset manager link available anymore.
Convert (sub menu)
There are different classes of materials supported within VRED. Truelight materials provide a photorealistic representation; this type of material is required for ambient occlusion calculation. Geometry that has been newly imported to VRED contains standard OpenGL Phong material that doesn't support ambient occlusion calculation. The convert sub menu helps either to convert a type of Truelight material into another type of Truelight material or it helps to convert standard OpenGL Phong materials into Truelight Phong materials.
- To Truelight Material
- Has the same behavior than using the Type drop-down menu within the materials properties. It converts the selected Truelight material into another type of Truelight material; all adoptable property settings are adopted automatically.
- All to Phong Truelight Material
- Converts all scene contained standard OpenGL Phong materials into Truelight Phong materials.
Other material context menu commands (besides sub menus)
- Load / Save Material(s)
-
Enables the reuse of materials within other VRED projects. Save is available when materials have been selected before; the dialog box asks for a folder within the file system that is used to store before selected materials in OSB file format. Every material is selected as a single OSB file. Use Load to import a saved material into the library.
- Create Switch from Selection
-
Creates a switch material node and applies selected materials to it.
- Select Nodes (Hotkey Ctrl +N)
-
Selects all geometrical objects that have the selected material assigned.
- Add Nodes to Selection (Hotkey Ctrl + Shift + N)
-
Adds all objects that have the selected material assigned to the current selection of geometrical objects.
- Apply to Selected Nodes(Hotkey Ctrl + M)
-
Applies selected material to the selected objects.
Icons bar and slider within material module
Often required commands are accessible by an icon located directly below the material library.

- Create
-
Opens sub menu that contains all material node types VRED is able to create.
- Duplicate
-
Creates an independent copy of the selected material.
- Select Nodes
-
Selects all geometrical objects that have the selected material assigned.
- Apply to Selected Nodes
-
Applies selected material to the selected objects.
- Remove unused
-
Deletes all materials from the library that are not applied to any object.
- Delete
-
Removes the selected material from the library when it's not in use.
- Slider
-
Scales the material preview representations inside the library.
Material properties
Object property settings and texture assignment takes place here.