You can define geometry of steel railings.
To begin defining a railing, open the Railing dialog from:
- Menu: Steel > Parametric structures > Railing
- Ribbon: ASD - Model > Parametric structures > Railing
- Toolbar: Parametric structures > Railing
 .
.
In the drawing area, click to specify a polyline.
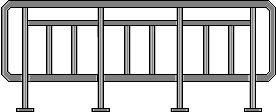
All component elements of a railing are comprised in one object as shown:
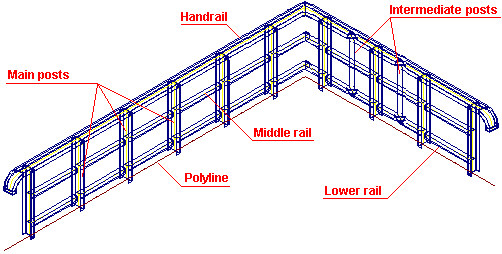
The polyline on which the railing is based may consists of straight segments or arcs. Straight segments may be inclined, but they may not be vertical (parallel to Z axis of the UCS). Arcs must be parallel to the horizontal plane (XY in the UCS).
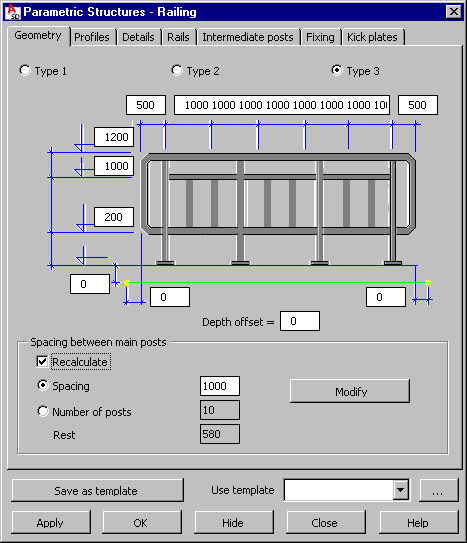
At the top of the Geometry tab, specify the railing type:
 |
Type 1 |
 |
Type 2 |
 |
Type 3 |
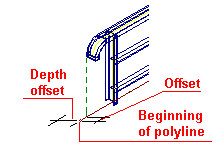
Polyline geometry determines the length of the railing. Because the railing is generated over the entire length of the polyline, the outer edge of the handrail should be positioned at the beginning or at the end of the polyline. You can also define offsets (shifts along the polyline) at the beginnig or at the end of the railing (see the drawing below). If an offset value differs from 0, then the railing, at its beginning or end, will be extended or shortened with respect to the polyline length. A positive offset value shortens the handrail, and a negative offset value extends the handrail. Also, the drawing below displays the possibility of defining the railing offset in the direction perpendicular to the direction of the defined polyline (the Depth offset parameter).
The remaining railing dimensions can be defined in the dialog as shown (using Type 1 as an example):
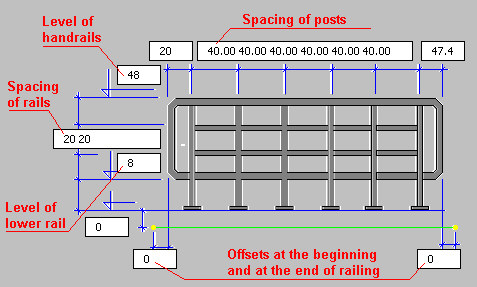
Under Spacing between main posts, calculate spacing of main posts based on either a post spacing value or a number of posts. Click Modify to recalculate the spacing of posts.
After you finish defining geometry of a railing, click the Profiles tab to display the Railing - Profiles dialog.