Presets for animation
 Presets can be created using any object in your scene (e.g. a teapot or a text letter) and then;
- apply a series of modifiers to it, or
- animate transforms to it, or
- do both.
You can then save that animation as a Preset that can then be applied to produce the same behavior on other geometry.
Benefits:
- Easily reuse complex animations on multiple objects.
- Have control over animation offset timing controls.
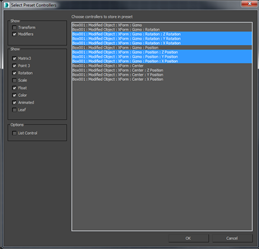
 The process is easy and straightforward; you create a preset, then you select the controllers you want to offset, which will place a modifier on top. There are different filters (or ways) to show what you want. If animation has been done on the modifiers and transforms, you could easily show, for example, the ones that have animations on them.
Once the controllers you want to have an offset are selected, a modifier will be added that allows you to name the preset and adjust the time controls that you want. You can also add custom attributes to that preset modifier. Once this is done, and the modifier saved, the preset can be applied to anything.
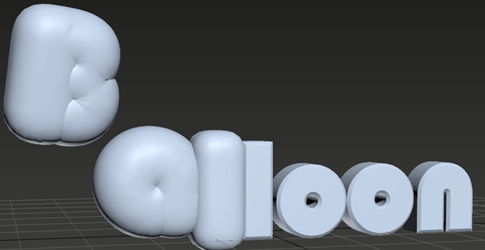
 Presets allow you to create offset animations; for example, a balloon animation. If you wanted all your text to blow up like a balloon, you could use a smooth modifier, a relax modifier and a push modifier, and all those three modifiers would have the text blow up like a balloon.
You can build up a more complex set of instructions, save them, apply them as a preset, then apply the preset to other objects. You could then select each object and manipulate the controllers, such as time controllers and preset modifiers. For example, you can change the object's timing to be 5 frames instead of 10 frames, or, rather than the animation playing forward, to play backward, etc.
Presets can also be created without using offset controllers, allowing you to apply a complex setup instead of having to remake them every time.