Start the Numbering
Before starting
Make sure that no element is selected. If there are any selected parts, only those parts will be considered by the numbering process.
Recommended practice: Consider the entire model to avoid possible problems later.
- On the ribbon, select: Output > Part marks
 . The Numbering dialog box appears.
 - In the dialog box, make the necessary settings, such as:
- The numbering method
- The numbering for single parts and assembly parts can be performed in one step or separately. Unless both single part and assembly numbering are done together (recommended), then single part numbering must be done first.
- The start value for the numbering
- Additional numbering options.
- Click OK.
The numbering report is displayed in a dialog box.
The assigned marks are visible on the Naming tab of the object properties dialog boxes.
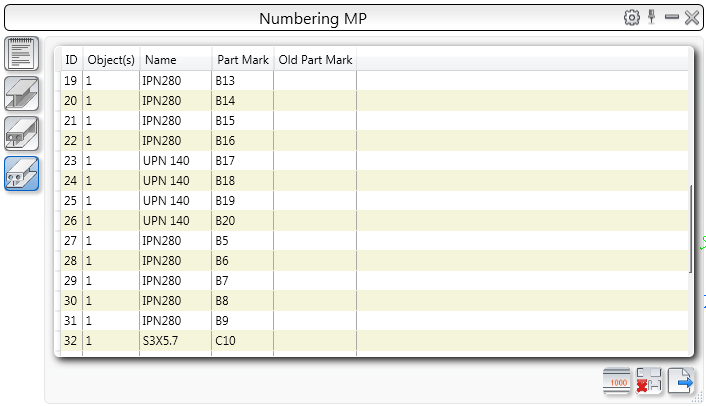
The Numbering Report
Displays the list of elements and their part marks for an entire model or a selection set. The objects are numbered with continuous index numbers.
 Displays the list of all messages displayed during the numbering and clash check processes.
The list of elements
For each numbered element the following information is displayed:
- Index number
- Number of objects of the same type
- Name
- Part mark or the new part mark if the model has been renumbered
- The part mark before renumbering
You can use the list to locate the elements in the model.
- Use the buttons on the left side to filter the list of elements as follows:
|
Icon |
Description |

|
by preliminary mark |

|
by single part mark |

|
by assembly mark |
- Double clicking a line corresponding to an element zooms directly to the element.
- Selecting a line, highlights the element in the model.
The toolbar
| Icon | Description |

|
Displays the Numbering dialog box |

|
Turns off the highlight and the marking arrow |

|
Exports the numbering result in a text file |