Create custom joints
Like default joints, a custom joint is created with all its parts, connection objects and features using a single operation. At the same time, the existing connected elements are processed (shortened, coped etc.) and connection the logic between the parts is established.
All custom joints are available in the
Custom Joints Explorer
. To open the
Custom Joints Explorer
, use the
Insert custom connection
tool ( ) on the
Custom Connections
tool palette.
) on the
Custom Connections
tool palette.
After selecting the desired joint template, select the members to connect in the correct order and press Enter.
Modify custom joints properties
You can change the definition of the custom joint from the template .dwg file:
- Change the set of connecting elements: you can select another set of connecting elements
- Change the position of the connected elements
- Change the properties of the elements involved in the connection
Once the custom joint is inserted in the model, you can control its behavior and allow objects modification or not using the corresponding option in the joint properties dialog box.
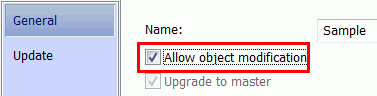
Once the joint modification is enabled, most parts of the joint can be edited:
- Move any of the connecting elements
- Modify the properties of the joint elements
- Access the properties of any Building Bricks or full joints inside the User Joint Template
Once a user connection placed, it can be copied and grouped to efficiently place the joint in multiple locations.
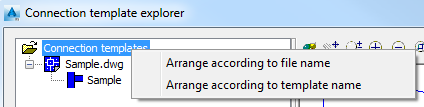
The Connection Template Explorer
Displays a list of all defined custom joints available in \ProgramData\Autodesk\Advance Steel 2016\Shared\ConnectionTemplates.
With the Connection Template Explorer you can:
- Browse for defined custom joints
- Preview a selected joint. Viewing tools are available for better display.
- Select a custom joint and then create it in the model
The Connection Template Explorer includes sorting options that allow easier finding a joint.
Command access:
Custom connections tool palette:
Command line: _AstM4UserTemplateConn