Layers are the primary method for organizing the objects in a drawing by function or purpose. Layers can reduce the visual complexity of a drawing and improve display performance by hiding information that you don’t need to see at the moment.
Before you start drawing, create a set of layers that are useful to your work. In a house plan, you might create layers for the foundation, floor plan, doors, fixtures, electrical, and so on.
In this example, the display is limited to the objects on the Floor Plan layer by turning off the other layers.

For other disciplines, the names and number of layers that you create will be different. Once you create a standard set of layers, you can save the drawing as a template file (.dwt) that you can use when you start a new drawing.
For complex drawings, you might want to consider a more elaborate layer naming standard. For example, layer names could begin with 3 digits followed by a naming code that accommodates multiple floors in a building, project numbers, sets of survey and property data, and so on. This type of naming convention also makes it easy to control the order of the layers and limit the layers displayed in the layer list.
Layer Tools
Use the Layer Properties Manager to manage your layers. Find
- Create, rename, and remove layers
- Set the current layer on which new objects are automatically created
- Specify the default properties for objects on the layer
You can override any layer property of an object. For example, if an object’s color property is set to BYLAYER, the object displays the color of that layer. If the object’s color is set to Red, the object displays as red, regardless of the color assigned to that layer.
- Set whether the objects on a layer are displayed or turned off
- Control whether objects on a layer are plotted
- Set whether a layer is locked against editing
- Control the layer display properties for layout viewports
- Sort, filter, and group layer names
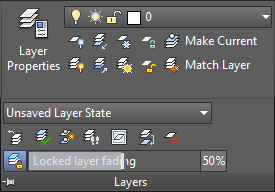
In addition to the Layer Properties Manager, you can access layer tools on the Layers panel on the Home tab of the ribbon.

For example, the Off button turns off the layers of any objects that you select.

Current Layer
All new objects are drawn on the current layer. The green check mark on the Layer Properties Manager indicates the current layer.

A layer cannot be the current layer if:
- The layer is frozen
- The layer is part of an external reference
Layer Visibility
You can control the visibility of objects on a layer by toggling the layer on/off or by using freeze/thaw.

 You can turn layers off and on as needed. Objects on layers turned off are invisible in the drawing.

 Freezing and thawing layers is similar to turning them off and on. However, when working with drawings with lots of layers, freezing unneeded layers can speed up display and regeneration. For example, objects on a frozen layer are not considered during a ZOOM EXTENTS.
Locking Layers
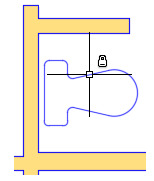
You can prevent objects on selected layers from being inadvertently modified by locking those layers. Objects on locked layers appear faded and a small lock icon is displayed when you hover over the object.

The fading feature for locked layers lets you reduce the visual complexity of a drawing, but still maintain visual reference and object snapping capabilities.
You can set the fade level for locked layers. Find
In this example, the fading level is set at 25%, 50%, and the maximum fading level, 90%.

There are a few things to keep in mind when working with locked layers:
- The locked layer fading value further reduces the visibility of transparent objects.
- The locked layer fading value does not affect how objects appear when plotted.
- Grips are not displayed on objects that are on locked layers.
Layer Filters
Sometimes drawings can include dozens or even hundreds of layers. A layer filter limits the display of layer names in the Layer Properties Manager and in the Layer control on the ribbon. You can create layer property filters based on the name, color, and other properties. For example, you can define a property filter that lists all layers that include the letters "mech" in the layer name and are set to red.
You can also create layer group filters where you choose specific layers to include in the group. For example, you could create a group called Tool Fixture that includes all the layers associated with the tool fixtures in your drawing. When you click the Tool Fixture group in the Layer Properties Manager, only the layers in the Tool Fixtures group are listed.