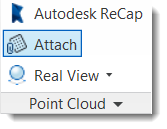
Before a point cloud can be used by Inventor, the scan file from which it was derived must first be indexed. This is accomplished using the Autodesk ReCap command. After indexing the file in Autodesk ReCap, use the Attach command to place, orient, or scale the point cloud in the Inventor graphics window. Point cloud density can also be decreased.
- Click Attach in the Point Cloud area of the Factory tab:

- Navigate to the folder than contains the indexed file (.rcs or .rcp) you wish to attach. Select the file and click the Open button to close the dialog box.
- Pick a point in the graphics window to place the point cloud. The Attach Point Cloud dialog box appears.
- Select the Insert at Origin checkbox to insert the Point Cloud at 0,0,0 of the layout. Alternately, enter X, Y, or Z offset values in the corresponding text boxes if you wish to move the point cloud relative to the base 0, 0, 0 origin.
- Enter X, Y, or Z rotational values (in degrees) if you wish to rotate the point cloud about one or more axes.
- Increase or decrease the scale of the point cloud as necessary using the Scale text box.
- Adjust the density of the point cloud. Use the Density gradient setting to adjust the density of the point cloud. The number of attached points and total points decreases with a decrease in point density.
- Click the OK button to close the dialog box.
Attaching a point cloud creates a new Point Clouds node in the browser. Expand the browser node to see all of the point clouds attached to the current part or assembly file.