Most ductwork manufacturers have to work to a specification . These are a set of rules that govern how fittings are made and installed. Setting up a specification correctly in the Fabrication products will allow the software to determine certain information automatically, instead of the user having to choose each of these factors individually.
As well as being able to apply rules to the fitting it is also possible to apply rules to Insulation Materials and Double Wall through an Insulation Specification.
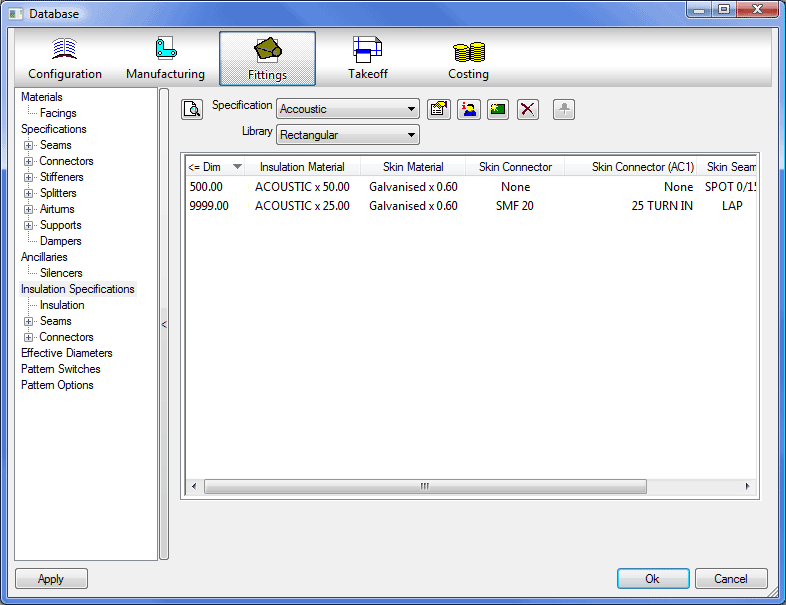
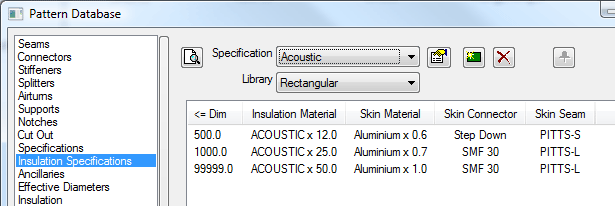
Select Fittings  Insulation Specifications.
Setting up the specification enables the automatic selection of parameters. Some patterns have the ability to override the specification settings. It is not essential for ductwork users to set up or use specification, however, when the specification table is correctly set up, it makes the operation of adding items to a job considerably easier and quicker. It is necessary to set up the relevant Connector, Seam, and Insulation Material values before defining specification.
Insulation specification can be used to also apply Double Wall settings to the item.
To create a new specification, click the New  button.
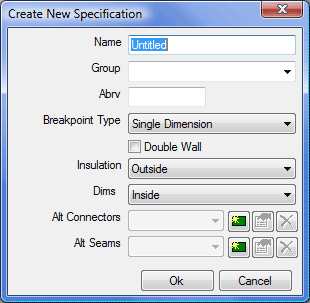
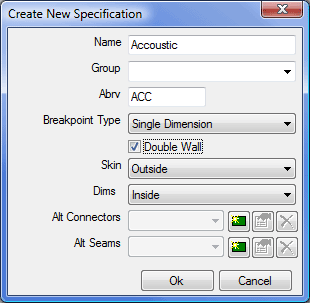
Name: The user can give the specification a descriptive name for identifying the specification.
Group: Specifications can be sorted into groups, such as Thermal, Acoustic, etc. To create a new Group, type its name in the Group field. This will then be available for later use in the drop-down list.
Abrv: The Specification Name can be abbreviated for use on labels or reports where space is of a premium.
Breakpoint Type: There are 2 basic specification types: Single Dimension and LS/SS Dimension.
If starting a new table when an existing table is open, the user can copy the currently displayed values, into the new table, by selecting the Copy Current Values option.
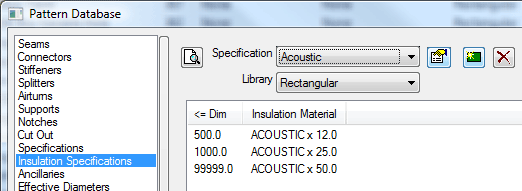
Single Dimension Specification: A Single Dimension Specification is a break table that will look at the Longest side of the fitting and apply the relevant Insulation data to it.
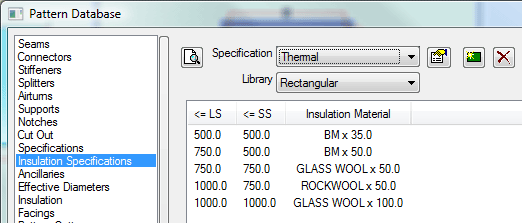
LS/SS Dimension Specification: A LS/SS Dimension Specification is a break table that looks at both the Width and the Depth of the fitting and will apply the relevant Insulation data to it.
Specification Table Breakpoints can be created for the different library types (Rectangular, Round, Flat Oval and Pipework).
This displays the Specification Name, Group, and Abbreviation but also contains options to determine whether the Insulation is applied to the Inside or the Outside of the fitting and whether the Dimensions are applied to the Inside or the Outside of the fitting.
When the Double Wall check box is unchecked, only the Insulation drop-down is used, this selects whether the Insulation is to be applied to the Inside or the Outside of the Fitting.
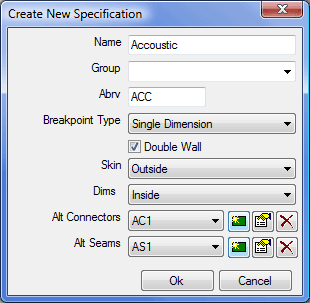
When the Double Wall check box is selected, then the Insulation field changes to Skin, and the user can then determine whether the skin is applied to the inside or the outside of the fitting, and whether the dimensions applied relate to the inside or the outside of the fitting with the Skin applied.
Once Double Wall is applied, there will be more options that display in the specification.
These new fields allow the user to apply a Skin Material and gauge, Skin Connectors and the Skin Seam to the fitting, all through the specification.
Alt Connectors: The Alt Connector allows the user to allocate a different set of connector information to an item file where you still want the Item to follow the rest of the Specification Parameters.
Alt Seams: The Alt Seams allows the user to allocate a different set of Seam information to an Item where you still want the Item to follow the rest of the Specification Parameters.
Selecting the New icon in Alt Connectors or Seams will let the user enter a name for the Alternative Field, this will then be displayed in the Specification Table as an Alternative Connector and/or Seam.
In the example above an Alt Skin Connector and Seam were created called AC1 and AS1 respectively. This then creates the extra columns in the Specification Break Table.
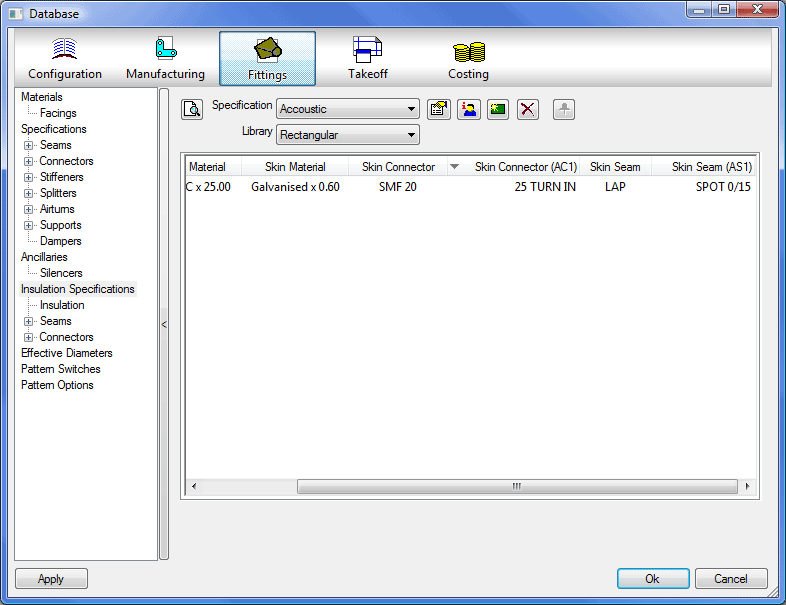
Item files that are to use the Alt Seams and Connectors will have to be edited and have the Alt Name entered into the Alt Column.
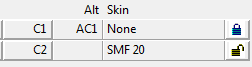
This will then apply the Normal Specification entry to the fitting as well as the Alternative Entry.
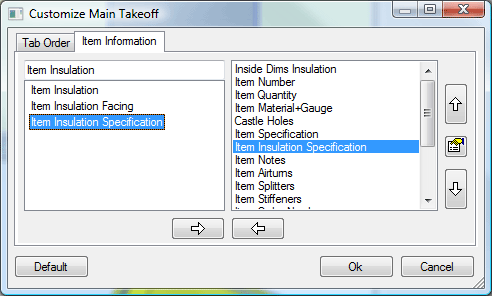
The Insulation Specification can then be applied to a Fitting from the Item tab in Takeoff. If this is not showing it can be added by going to Takeoff Customize and adding the Item Insulation Specification field to the Item Information tab.
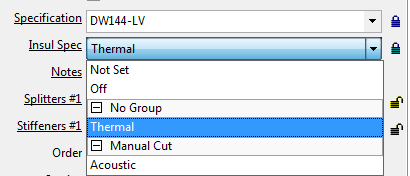
Note: If the Insul Spec is set to Off, then insulation can not be applied to the fitting. If you need to manually add insulation, then set the Insulation Specification to Not Set.