The steps below describe how to get started creating spools.
- The first step to spooling is to open the desired model.
- As a prerequisite to spooling the model into individual spool drawings, it is essential to setup the "Export-Layout" template, which is utilized for the presentation and set-out for each individual spool drawing. "Export-Layout" functionality will duplicate and convert the selected "Layout tab" into a "Layout Template.ltp". The automated conversion process will incorporate the following:
- Attached "Worksheets"
- Added "Cameras"
- Right click the appropriate "Layout tab" located at the lower left hand corner of the 3D Viewer.
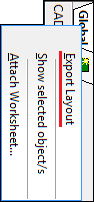
Left click "Export Layout".
A "Save Layout As Template" dialog displays.
- Name the model, navigate to the target folder to save, and click OK.
- Click the "Define / Create Spool/s" icon
 , or type "SPL". The following dialog displays.
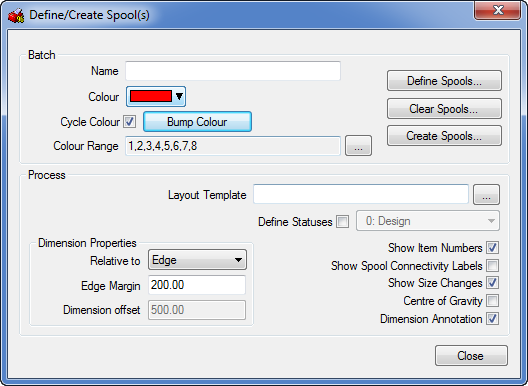
- Enter a spool name, for example SPOOL-001.
- Configure the following options in the Batch section of the dialog:
- Cycle Colour: Check to enable the following options :
- Colour: Select the colour of the HVAC / mechanical section.
- Colour Range: Sets the colour pallet range to use.
- Bump Colour: Click to increment the colour selection.
- Configure the following options in the Process section of the dialog:
- Layout Template: Selection of the "Template Layout" file (*.ltp).
- Define Statuses: When enabled, sets the "Item Status" for the spool drawing output.
- Dimension Properties: Specify the Relative To, Edge Margin, Dimension Offset options as required.
- Show Item Numbers: Applies the approbate "Item Number" to the layout.
- Show Spool Connectivity Labels: Applies the approbate "Spool Connectivity Labels" to the layout.
- Show Size Changes: Applies the approbate "Size" to the layout.
- Centre Of Gravity: Applies the approbate "COG" to the layout.
- Dimension AnnotationApplies the approbate "Dimensions" to the layout.
- With the settings applied to the desired requirements, the next step is to define the items for each individual spool drawing. Click the "Define Spools" button.

- With the "Define Spools" command active, you are prompted with a command in the lower part of the screen, as shown below:

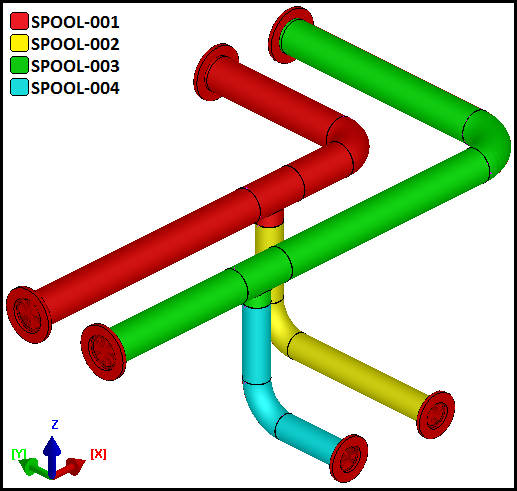
- Select the appropriate Items required, for "SPOOL-001". Right Click to finalise the selection.
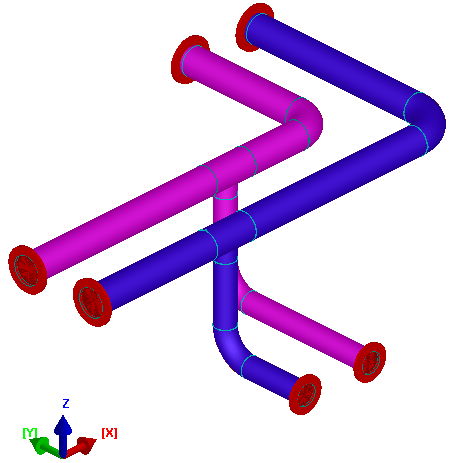
- The items within the model will be indicated with a spool reference label / tag "SPOOL-001". To create numerous spools repeat step "13" by selecting the appropriate items, right click the mouse to finalise the selection. Note: The "SPOOL-001" will increment to the next determined spool, e.g. "SPOOL-002", "SPOOL-003", "SPOOL-004".
- When all the items within the model have been selected and organised, the next stage is to create the spool/s.
- Select the "Define / Create Spool/s" icon or type "SPL". The following dialog displays:
- Click the "Create Spools" button
 . The "Select Spools" dialog displays:
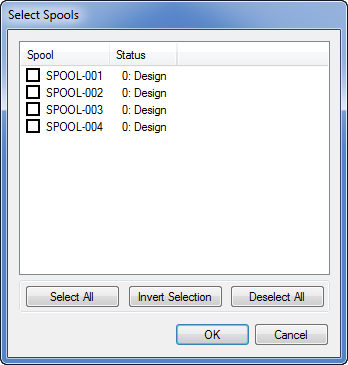
You now have the option to "Select All" the spools, or to enable the required spools. To determine which spools need creating, left click on the mouse on the appropriate box adjacent to the spool name "SPOOL-001", see below:

- Click "OK" to finalise the command, the "Select Spools" dialog will close automatically.
- The selected spools are processed. With this automated process, the application will organise them into a sequential order situated at the bottom of the screen, next to the original Layout tabs as illustrated below:

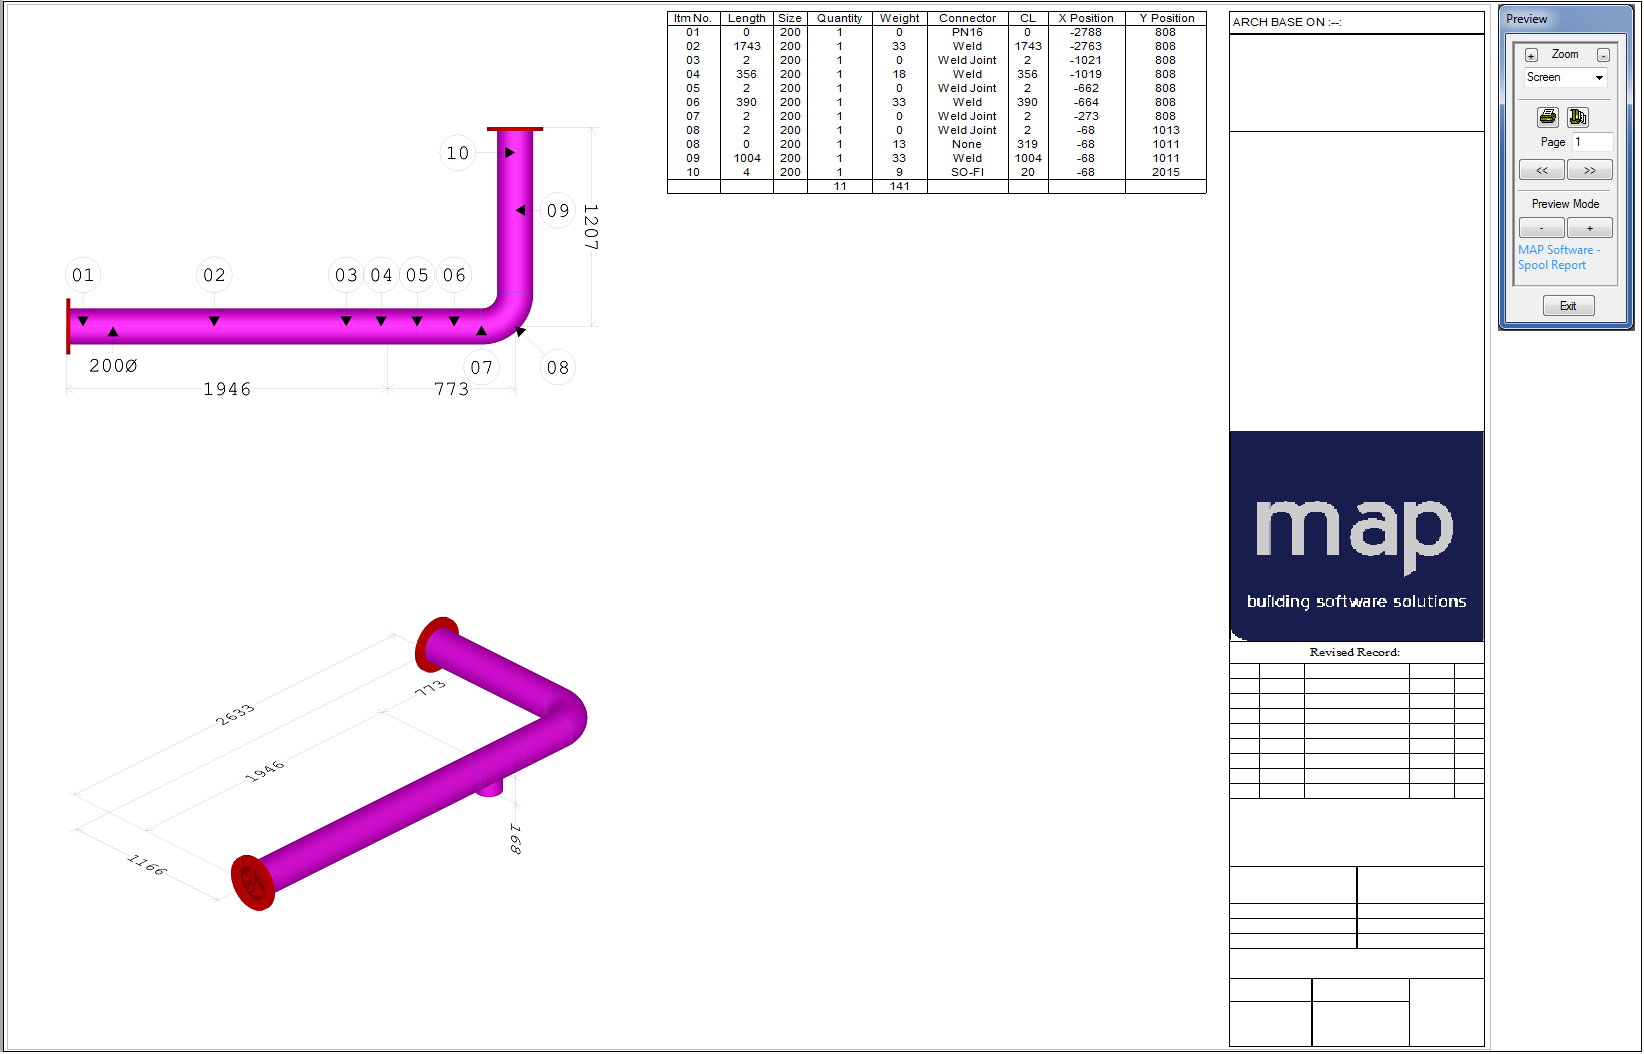
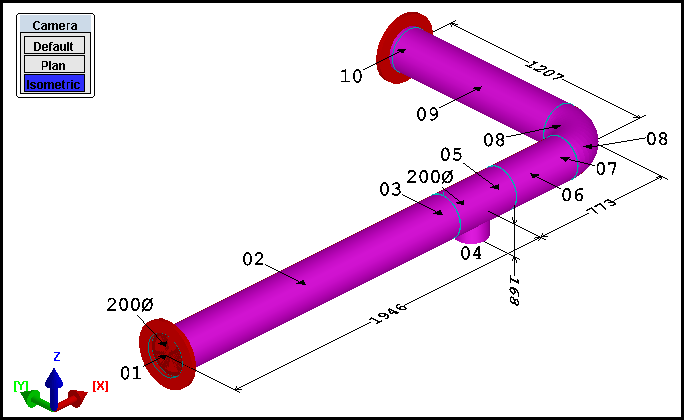
- To visualise the created spool, left click on the appropriate layout tab "SPOOL-001":
Camera : Plan Elevation

Camera : Isometric Elevation

Applying "Spool" models on to a "Worksheet Layout.DWN"
- Type the "Layoutsheet" command, or alternatively, right click on the mouse in the 3D Viewer, then select Print Preview from the drop down menu.
When using the Layoutsheet command, the following dialog displays:
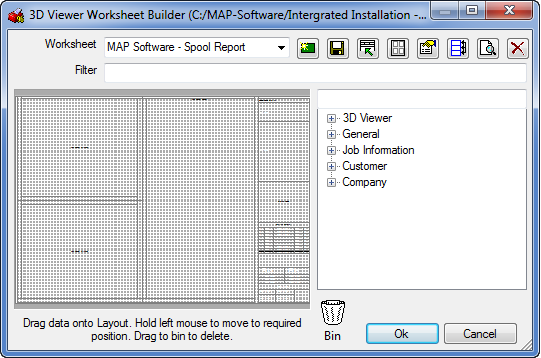
When right-clicking in the 3D Viewer and clicking Print Preview, the following dialog displays:

- By using either of the two methods, an example Worksheet Layout will be illustrated, using the "SPOOL-001" and the appropriate report name and format. See the sample below: