The Nest Prints dialog allows nest prints to be customised. These printouts can be used by the machine operator as a reference for downloading and cutting. To access the Nest Prints dialog, click File  Print Layout Nests and the Nest Prints dialog displays. This dialog consists of three tabs: General, Graphic and Overlay Font. The options on these tabs are described below.
General Tab
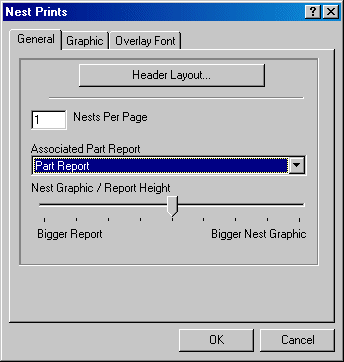
- The Header Layout option governs the appearance of the nest report header. For more information, see Header Layout.
- The Nests Per Page field allows the user to determine how many Nests will be printed on one page.
- The Associated Part Report allows a pre-configured part report that be can be printed after each nest report. This report can contain details and instructions for each part in the nest. Alternatively part reports can be printed later.
- The Nest Graphic / Report Height slide bar allows the user to adjust the size ratio between the Report and the Nest Graphic.
Graphic Tab
This tab allows the user to add additional information to the graphic
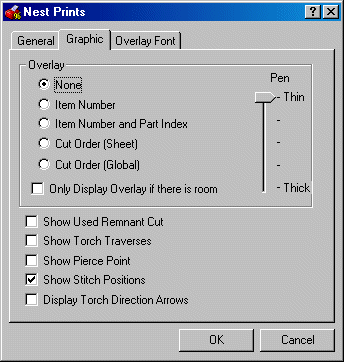
The Overlay section has various settings:
- If the Item Number is enabled, the item number entered during pattern takeoff will be added to the nest graphic.
- The Item Number and Part Index field adds the Item Number and the part number within the fitting to the nest graphic.
- The Cut Order (Sheet) option displays the cut order of the sheet. This mans that each sheet's cut order will begin at number one.
- The Cut Order (Global) displays the cut order of the parts within the job. This works in a different way to the Cut Order (Sheet) option. In this case the cut order is carried over from sheet to sheet throughout the job. For example if the first sheet has 10 parts on it, the first part on the second sheet will be number 11.
- If the nest has a lot of small parts the overlay can get cluttered and unreadable. The Only Display Overlay if there is room options allows the user to abort the overlay in this situation.
- The Pen Thickness slide-bar lets you adjust the thickness of the outlines of the parts displayed in the nest. Using this adjustment can help make the printout clearer, easier to see.
The other options on the Graphic tab are:
- If the Show Used Remnant Cut option is enabled and a remnant sheet has been used for nesting, the old parts cut will be displayed by dashed lines.
- The Show Torch Traverses option allows the user to determine whether the nest print will include the torch off traverse path between parts.
- If the user needs to see where the pierce point for each piece is, enabling the Show Pierce Point option allows this. The pierce point is shown on the nest graphic with a small circle.
- The Show Stitch Positions option determines whether or not stitch positions will be displayed. Stitch positions will be indicated by a small crossed circle.
- If the Display Torch Direction Arrows is enabled triangular black arrows on the nest prints will indicate the direction of the cut.
Overlay Font Tab
The Overlay Font tab allows the user to determine various options related to the type and size of font to be used.
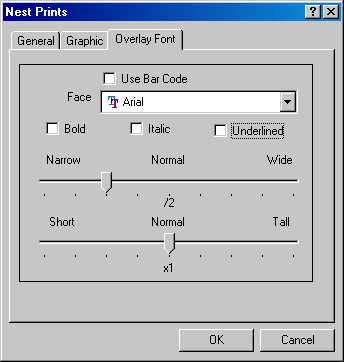
- This enables the use of Bar Codes on the nest print.
- The Face field allows the user, via the drop-down menu to select any font installed on the PC. This font will then be used on the nest print.
- If any of the Bold / Italic / Underlined options are enabled, they will be applied.
- The Narrow - Normal - Wide and Short - Normal - Tall slide-bars adjust the width and height of the printed text accordingly.