Because nesting tasks typically involve long-running, CPU-intensive processing, you can use the Autodesk Cloud Nesting Service to perform nesting tasks "in the cloud". This frees up valuable CPU processing bandwidth on your desktop computer.
The Autodesk Cloud Nesting Service is available to Autodesk Subscription customers, and is accessed directly from within CAMduct. Simply upload the fabrication job to the Autodesk Cloud Nesting Service. An email notifies you when the nesting job is complete. Then you can download the nested job back into CAMduct.
To use the Autodesk Cloud Nesting feature in CAMduct:
- Open the desired project *.MAJ file.
- In the top menu bar, click Cloud
 Cloud Nesting.
If you are not already logged into your Autodesk Account, you are prompted to do so.
Once logged into your Autodesk Account, the Automatic Nesting dialog is displayed.
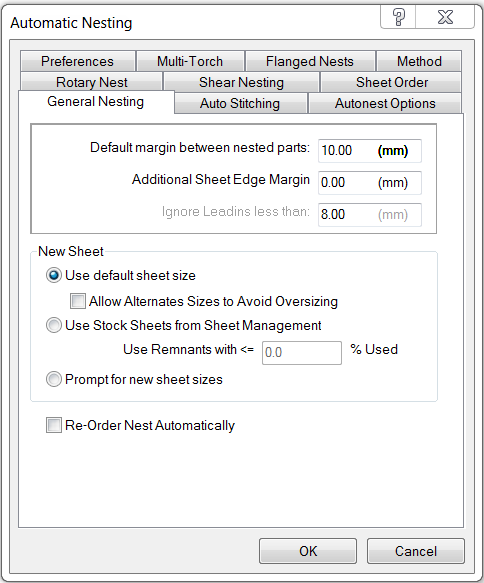
The same settings and options used for automatic nesting on the desktop are also used for nesting in the cloud.
Note: The Autodesk Cloud Nesting Service automatically performs nesting using all five of the main nesting methods available (True-Shape, Row, Rectangular, Edge, and NFP). This optimizes material utilization in the most efficient way possible.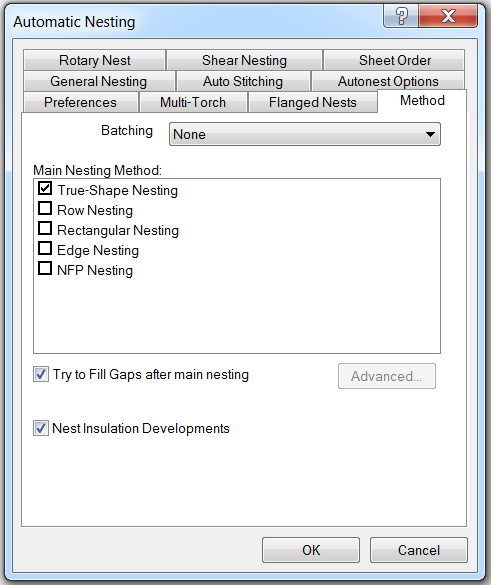
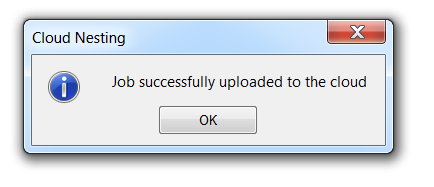
- Click OK and the dialog closes. The job is uploaded to the Autodesk Cloud Nesting Service, and confirmation dialog is displayed.
- Click OK.
- To check the status, click Cloud
Check Status. The status window appears. This window automatically updates very few seconds.
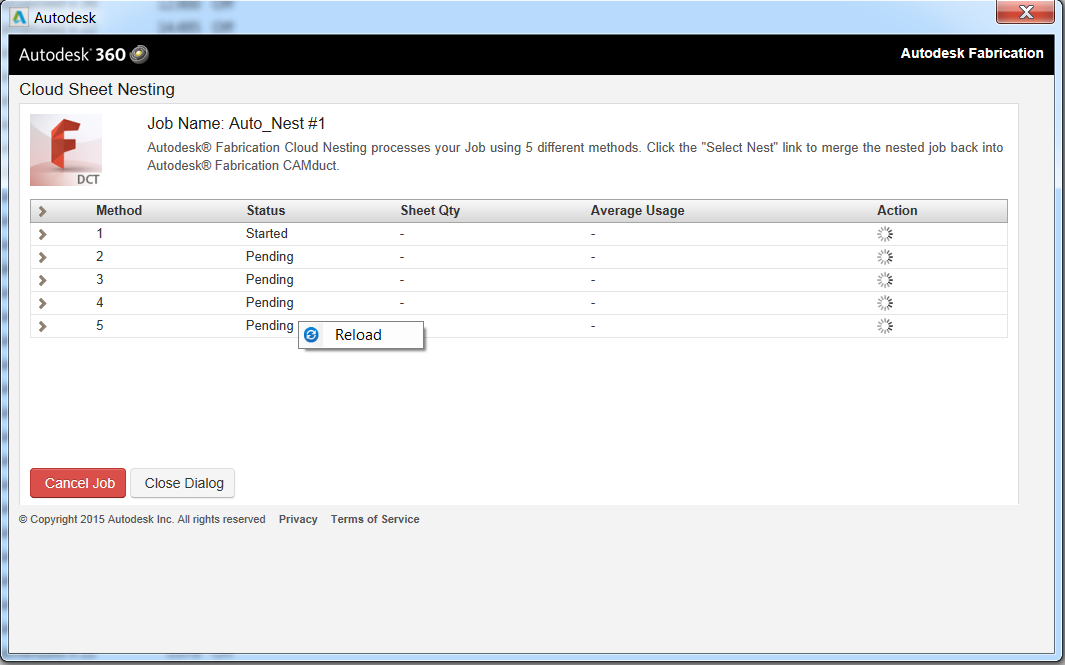
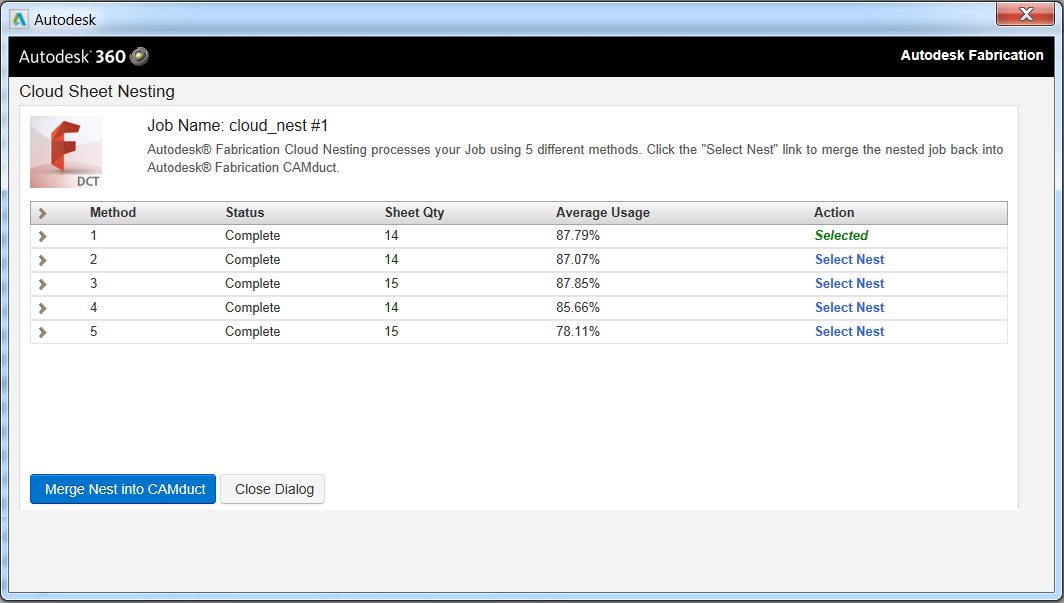
- As the job progresses, the status for each nesting method is indicated. When the nesting process is complete, statistics are reported for each method.
Sheet Qty: This column lists the number of sheet of material used for nesting this job.
Average Usage: This column lists the material usage efficiency. A higher number is more efficient resulting in lower material costs.
- Click the > arrow to the left of each method to view details about each sheet.
- To select a nest, click the "Select Nest" link for a nesting method.
As soon as you select a nest, it displays as "Selected" under Action, and at the bottom of the dialog the Merge Nest into CAMduct option displays.
-
Clicking the Merge Nest into CAMduct button downloads the nesting layouts into the job in CAMduct.
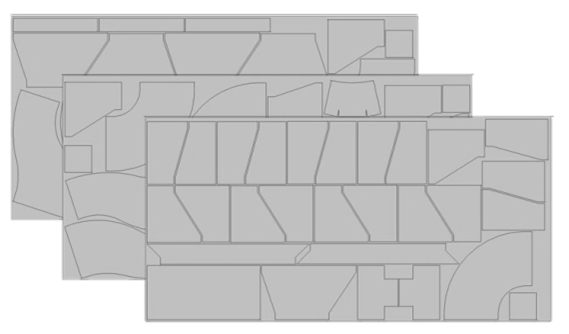
Once you have downloaded the nests into CAMduct, you can click the Nests tab in the Job Contents dialog in CAMduc to view the nested sheets.
Because this is a cloud service, you do not have to open the status window and actively wait for the nesting process to complete. When your nesting job is ready, the Autodesk Cloud Nesting Service automatically sends you an email notification.
You can access your nests and download them at your convenience. These nested jobs are saved and stored in the Autodesk Cloud Nesting Service for 96 hours.