The next step is to set a range of colours in the key-in clip to be partially transparent so as to soften the transition between the front and back clips in the composite. This is called the softness range. To specify the softness range, sample the areas to be softened in the image window. The pixels in the key-in clip in the softness range are grey in the matte. The key should have the greatest possible softness value.
As shown in the following steps, the softness range can be set using the RGB or YUV colour models. RGB Softness is the default setting.
To sample for softness:
- Make sure you are at frame 1. If you move to a different frame while sampling, you will set a second softness keyframe (at the new frame) and animate the softness. Note: To avoid setting keyframes, disable Auto Key.
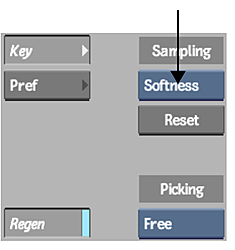
- From the Sampling box, select Softness.

- From the View box, select Front to view the input image for the 3D Keyer.
- Identify an area where softness is needed. For example, if the clip consists of a talent in front of a blue or green screen, softness is needed at the edge of the talent to soften the transition between the front and back clips. If the clip contains transparency, softness is needed in the semi-transparent area.
- From the View box, select the current result view (displayed as <Currently Selected Node> Result, in the View box) to monitor the result as softness is applied to the matte while you sample. Tip: You can switch views as you sample the image. The current result view (displayed as <Currently Selected Node> Result, in the View box), shows the result of the processing pipeline up to the selected node. To see the Front Source, select Front from the View box.
- Zoom in to see the image more closely.
- Click in the area you identified.
The cursor changes to a colour picker.
- Drag the colour picker over the area in the image to be softened. Avoid sampling any area that should not be softened, such as the key itself; however, there is no need to avoid areas that have been keyed out. For transparencies, drag the colour picker in the area that you want to be semi-transparent.
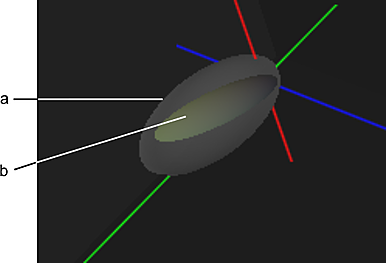
A softness ellipsoid appears in the RGB viewer. Notice the tolerance ellipsoid in the softness ellipsoid.

(a) Softness ellipsoid (b) Tolerance ellipsoid
All colours in the softness ellipsoid (except those inside the tolerance ellipsoid) will be grey on the matte. In the softness ellipsoid, the closer a point is to the tolerance ellipsoid, the darker the grey will be. For example, the mid-point between the edge of the tolerance ellipsoid and the edge of the softness ellipsoid is always the same mid-grey.
Notice how the softness ellipsoid increases in size as you sample the edges.
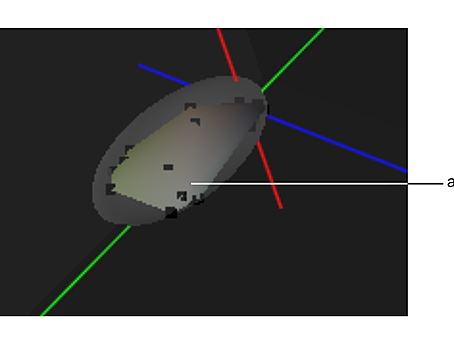
Note: The softness is rendered interactively on the matte - you see the results immediately. For information on rendering the softness only after releasing the cursor, see Regen. - Like the tolerance ellipsoid, the softness ellipsoid has a convex hull. To see it clearly, set the Tolerance Display and Tolerance ConvexHull display to None, and set the Softness ConvexHull display to Vert&Surf.

(a) Softness convex hull
- If needed, take another sample elsewhere on the edges or transparency. Each time you sample, the pixels touched by the colour picker contribute to the previously calculated softness range. Note: If you are not satisfied with the result of a sample, click Undo. To reset the entire softness sample, click the R button. To remove the entire sample range and start over with a new sample, press Ctrl+Alt and drag the cursor in the area to be softened.
- From the View box, select MK Schematic and, in the schematic, click the Result node.
- From the View box, select the current result view (displayed as <Currently Selected Node> Result, in the View box) to view the result.
The edges are softened but may be grainy.