In some cases, for example, when a dust artefact occurs in an area of very fast motion, the Motion Estimation repair cannot remove a dust artefact. When this happens, you have two methods you can use to remove the artefact. You can simply instruct the system to repair the entire contents of a box, or you can use a Single Frame repair to clone pixels in the area surrounding the problem.
If neither of these work, you can flag the artefact for later removal with the Can't Fix repair type. When you set a box to Can't Fix, no dust removal process is applied to the particle, and the x and y co-ordinates of the box are saved with the dust removal metadata. The removal of the artefact can then be performed using other methods. For example, a simple script could be written that would list the frames with “Don't Fix” boxes on them, and then send the files to a paint program.
To fix problem dust artefacts:
- In the Main menu, click Image, and then click Dust to display the Dust menu.
- Select the box surrounding the problem artefact.
All other active boxes on the frame are deselected.
- Turn off Use Mask.
If the artefact is still visible, turn on Use Mask again and continue to step 4.
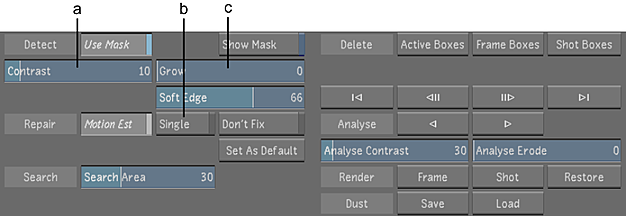
- Click Single.

(a) Contrast field (b) Single button (c) Grow field
The box border changes from blue to green, indicating the applied Single Frame repair type.
- Set the Contrast, Grow, and Soft Edge parameters to the optimum values. Use Show Mask as needed.
- (Optional) If the artefact is still visible, set the repair type to Don't Fix.
The box border changes to red, indicating the applied Don't Fix repair type.
Tip: To navigate between boxes set to Don't Fix, right-click the Previous and Next Box buttons.