Blur and Blooming Settings

- Blur Width field
- Displays the horizontal blur amount in pixels. Editable.
- Blur Height field
- Displays the vertical blur amount in pixels. Editable.
- Blur Proportional button
- Enable to constrain blur amount proportions.
- Bokeh Blur field
- Displays the amount of smoothness applied to sharp bokeh edges. This creates the blur that is applied to out-of-focus points of light to simulate a shallow focus. Editable.
- Basic/Additive Blooming button
- Switch between basic blooming and additive blooming bokeh effects. The basic blooming mode displays the gain applied to highlights in non-HDR images, to allow the creation of bokeh patterns without affecting colour integrity. The additive blooming mode allows you to create higher intensity bokeh patterns from any source image, using minimum and maximum thresholds for highlight segregation.
- Basic Blooming field
- Displays the gain applied to highlights in non-HDR images, to allow the creation of bokeh patterns without affecting colour integrity. This creates the glow effect that is applied to the bright spots of the image to simulate light bleeding, or blooming, over the edges. Editable.
- Additive Blooming field
- Displays the amount of high intensity bokeh patterns that can be created from any source image generating extreme highlight content . Editable.
- Additive Blooming minimum field
- Displays the minimum threshold for highlight segregation. Editable.
- Additive Blooming maximum field
- Displays the maximum threshold for highlight segregation. Editable.
Bokeh Settings
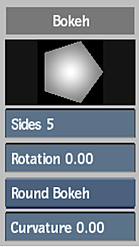
- Sides field
- Displays the number of sides in the kernel shape. Editable, if kernel information is not attached to the node.
- Rotation field
- Displays the angle of rotation of the kernel shape. Editable, if kernel information is not attached to the node.
- Bokeh Type box
- Select whether to use a round or angle bokeh curve to define the kernel shape.
- Curvature field
- Displays the amount of curvature applied to a round bokeh kernel shape. Editable.
Slices and Edge Artifacts Settings
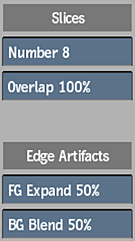
- Slices Number field
- Displays the number of slices to blend to determine the Z-Depth interpolation of a depth-of-field focus blur. You can see the slices in the depth-o-gram to allow a better understanding of the focus plane behaviour, and to help define the number of slices required, depending on your Z-depth colour information. Editable.
- Slices Overlap field
- Displays the amount of blending overlap between adjacent slices. Editable.
- Foreground Expand field
- Displays the amount of mixing between the edges of selected objects and their surroundings in the foreground. Editable.
- Background Blend field
- Displays the amount of mixing between the edges of selected objects and the background image. Editable.
Z-Depth Settings
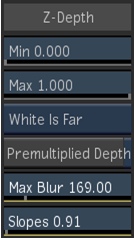
- Z-Depth Minimum field
- Displays the lower limit of the Z-Depth values. Pixels with lower values are mapped to black. Editable.
- Z-Depth Z Maximum field
- Displays the upper limit of the Z-Depth values. Pixels with higher values are mapped to white. Editable.
- White Value box
- Select whether white pixels represent the furthest point or nearest point on the Z-axis.
- Premultiplied Depth button
- Enable to have the alpha channel information premultiplied with the colour depth data. Use to prevent a black halo from forming around blurred areas.
- Max Blur Field
- Displays the maximum total horizontal and vertical blur amount to clamp the value and avoid unnecessary rendering. The cumulative effect of the high blur amount (Basic tab), and gamma and gain correction applied to the Depth map (Depth tab) may result in very large values, which greatly increases the rendering time. Editable.
- Slopes field
- Displays the gamma value. Applies a gamma curve to the Z-depth map before it is used. Editable.
Depth-O-Gram Settings
Use the Depth-O-Gram settings to refine focus values.

Depth blur effects control the amount of blur based on a depth of field matte. Depth blur settings are displayed in the Depth-O-Gram tab.
A depth of field map (Z-depth map) can be connected to the node. Black portions of the map are in focus. White portions display the highest level of blur. Note that a Z-depth map imported from another application may use the opposite convention and may need to be inverted.
- Focus Plane field
- Displays the distance of your focus point, which is the point at which there is no blur on the image. Editable.
- Focus Offset field
- Displays the distance between the focus plane and the near offset represented as a percentage of the total offset range. Select 50% to make the near and far offsets equidistant from the focus point. Editable.
- Focus Range field
- Displays the distance the near and far offset. Editble.
- Frame option box
- Select how you want to frame the histogram.
- Zoom field
- Displays a vertical zoom value for the histogram to display. You can zoom horizontally by pressing Ctrl+spacebar and dragging left or right in the histogram. To pan horizontally, click spacebar and drag left or right in the histogram.Editable.
- Z Plot button
- Click to activate the pick cursor. Use to select a pixel in the image to display its depth.
- Z Plot Colour pot
- Displays the colour that indicates the plane on which the plotted value is located.
Modifying Depth of Field Gesturally
Depth blur effects can be modified gesturally by dragging the focus, near offset, and far offset planes in the graphic representation of the depth of field. As you drag these elements, the planes are also displayed in the Result view as a preview of the areas that will be in focus. Use the depth control fields to change the gamma and gain, and to change the focus range while keeping the focus plane constant. These parameters are updated in the depth of field display automatically.
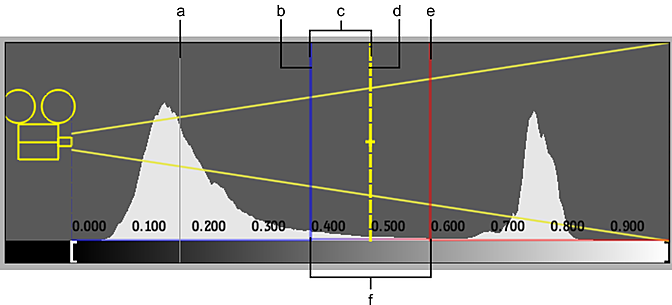
(a) Plot Value Plane (b) Near Focus Offset Plane (c) Focus Offset (d) Focus Plane (e) Far Focus Offset Plane (f) Focus Range
Bokeh Profile Settings
Use the Bokeh Profile tab to edit the blur kernal pattern.
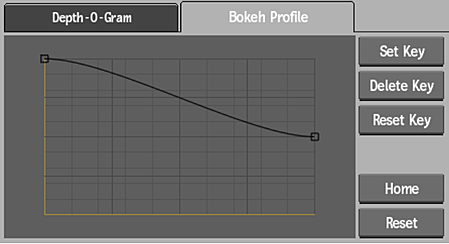
The kernel is the basic blur shape. The shape of the kernel is determined by its number of sides, its rotation, and the shape of its S-curve. This curve represents the shape of the pattern, from its centre to the outside. The default S-curve defines the softness of the blur. You can change the curve by manipulating the two points that define the curve, or you can add points to the curve. Use the Tools box to add and delete points on the curve.
- Set Key button
- Sets a keyframe at the selected frame.
- Delete Key button
- Deletes the selected keyframe.
- Reset Key button
- Resets the curve at the selected keyframe.
- Home button
- Resets the profile view.
- Reset button
- Resets the blur pattern profile curve to its default values.