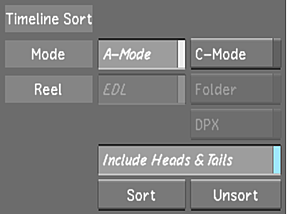
When you use A-mode to sort your timeline, your shots are organized according to their time location within the sequence (i.e., the record timecode). The shots are displayed one after another on a single layer and any dissolves and retimes are not displayed.
To sort the shots using A-mode sort:
- Click Editing and then click Assemble to display the Timeline Sort section.
- Select the shots you want to sort. If you want to sort the entire timeline, you do not need to select any shots.

- Enable the A-Mode button and choose whether you want the head and tail frames to be exposed.
 Note: If any of your shots have a retime value with heads and tails, the Retrim button (in the Edit menu) must be enabled so the sort function can calculate the handles properly.
 - Click Sort.
The shots are now sorted by the record timecode. A green border appears around the timeline canvas to indicate that you are working in a sorted timeline.
Note: You cannot do any editorial work or delete and add shots while you are in the sorting mode. As well, undo actions are disabled.
Once you have completed grading the shots, you can do one of the following:
- Create a new cut list with the sorted shots. See Creating a New Cut.
- Render the sorted shots. See Rendering Shots.
- Play out the sorted shots to a VTR. See Playing Out to a VTR and Writing Telecine-Style Tape.
- Return the sorted shots to their original order.
To return the sorted shots to their original order:
- Do one of the following:
- Click Unsort.
- Press Alt+F8.
A-Mode Sort Using Hotkeys
You can also sort the shots, without accessing the Assemble menu, by using hotkeys. Press Alt+F9 to sort the shots in A-mode and enable the heads and tails. The heads and tails are showing 0 (zero) so you can work on every single frame within the shot.

Press Alt+F10 to sort the shots in A-mode and for head and tail frames to remain unexposed (disabled).
