Most strategies allow you to select contours/boundaries for defining the machining. Depending on their particular purpose, these contours can be either open or closed. The contours can be selected from either edges, faces, sketches, or sketch segments - including splines, or a combination of all these.
Stock boundaries require closed contours exclusively. Geometry selection can be in either open or closed contours. Some operations, like 2D Adaptive and Slot, only accept closed contours. Other operations, such as 2D Pocket, 2D Contour, and Trace accept both.
Selecting a Closed Contour
When a suitable sketch or face does not exist, 2D geometry is normally selected from edges or sketch segments. Inventor HSM lets you quickly select a closed contour using the Contour Selection mini-toolbar. This procedure is described as follows:
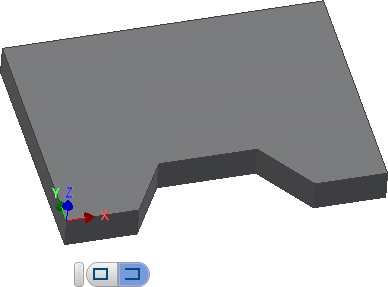
- After selecting your tool, click the Geometry tab and then click the Contour selections button. (This button is active by default.) The Contour Selection mini-toolbar is then displayed in the graphics window with the Closed contour button (at the left) active.
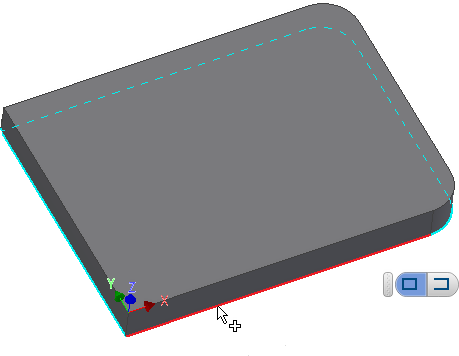
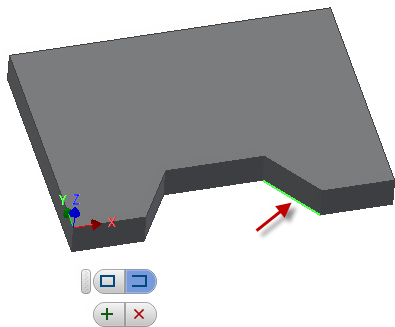
- Click the edge of the contour geometry you wish to machine.
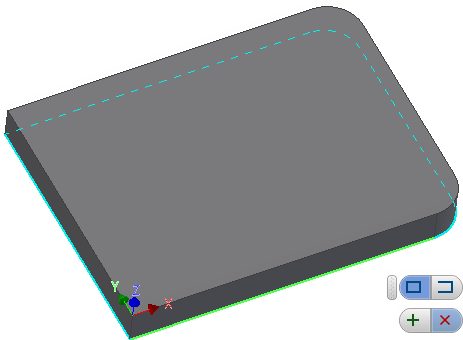
- Inventor HSM automatically identifies a connected, or chained, contour and it is highlighted in the graphics window. At this point, two new buttons are added to the mini-toolbar. Click the green "+" button to accept the contour selection, or click the red "X" to cancel the contour selection.
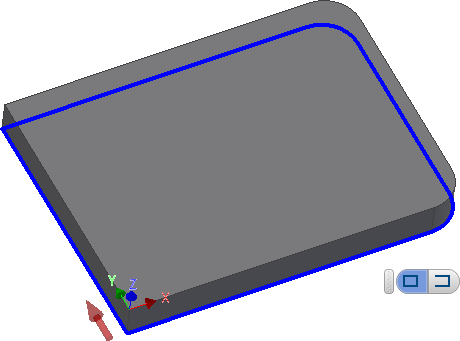
- After accepting the highlighted contour selection, the contour is displayed in a solid blue line type. An arrow appears indicating the side of the machining. Click the arrow if you wish to machine on the opposite side.
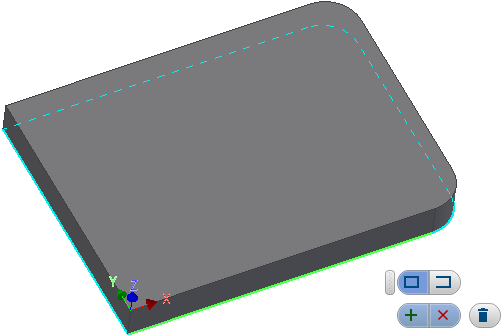
- Should you decide at this point to reject the contour selection, simply click the contour again and a trash can button appears in the mini-toolbar.
- Click the trash can button to delete the current contour.
- The mini-toolbar remains displayed so that you can make another selection. At this point, the default selection going forward remains in Closed contour mode.
Selecting an Open Contour
It is occasionally necessary to select a partial chain, or open contour, only. Use the following procedure when you wish to select an open contour:
- After selecting your tool, click the Geometry tab and then click the Contour selections button. (This button is active by default.) The Contour Selection mini-toolbar is then displayed in the graphics window with the Closed contour button (at the left) active. Click the Open contour button at the right of the mini-toolbar to activate Open contour mode. Note: The decision between open and closed contour does not need to be made during the initial selection. You can also make this choice after reselecting previously made selections.
- Select the segment that represents the starting point of the open contour.
- Next, select the segment that represents the ending point of the open contour.
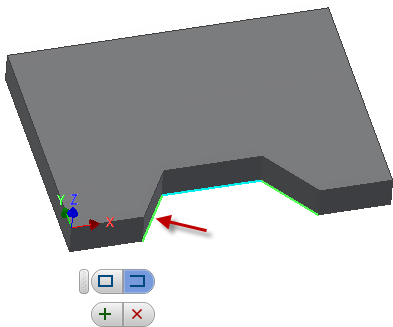
- Click the green "+" button to accept the contour selection. However, you can continue adding segments if necessary. Here is an example of the creation of an open 3D contour by selecting extra edges on the model.
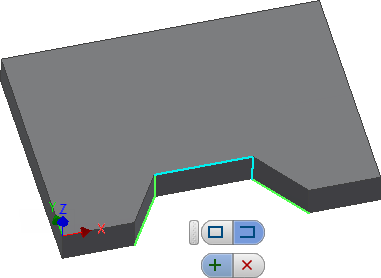
Selecting extra edges in an open contour
- After accepting the highlighted contour selection, the contour is displayed in a solid blue line type. An arrow appears indicating the side of the machining. Click the arrow if you wish to machine on the opposite side.

- Should you decide at this point to reject the contour selection, simply click the contour again and a trash can button appears in the mini-toolbar.
- Click the trash can button to delete the current contour.
- The mini-toolbar remains displayed so that you can make another selection. At this point, the default selection going forward is in Open contour mode. Note: Open contour mode can be used to select individual (disconnected) line segments by skipping Step 3.