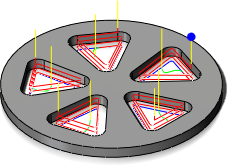
Circular pattern toolpath example
Creating a Circular Pattern
To create a circular pattern, follow these steps:
- Start by creating the operation(s) for a single feature or the part that you want to pattern.
- Add the operation(s) to a new CAM Browser folder by right-clicking and selecting Add to New Pattern from the pop-up context menu.
- The Pattern operation dialog is displayed. Select Circular pattern from the Pattern type: drop-down menu.
- Click the Axis button and select an axis feature around which the operations should be patterned. If the axis is not visible, you may have to select it from the Inventor Model Browser.
- If necessary, enable the Flip direction check box to reverse the direction of the pattern.
- In the Angle: field, enter the number of degrees (360 degrees is the default) and enable the option Equal spacing. This distributes the pattern instances over the specified angle range. Alternatively, you can measure the angle between two of the features and enter this angle here.
- In the Number of instances: field, enter 5. This updates the preview to show the toolpath on every instance.
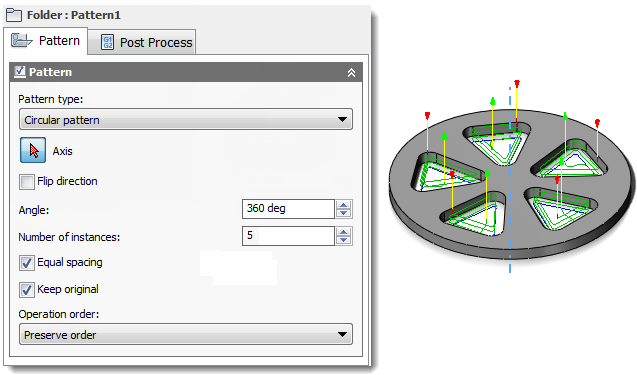
- Finally, from the Operation order: drop-down menu, choose whether the pattern should re-order the operations according to tool or operation, or preserve the order of the operations within the pattern.