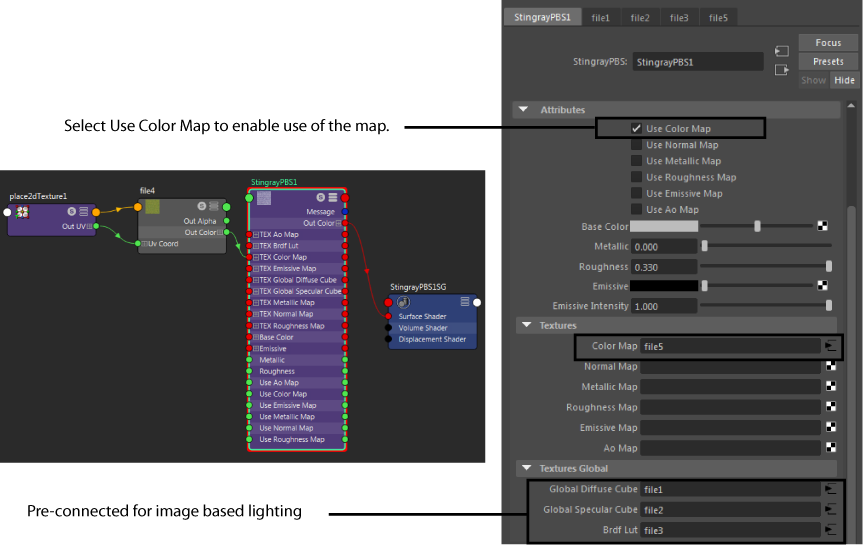
By default, the Stingray PBS node accepts inputs for six different types of maps:
- Ao Map (ambient occlusion)
- Color Map (albedo or diffuse)
- Emissive Map (glow)
- Metallic Map (metallic)
Your metallic map is a mask that determines the areas of your object that are metallic and the areas that are not. This value should be 0 or 1, with non-metals as 0 and metals as 1. The map value should represent the top layer of the material; therefore, painted metal should not be set to 1 as paint is a non-metal.
- Normal Map
- Roughness Map
This map determines how rough a surface is and thus its reflectivity. A roughness of 0 represents a smooth surface and thus perfect reflection. As you increase the roughness value, the reflection becomes more scattered and more blurry.
In addition, three files are pre-connected for image-based lighting, and their connected file nodes are shared amongst all Stingray PBS nodes in the scene. You can find these connections in the Textures Global section of the Attribute Editor.

In addition to the above Standard preset, two other presets are available that enable you to do the following. Switch to these presets using the Preset Material drop-down list in the Attribute Editor.
- Standard_Transparent preset: provides an Opacity control that allows you to set the level of opacity/transparency
- Standard_Masked preset: enables you to further control the transparency by providing an opacity mask map to determine whether or not to render a pixel (instead of performing alpha blending)
Connect these maps in one of two ways:
Using the Attribute Editor
-
Select the Stingray PBS node.
- In the
Attribute Editor, under the
Textures heading, click the
 icon where you want to connect a map (for example,
Color Map).
This creates a file node, and displays its attributes in the Attribute Editor.
- In the File node attributes, click the folder icon next to Image name and navigate to select your texture map.
- Select the Stingray PBS node again, then enable the corresponding Use * Map attribute (for example, Use Color Map) in the Attribute Editor.
Using the Hypershade
-
In the Hypershade work area, create a File node, and navigate to your texture map. See Create and connect nodes in the Hypershade.
-
Connect the OutColor output of the File node to the map input attribute of the Stingray PBS node; for example, TEX Color Map.
-
Enable the corresponding Use * Map attribute (for example, Use Color Map) in the Attribute Editor.
