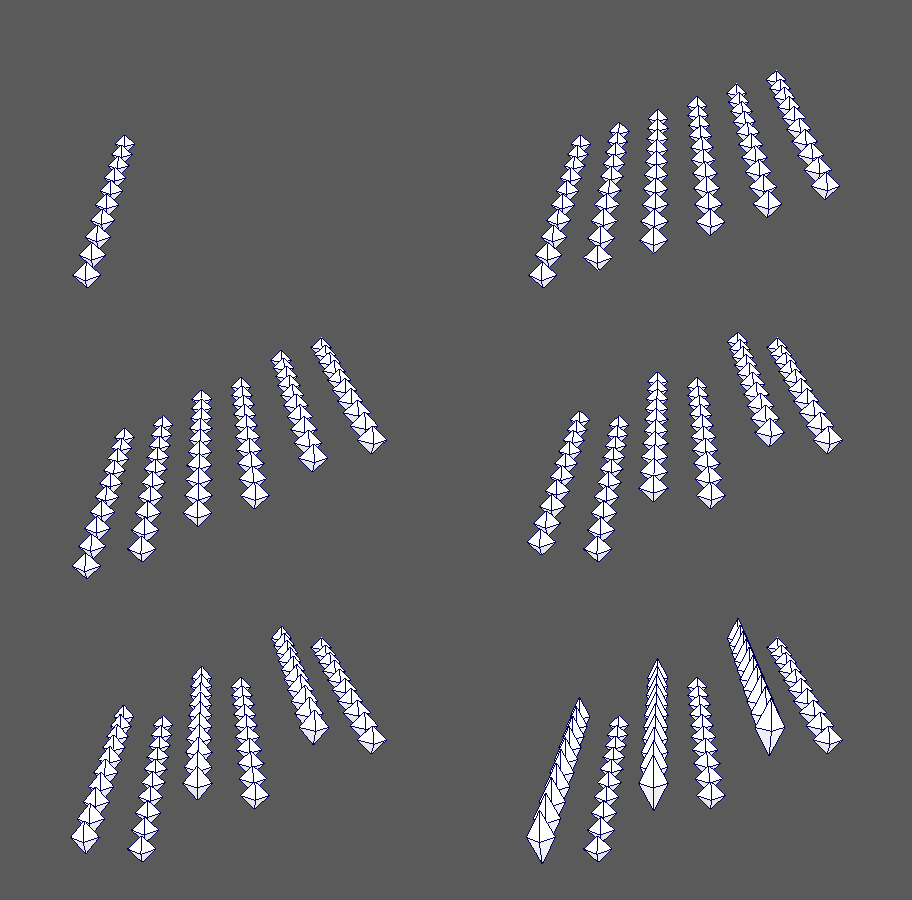

Duplicates the MASH network and allows you to perform transformations on the replicants.
Replicator
- Replicants
- Determines the number of times your MASH network will be duplicated.
- Offset Position X, Offset Position Y, Offset Position Z
- Determines the spacing between replicants.
- Position Ramp
- Customizes replicant positions using a ramp.
- Scale Together
- Scales all points together from the axis.
- Scale Replicants X, Scale Replicants Y, Scale Replicants Z
- Scale the space between replicants.
- Scale Ramp
- Customize the shape of the scale using a ramp.
- Rotate Together
- Rotates all points together from the axis or driven rotations.
- Rotate Replicants X, Rotate Replicants Y, Rotate Replicants Z
- Rotate the replicants around a shared center.
- Rotation Ramp
- Customize the shape of the rotation using a ramp.
- Rotate Around
- Sets the point around which replicants will rotate.
- Offset
- Offset the number of replicants. The effect resembles what would happen if additional invisible replicants were added before the actual replicants.
- Step ID
- Increments IDs with each replicant, rather than with each object.
Pattern
This allow you to add additional offsets to every nth replicant.
- Affects Position, Affects Rotation, Affects Scale
- Specifies what channels are affected by the pattern.
- Pattern
- Specifies every nth row to apply the offsets to.
- Pattern Offset, Pattern Scale, Pattern Rotation
- Sets the transform offsets to apply to every nth row.
Time Machine
This allows you to offset the animation of each replicant.
- Time Offset
- Sets the number of frames to offset the animation of each replicant.
Curve
This allows you to arrange and animate replicants along a curve.
- Curve
- Displays the curve along which replicants will be evenly distributed.
- Connect Curve
- Connects the selected curve to the Curve attribute.
- Time Slide (Animation)
- Determines whether or not to animate the replicants along the curve.
- Curve Scale
- Adjusts the scale of the Time Slide (Animation) to account for small/large curves.
- Up Vector
- Defines the up facing direction for your replicants.
- Rotational Offsets
- Adds an offset to the rotation. Useful for making manual adjustments to the replicants' facing direction.
- Use Curve
- Enables/disables the effect of the curve.
Driven Channels
This allows you to assign another Waiter to drive the replicants' position, scale, and rotation.
- Driving Position, Driving Rotation, Driving Scale
- Displays the Waiter that currently drives the replicants' respective channel.
Strength
When Blend Type is set to Strength, you can use the following options to manually adjust the blend.
- Strength
- Control the amount of blending. Higher values represent more child network influence.
- Random Strength
- Controls the amount of randomization added to the blend.
- Step Strength
- Turns the node's effect off one object at a time.
- Strength Map
- Determines the input file (2D texture, animated texture, etc) that controls the shape of this node's effect.
- Map Projection Axis
- Determines the axis along which the Strength Map is projected.
- Map Helper
- Displays the object being used to interactively place the
Strength Map in the scene. You can right-click the field to create a new helper object (a plane) if none exists. You can also middle-drag a mesh into this field or right-click to connect a selected mesh. If a mesh is already connected, you can also right-click to break its connection or show it in the Outliner.
Note: For the best results, assign the same texture to both the Strength Map and the Map Helper (this automatically happens when creating a new helper object).