Depending on the editor from which you set these options, you may see a subset or all of the following attributes:
- Type
-
Click the arrow to choose a light type from the drop-down list. When you change a light’s type, only those attributes common to both types retain their previous values or settings. Values and settings for non-common attributes are lost. When you change a light’s light type, the light’s position is also preserved.
- Color
-
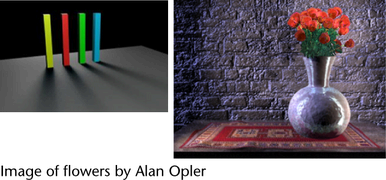
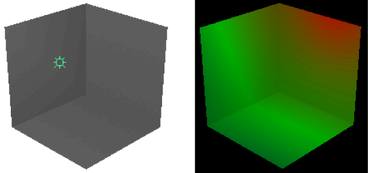
Set the color of the light. Click the swatch either to change the light’s color in the Color Chooser or to map a texture to the light. If you map a texture, the light projects it (depending on the light Type). The default setting is white. The following shows the rendered result when you map a Ramp texture to an Ambient light’s Color attribute.

- Intensity
-
Represents the brightness of the light. A light with an Intensity value of 0 produces no light. A light with a negative Intensity value removes light from a scene in the area of the light’s influence. The slider range is 0 to 10, but you can type in a larger value for a brighter light (for example, 20). The default value is 1.
Tip:Use a negative Intensity value to reduce or remove hot-spots or glare.
Intensity for area lights is based on the intensity per area units, not for the light as a whole.
- Illuminates by Default
-
If on, the light illuminates all objects and is included in the defaultLightSet. If off, the light only illuminates objects to which it is linked. Illuminates by Default is on by default.
- Emit Diffuse and Emit Specular
-
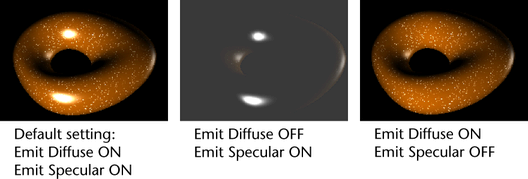
Emit Diffuse and Emit Specular are on by default. Turning them off turns off the diffuse or specular shading results for the light.
Note:The results do not show in the scene view. To see the results, test render in Render View.

To enable or disable the diffuse and specular shading for multiple lights at the same time, use the Rendering Flags window (Windows > Rendering Editors > Rendering Flags).
- Decay Rate
-
Controls how quickly the light’s intensity decreases with distance. The Decay Rate setting has no effect at distances less than 1 unit. The default setting is No Decay.
For more information on light decay, see Light decay.
Tip:The Decay Rate also controls how fog brightness decreases with distance from the light source.
In the Attribute Editor, click the arrow to display the drop-down list and select a Decay Rate. In the options window, type a value or use the slider.
No Decay
no decay; light reaches everything
Linear
light intensity decreases directly (linearly) with distance (slower than real world light)
Quadratic
light intensity decreases proportionally with the square of distance (the same as real world light)
Cubic
light intensity decreases proportionally with the cube of distance (faster than real world light)
- Cast Shadows
-
If on, the light produces depth map shadows (for directional, point, or spot lights) or raytraced shadows (for ambient lights). Cast Shadows is off by default. See also Shadow attributes.
Tip:- Depth map shadows are typically used for quick render tests when the quality is not important.
- Raytraced shadows produce more accurate results and can handle transparency, but can be slower.
- Shadow Color
-
The color of shadows produced by the light. Use a colored shadow to simulate shadows produced by transparent, colored surfaces (for example, colored glass). The default setting is black.
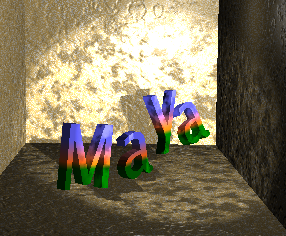
You can also map textures to shadows to create interesting effects. The following example shows a Checker texture mapped to the Shadow Color of a Spot Light.

If you decide to map a texture that has color (such as the Stucco texture in the following example), change the texture’s color to black and white if desired.

- Interactive Placement
-
Turn this option on so that you are automatically looking through the directional light upon its creation.