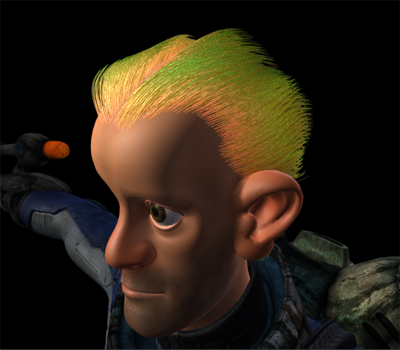
You can add Custom Shader Parameters to change how you hair looks when it is rendered. The effects of Custom Shader Parameters are visible in the rendered Description, but not in the preview.
In this example, two custom shading parameters called tip_color and root_color are created to vary the hair color from root to tip. An expression with a noise function is added to the custom attributes to control how the root color blends with base hair color.
- In the Preview/Output tab, in the Custom Shader Parameter section do the following:
- In the space beside Name, type tip_color.
- From the drop-down list beside Name, select color.
- Click
 to create the parameter.
The tip_color parameter appears in the Custom Shader Parameters.
- Repeat the steps to create a parameter named root_color.
Using an expression, you can add color for the tip and root color.
- Click this icon
 beside the parameters to open the XGen Expression Editor.
 - In the XGen Expression Editor, click the Samples tab.
- Click the + beside Global and then + beside UI.
- From the expression list that appears, click a color-related expression such as color_green.
- Click Accept.
The tip_color parameter is now set to green.
- (Optional) To change the color, click the color swatch and select a new color.
- Repeat steps 4 to 8 for root_color.
 Note: These colors appear in the rendered Description, but not in the preview.
 - Render the Description in mental ray.

The rendered image displays the hair base color set by the XGen Hair Phenomena shader and blends the root and tip colors into the final rendered color.
Note: If your Customer Shader Parameters do not affect the rendered Description, you may need to delete the Descriptions xgmr:geoshader object. To do this, in the Outliner, expand the Description until the xgmr:geoshader object displays, then delete it. Rebuild the shading network by clicking Setup in the mental ray Settings of the Preview/Output tab. Render your Description again.