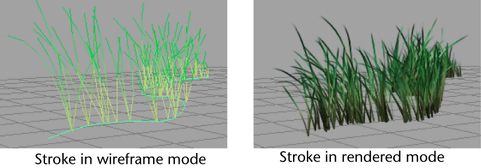
The Paint Effects Tool works like a paintbrush. When you drag with the Paint Effects Tool, you create a stroke. A stroke is a collection of curves with attributes that define how the paint is applied along the stroke path. You can paint strokes on a 2D canvas to create 2D images or textures, or you can paint strokes in a scene to create paint effects in true 3D space.
Brushes
The attribute settings that define the appearance and behavior of a stroke are collectively called a brush. When you paint a stroke, Paint Effects creates a new brush, copies the template brush settings to the new brush, then attaches the new brush to the stroke, giving the brush a unique name.
The template brush is simply the collection of attribute settings that define the brush to be attached to your next stroke. Think of it as your paint can—the place you mix your paint before applying it. Any changes you make to the paint in the can (the attribute settings in the template brush) affect what your next stroke looks like, but they do not affect any previous strokes made with paint from that can (the template brush).
You can save brushes so that specific combinations of attribute settings are available when you need them. Saved brushes are called preset brushes. When you select a preset brush, its settings are copied to the template brush, where you can tweak them before painting your stroke. Any tweaks or changes you make to the settings in the template brush are not made to the selected preset brush, unless you explicitly save them. You can create your own preset brushes or use the preset brushes that ship with Paint Effects.
Strokes
A Paint Effects stroke is a curve attached to a hidden underlying NURBS curve (or curves). The underlying NURBS curve defines the shape of the stroke path.
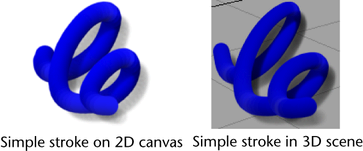
When you paint a stroke on a 2D canvas, Paint Effects applies paint along the stroke path according to the template brush attribute settings, then discards the stroke geometry. Because there is no geometry on the 2D canvas, you cannot modify the strokes or the attached brushes after you have painted them.
When you paint a stroke in a 3D scene, Paint Effects saves the stroke with the scene. Because strokes are geometry, they have construction history and they are editable. You can modify a stroke’s attributes, transform a stroke, change its shape, modify the number of CVs on the stroke path curve, and reset the attributes of the brush attached to the stroke. You can even attach brushes to existing NURBS curves to create strokes.
Although by default each stroke has a unique brush attached to it, you can force strokes to share a single brush. When stokes share a brush, any changes you make to the brush affect all the strokes that brush is attached to.
Types of strokes
There are two basic kinds of strokes: simple strokes and strokes that simulate growth.
Simple strokes
On simple strokes, paint is applied directly along the stroke path.
Strokes simulating growth
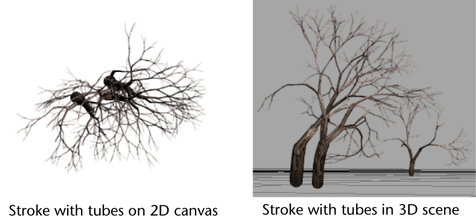
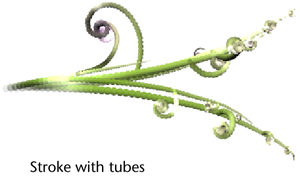
Strokes with tubes simulate organic growth. As you paint, tubes sprout from the stroke path, like plants growing from a path of seeds. The tubes grow, split, and expand in discrete steps along the stroke path, growing a segment longer at each step.
Here’s how it works. As you paint the stroke, Paint Effects samples points on the stroke path based on input from your mouse or stylus. When you paint the stroke quickly, the sample points are farther apart, when you paint the stroke slowly, the sample points are closer together. When it samples a point, Paint Effects plants new tubes along the path between the last sampled point and the current one, then grows the previously planted tubes one more segment. When you finish painting the stroke, the tubes will either continue growing until they reach the end of their life span (defined by the number of tube segments), or they will stop growing, so that tubes near the end of the stroke are less complete than the ones at the beginning.
Tubes can grow into an almost infinite variety of shapes and forms (for example, plants, hair, fire, and water) depending on the attributes you set for the stroke.
On the 2D canvas, strokes with tubes can quickly produce complex images. In a 3D scene, the tubes can grow into 3D space.
How paint is applied to strokes
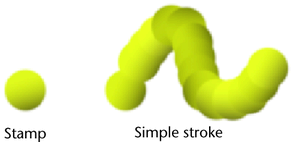
Paint is applied to strokes in overlapping stamps when the stroke is rendered.
If the stroke is simple (it has no tubes), the stamps are applied along the stroke path.
If the stroke simulates growth (it has tubes), the stamps are not applied along the stroke path, but are applied along the tube paths.
When you work on the 2D canvas, you immediately see the paint applied to the stroke. However, when you work in 3D in your scene, strokes are represented as wireframes. While a wireframe representation of a stroke provides quick, immediate feedback without diminishing performance, at times you will want to see what the stroke really looks like without having to do a post-process render. You can do this using an interactive stroke rendering mode in the Paint Effects panel called the scene painting view.
The Paint Effects scene painting view is a snapshot of the scene view of your scene where you can view your strokes as wireframes, or you can apply paint to your strokes as you paint, in effect, rendering your strokes interactively.
