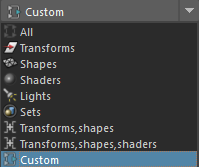
Use the filter functionality to add only transforms, shapes, shaders, and so forth to your collection. You can also create a custom filter to add specific node types that you are interested in.

You can populate your collection by doing any of the following:
- providing an expression in the Include field in the collection Property Editor,
- selecting nodes from the viewport or Outliner and clicking Add in the collection Property Editor,
- a combination of both.
Occasionally, you may only want to include one or two types of nodes in your collection. For example, you may want to include only shaders, or only transform or shape nodes. For more information regarding node types, such as transform and shape, see Node types.
In this case, click the filter icon
 on the collection, and select from among the available filters:

After you have selected a filter, you can check your results by clicking the Select button in the Property Editor to ensure that only nodes that match the filter you chose are selected in the Outliner. You have streamlined your collection to only include these selected nodes.
Filters are useful because they allow you to apply overrides to only a subset of the nodes in your collection. For example, if you only wanted to translate the place3dTexture nodes in your collection, but your collection includes both texture nodes and geometry nodes, then the translate override would be applied to both types of nodes in your collection, and your geometry would be translated as a result. Using filters allows you to avoid inadvertently overriding something that you do not want to override.
In this example, the expression Character* matches all nodes that start with Character. In this example, that would include the shading nodes. However, because the filter is set to Transforms and shapes; therefore, only the geometry nodes are included and the shaders are excluded.

Create a collection of shaders
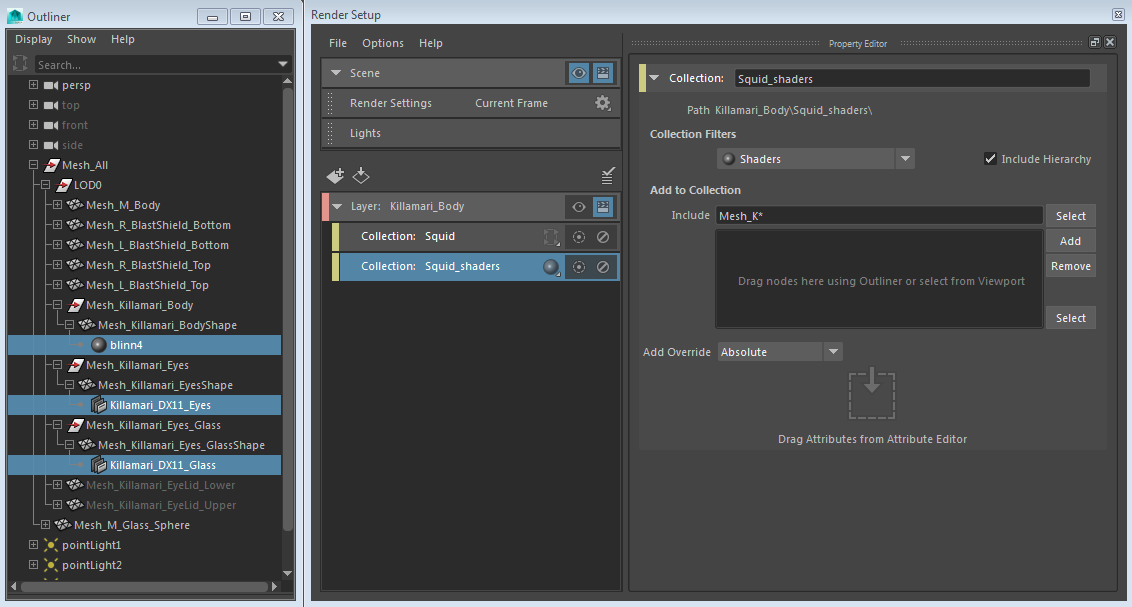
You can create a collection of shaders by selecting their group or parent node, then enabling the Include Hierarchy option, and then using the Shaders collection filter. The Include Hierarchy functionality traverses the children of a group or parent node. Because the material node is associated with the transform node, it is included in the collection.
To create a collection of shaders using this option, follow these guidelines:
-
Select your group node in the Outliner, then click Add in the collection Property Editor to add it to the collection.
If you want to add more than one group node, you can also use an expression to encompass the multiple nodes.
- Select a filter type (for example,
Shaders, or
Custom).
Note: You can use the Custom filter to include specific type of shader nodes; for example, only dx11 shaders, or only blinn shaders. See Use a custom filter to add specific node types below for more information.
- Enable the Include Hierarchy option.
In this example, the Mesh_K* expression is used to add the Mesh_Killamari_Body, Mesh_Killamari_Eyes, Mesh_Killamari_Eyes_Glass nodes to the collection, and Include Hierarchy is enabled. The Collection Filters searches all the hierarchy of these nodes to include their shaders:

Use a custom filter to add specific node types
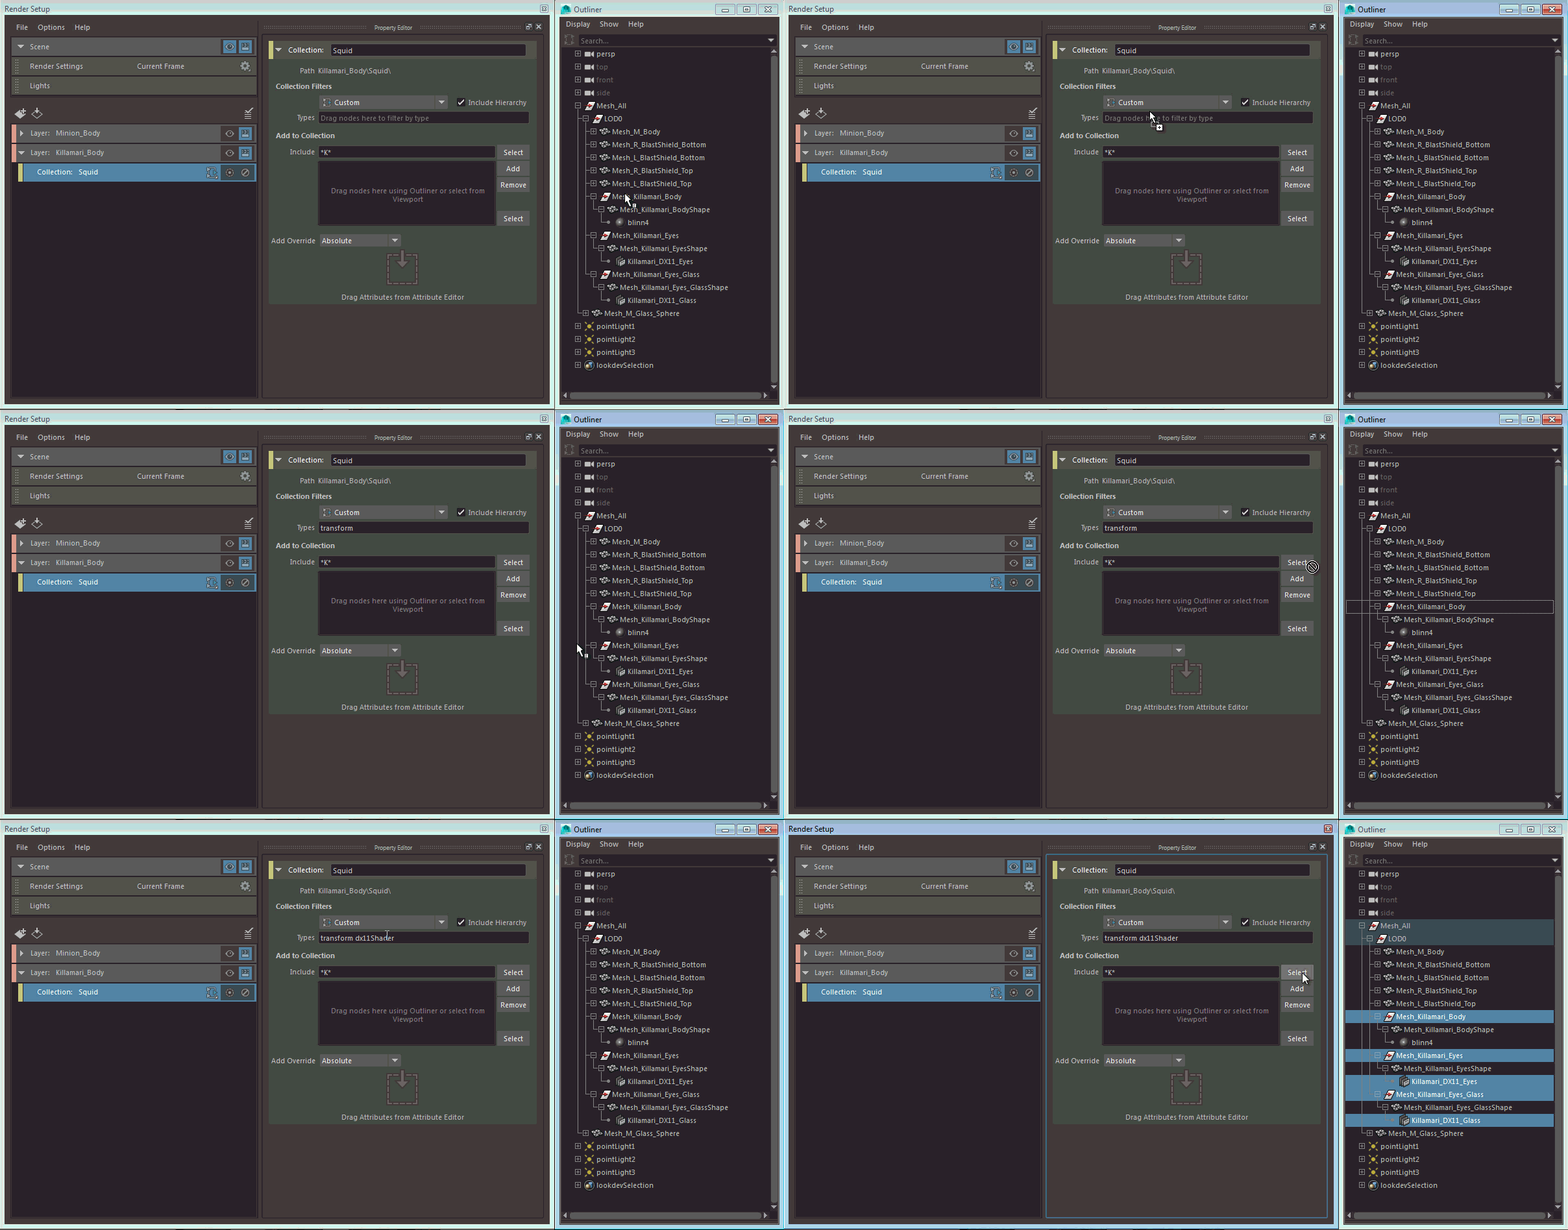
If the Collection Filters provided are too generic for your purpose, you can streamline your collection even further by using the Custom filter to include only specific node types of your choice. Select Custom from the drop-down menu and add node types to the Property Editor Collection Filters Types attribute. To add node types, middle-mouse drag and drop a node from the Outliner to the Property Editor, and its node type is automatically recognized. Plug-in node types are recognized.
In the following example, when you middle-mouse drag Mesh_Killamari_Body to the Property Editor Types attribute, the transform type is recognized. Likewise, when you middle-mouse drag Killamari_DX11Eyes to the Property Editor, the dx11Shader type is recognized. Now when you click the Select button, all nodes that belong to type transform and dx11Shader and that match the *K* expression are selected. These are the contents of the Killamari collection.

Use a classification string to add a node type
Enter a classification string such as texture/2d in the Types field to add file nodes, or 2d texture nodes such as Checker. Other options include the classification string utility to add bump2d or place2dtexture nodes. This field is case sensitive; in other words, Texture/2d will not return any results.
The Nodes documentation for each node provides information on its classification string. See the Nodes section of the Technical Documentation in the Maya Help for more information.
Subtract collection members by node type
You can exclude node types with a -. For example, the following includes all transforms and surface shaders except for shaders of type blinn:
transform shader/surface -blinnYou can also exclude by classification string. This example includes all utility nodes except for those classified by utility/general/placement/2d (such as place2dTexture nodes):
utility -utility/general/placement/2d