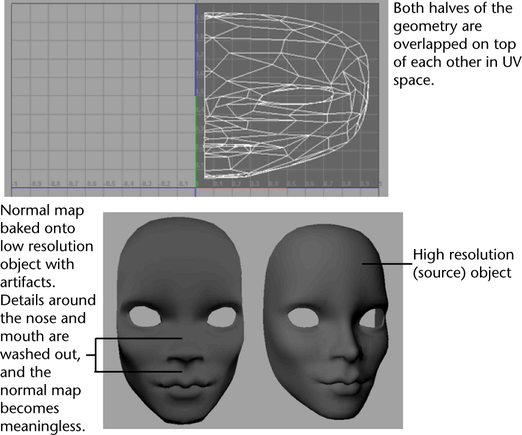
Mirroring a normal map across a character allows you to optimize texture usage where all of the normal map detail is symmetric around the UV axis. For example, the two arms of your character may share the same normal map.
If both halves of the geometry are rendered into the normal map on top of each other, the mirroring of the normals introduces artifacts into the combined result. Therefore, you need to specify which half of the geometry defines the normal map (and which half just uses it).

Follow these steps to create your normal map.
Creating and displaying a mirrored normal map on a character or object: Option 1
- Set the UV Winding Order of your object to Detect to ensure that both sides of your mirrored normal map are displayed correctly. For more information about UV Winding Order, see UV Winding Order.
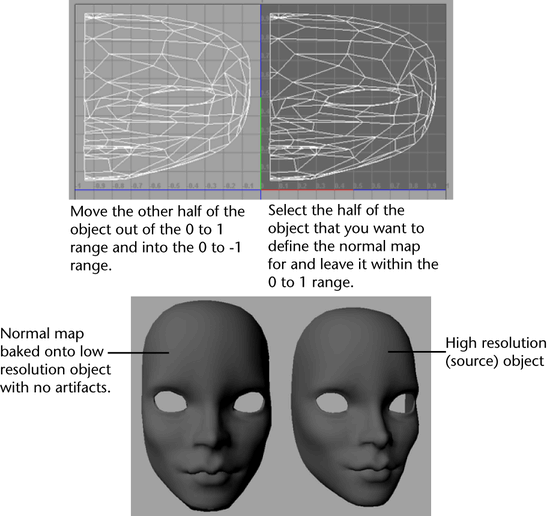
- Select the half of the object (for example, face) that you want to define the normal map for. Leave this half within the 0 to 1 UV range.
- Move the other half of the object out of the 0 to 1 UV range so that it does not affect the generated normal map.
- Bake the normal map using Lighting/Shading > Transfer Maps.

Creating and displaying a mirrored normal map on a character or object: Option 2
- Set the UV Winding Order of your object to Detect to ensure that both sides of your mirrored normal map are displayed correctly. For more information about UV Winding Order, see UV Winding Order.
- Select Lighting/Shading > Transfer Maps and enable the Ignore Mirrored Faces option under the Maya Common Output section. See Ignore Mirrored Faces for more information. Tip:
- For best results, ensure that each side of your model has consistent UV winding. Otherwise, artifacts may appear.
- To avoid seams when mirroring normal maps on a character, ensure that the source geometry is symmetric. That is, one side of the character matches the other. This becomes particularly important when working with surface meshes that are derived from scan data.