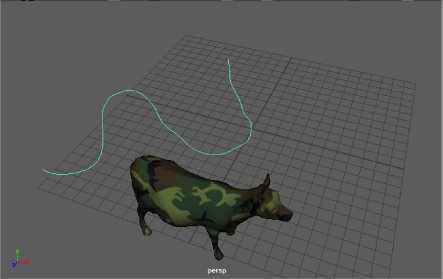
Before starting this procedure, identify a curve to use for the path. It can be one that you import or create with one of the curve tools. See Draw NURBS curves. You can select a curve tool to create a smooth or jagged curve, depending on the type of animated movement required.
If you draw a curve and want to join the two ends, creating a closed loop, select the curve, then switch to the Modeling menu and select .
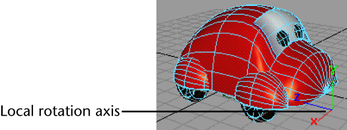
Before attaching the object to the path, it is recommended that you ensure correct orientation of the when it travels down the motion path. You should be able to identify one of the X, Y, or Z axes on the object as the forward direction, and another as the upward direction. If this is not the case, or if you want to verify the object orientation, use the following procedure:
To adjust object axis orientation
- Select the object you want to move along the path curve.
- Click the
Select by component type button in the Maya status line (toolbar) to switch to component selection mode.

- Right-click the
Select miscellaneous components option and turn on the
Local Rotation Axes option in the menu that appears.

This lets you select the Local rotation axes for the object.

- Select the Rotate Tool, and select the local rotation axis of the object.
- Rotate the axes so that one axis points in the direction of the front of your object, and another axis points in the up direction of the object.
If you are going to attach the object to the curve now, do the next step to switch to object selection mode.
- Click
Select by object type in the Maya status line (tool bar).

To create a motion path by attaching an object to a curve
- Select the object you want to animate on the path, and then Shift-select the curve.
 Note: You can Shift-select multiple objects and attach them to the same path curve. Remember to select the path curve last.
 - On the Animation menu set, select .
- In the
Attach to Motion Path Options window, do the following:
- Select the Time range for the animation as Time Slider (recommended), or select Start/End and specify times within the Time Slider range.
- Turn
Follow on.
When Follow is on, the Front Axis and Up Axis options determine which of the three local rotation axes sets the front and up of the object respectively.
- Select the axis you chose to represent the front of your object as the Front Axis, and select the axis you chose to represent the up direction of your object as your Up axis.
- Optionally select Bank if you want the object to bank inwards on each curve in the motion path, as does a bicycle or motorcycle.
- In the
Attach to Motion Path Options window, click
Attach.
The object moves to a point on the curve as specified in the Time range setting.

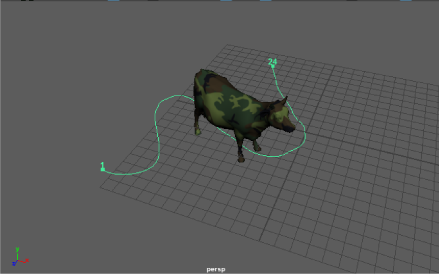
Two motion path position markers with numbers appear at each end of the curve. These markers indicate the start and end frames of the animation path.
- To view the animation of the object, click the Play button in the Playback controls.
Tip: If your object does not follow the motion path, it may be due to existing transforms on the parent of the object, such as the object shown in the illustrations. To force the object to follow the path, Open the Outliner, and select the Parent object, or attach the parent of the object of the motion path instead of the object, and then move the parent’s pivot until the object (its child) is on the path.
