Ambiguous cases

Default behavior:
- In the Render View: the render target takes the render pass result for the active layer.
- Batch rendering: the render target takes the render pass result for the master layer (regardless of active layer).
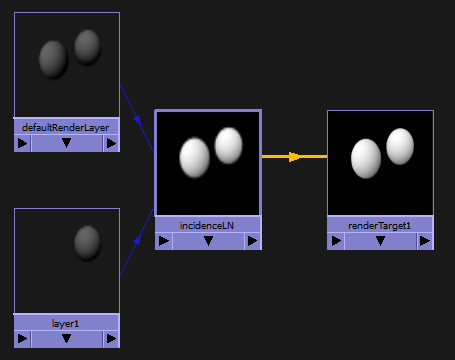
- If your render pass is shared between two or more render layers, none of which is the master layer, and your render target's renderLayer input is not connected to any layer, your render target renders black. An example of such a scenario is illustrated below.

You can avoid this ambiguous case as follows:
- If your render layers do not share render passes.
- By connecting the message output of the render layer to the renderLayer input of the render target.
- By connecting a rendered image source node to the render target to force the render pass to be taken from the connected layer.
Customizing your compositing graph so that your render target forces the render pass to be taken from a specific layer
Method 1
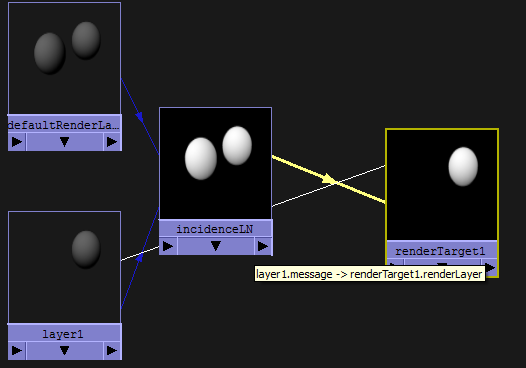
- Middle-drag the render layer node to render target node. The
Connection Editor appears. Connect
layer1.message to
renderTarget1.renderLayer.
Tip: If you do not see the message and renderLayer attributes in the Connection Editor, select Left Display > Show Hidden and Right Display > Show Hidden to expose them.

Method 2
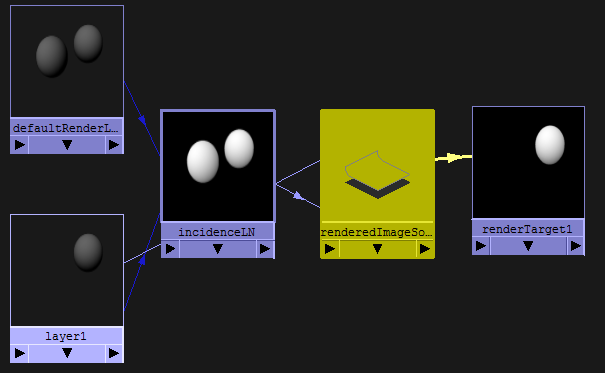
- Create a
renderedImageSource node by using this MEL script:
shadingNode -asRendering renderedImageSource;
- Middle-drag the render layer node to the renderedImageSource node. The Connection Editor appears. Connect layer1.message to renderedImageSource1.renderLayer.
- Middle-drag the render pass node to the renderedImageSource node. The Connection Editor appears. Connect <pass>.message to renderedImageSource1.imageSource.
- Ctrl + Middle-drag to connect the renderedImageSource node and renderTarget node.

Overriding the render settings using a render layer
If a render target is not connected to a specific render layer, it will, by default, render in the master layer using the render settings from the master layer. You can override these render settings by creating a render layer and connecting it to the render target. This way, the render target renders in the context of the render layer.
You can do this in the Hypershade by connecting the message output of the render layer to the renderLayer input of the render target.
Combining 3D output from different cameras
You can create a camera override by connecting a camera to the camera input of the render target. This signifies to the render target that all upstream connections in the compositing graph will use this 3D camera. This way, you can combine, in your pre-composite, the 3D output from different cameras.