For more information on using the features in this menu see Display a texture behind the UVs.
- Display Image
-
Shows or hides the texture image. This item can also be found in the UV Editor toolbar for quick access. See UV Editor overview.
- Dim Image
-
Reduces the brightness of the currently displayed background image. Dimming the background image lets you more easily view and select components in the UV Editor’s view. Selecting the item toggles it on or off depending on its current state.
- Display Unfiltered
-
Turns off pixel blurring to show exact pixel boundaries. This item can also be found in the UV Editor toolbar for quick access. See UV Editor overview.
- Shade UVs
-
Shades active UV shells in a semitransparent way.
Using Shade UVs you can:
- Display areas where UVs and UV shells overlap within the 2D view of the UV Editor. Regions where UVs and UV shells overlap are shaded with more opacity when compared to the default shading. See also Display overlapping UVs.
- Displays the UV winding order for UV shells as they appear within the 2D view of the UV Editor. UV shells that are front facing (that is have a clockwise winding order), are shaded blue. UV shells that are back facing (that is have a counterclockwise winding order), are shaded red. See also Display UV winding order.
- Front facing color
-
Specifies the shaded color for UV shells with a clockwise winding order. The default color is blue.
- Front facing alpha
-
Specifies the transparency value for the front-facing shaded UV shells. A value of 0 is fully transparent while a value of 1 is fully opaque. The default is 0.25.
- Back facing color
-
Specifies the shaded color for UV shells with a counterclockwise winding order. The default color is red.
- Back facing alpha
-
Specifies the transparency value for the back-facing shaded UV shells. A value of 0 is fully transparent while a value of 1 is fully opaque. The default is 0.25.
- UV Distortion
- Per UV Shell
-
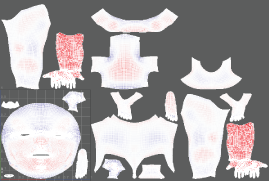
(Default) Compares the average texture area of the faces of each shell independently of the other shells in the object, generating distortion feedback for each shell. The following image shows the UV distortion Per UV Shell.

- Per Object
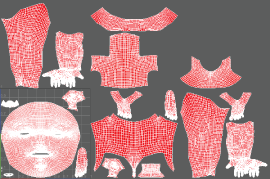
- Compares the average face size of the mesh to the UV texture space coverage, generating distortion feedback for the entire object. The following image shows the UV distortion
Per Object.

- Display RGB Channels, Display Alpha Channel
-
Switch between displaying the texture image and its alpha (transparency) channel. These items can also be found in the UV Editor toolbar for quick access. See UV Editor overview for a table of tool buttons and their uses.
- Pixel Snap
-
Determines whether or not to automatically snap UVs to pixels. Snapping is to pixel corners or centers. This item can also be found in the UV Editor toolbar for quick access. See UV Editor overview for a table of tool buttons and their uses..
Placement
Select where Pixels snap to.
- Snap corner
-
When on, the selected UVs snap to the corners of other UVs.
- Snap center
-
When on, the selected UVs snap to the centers of other UVs.
- Image Range
-
Use these settings to change how much of the texture appears in the editor.
- Minimum U/V and Maximum U/V
-
You can explicitly set the size of the image by setting these options, or you can select one of the presets.
- Presets
- Select one of the preset image ranges and click Apply.
- None
-
The texture space is defined by the Minimum and Maximum U and V values.
- Grid size
-
The texture fills the extent of the grid (defined in the Grid Options window).
- Unit size
-
The texture fills the 0 to 1 (or unit) texture space.
- Use Image Ratio
-
Switches between showing square texture space and texture space with the same ratio of width to height as the image. This item can also be found in the UV Editor toolbar for quick access. See UV Editor overview.
- UV Editor Baking
-
Bakes the texture and stores it in memory. See also UV Editor overview.
- Baked texture resolution
-
The resolution used when baking the texture.
- Create PSD Network
-
Creates an Adobe® Photoshop® texture you can use as a texture map. When this feature is used, a PSD layer of the UVs can be explicitly created to aid painting of the texture. For more information, see Use PSD Networks as textures in Maya and Create a PSD file with layer sets from within Maya.
- Update PSD Networks
-
When you modify a PSD file in Adobe® Photoshop® that is connected to a Maya PSD node, you can update (refresh) the image in Maya to show the modifications immediately. All PSD networks in the scene are updated. See Update PSD Networks.