Method 1
To connect attributes using connection lines
- In the Node Editor, click on the
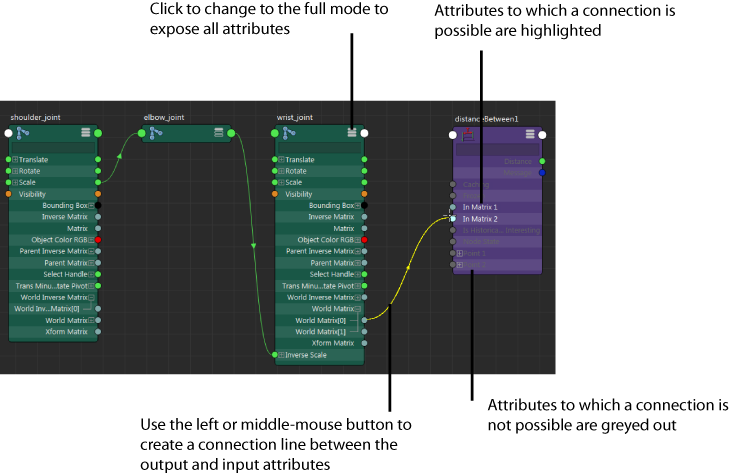
 icon on the top right hand corner of each node to expand it to its full mode.
 - Middle-mouse or left-mouse drag to create connection lines between your output and input attributes.
You can easily find a specific attribute using the search (filter) field. The filter field is hidden by default in custom mode (mode 4). Click
 to display it.
 If you mouse over a compound attribute, the Node Editor automatically expands to expose its children to which you can make a connection.
As you mouse over the available inputs, all inputs that can receive the connection are highlighted. This indicates that it is possible to make a connection with this input.
All inputs that cannot receive a connection are greyed out. This indicates that a connection is not possible.
In addition, it also snaps to the ports to which you can make a connection. This allows you to easily identify the attributes that you can connect to.

Method 2
To connect attributes without expanding the nodes
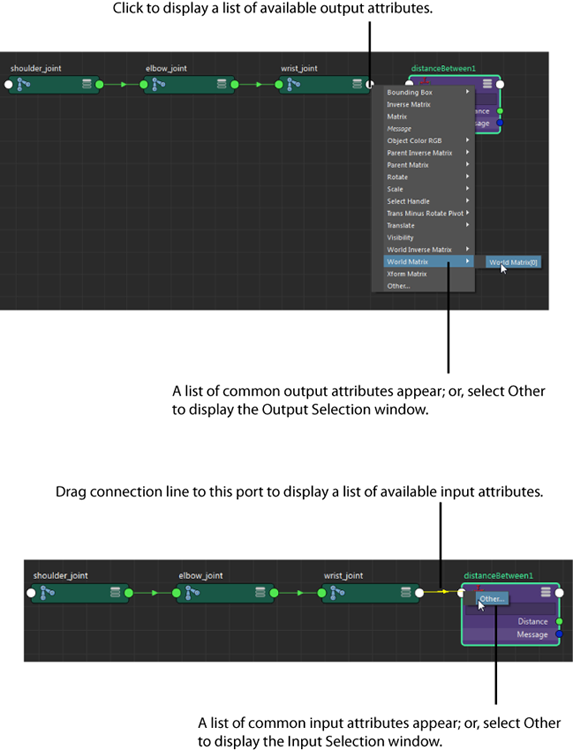
- Click the output master port of the node to display the menu of available output attributes. A list of common output attributes is displayed; or, select Other to display the Connection Editor, Output Selection window. From this window, you can select the output of your choice.
- Drag the connection line to the input master port of the node receiving the input connection. A list of common input attributes is displayed; or, select Other to display the Input Selection window. From this window, you can select the input of your choice. Note: The Input Selection window only lets you select an attribute that is compatible with the previously selected output attribute.
