To smooth polygon meshes at render time, use the following workflow. This is a very efficient method of smoothing polygon meshes as it reduces the amount of data calculations during interactive manipulation.
Major advantages for this feature include the following:
- During translation, mental ray for Maya only translates the mesh hull, and the actual smoothing occurs at render time.
- This workflow delays smoothing until required because mental ray only tessellates and smoothes the mesh when a ray, for example, a camera ray, reflection ray, or shadow ray, hits the object.
The drawback of this feature, however, is that all Maya creasing will render differently with this technique, since the creasing appears different in the scene view as compared to its mental ray render.
- Open the Approximation Editor (Windows > Rendering Editors > mental ray > Approximation Editor).
- Click the Create button beside the Subdivision approx. (Poly, Subdiv) attribute to create and assign a subdivision approximation to your polygon.
- Render the scene in mental ray. Note:
You can also smooth polygon meshes by selecting Mesh > Smooth. This method creates denser geometry in the scene view and can increase the number of data calculations for interactive manipulation.
Render a smooth polygon mesh using Smooth Mesh Preview
You can also set up a smooth preview in the 3D scene view and then render it.
- In the Render Settings window, under Render Using, select mental ray.
- Select the polyShape node for your mesh.
- In the Attribute Editor, expand the Smooth Mesh section and select Smooth Mesh Preview.
- Select the level of smoothing for your mesh by tweaking the division level. A higher value produces more smoothing. If you want to use the same division level for the 3D workspace preview as for your render, select the Use Preview Level for Rendering option. Otherwise, uncheck the Use Preview Level for Rendering option and use the Render Division Levels slider or text field to enter the desired division level for your render.
Note:
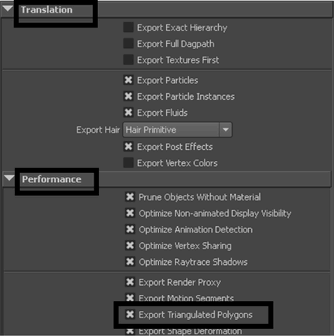
To obtain smooth render effects, you must ensure that the Export Triangulated Polygons option in the Options tab, under the Translation section and Performance sub-section, is enabled. 

