Learn how to add columns, and how to copy them to additional places.
- Return to the Plan view.
- In the Menu Bar, click Geometry >
 (Columns…) or in the Structure Model toolbar, click (Columns).
 - In the Column dialog box, set the Section type to RC column and the Section to C 45x45. Verify that the Height is set to 4.00.
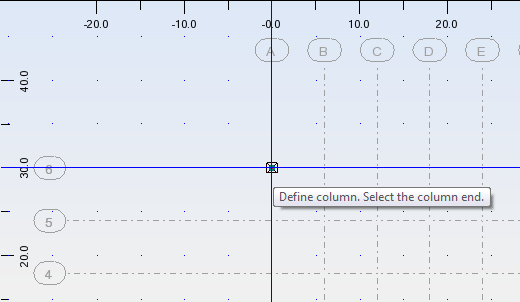
- Click the intersection of Grid A6 to add the column as shown below.
- You can continue clicking on the intersections at which you want to add columns or copy the first column to additional places.
- To copy the column, select the first column and in the Menu Bar, click Edit > Edit >
 (Move/ Copy…).
Note: You can also access the edit commands using a toolbar. On the Standard toolbar, click
(Move/ Copy…).
Note: You can also access the edit commands using a toolbar. On the Standard toolbar, click (Edit) to open the Edit toolbar. In the Edit toolbar, click (Move/Copy).
- In the Translation dialog box, set the Edit mode to Copy and type the Number of repetitions that you want to make, in this case 8.
- Place the cursor in the Translation vector box, click the intersection A6 to indicate the origin of the vector, and then click the intersection B6 to indicate the direction of the vector.
Note: Alternatively, enter the following coordinates in the Translation vector box: 6.00, 0.00, 0.00.
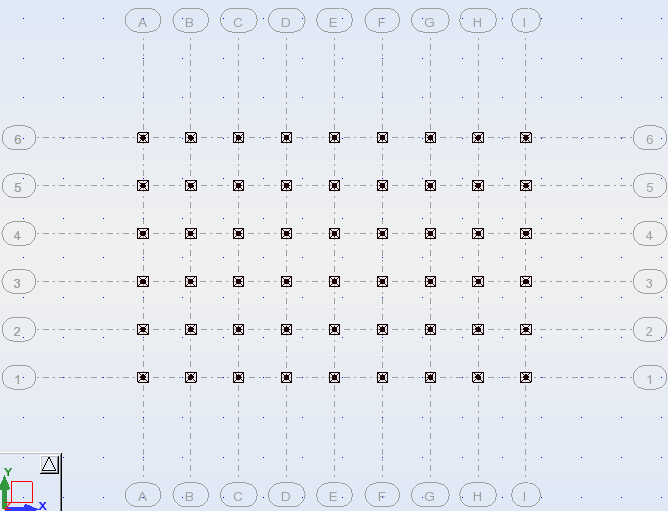
- To copy the group of columns to the rest of the locations, right-click and select Select and then select all of the copies that you just created.
- Set the Number of repetitions to 5 and pick two points going down.
- The columns are placed as shown below.
- Click the View tab to display the columns in a 3D view.
- In the Display Shortcuts bar, click
 (Section Shapes) to display the full size column as shown below.
- Save the project.