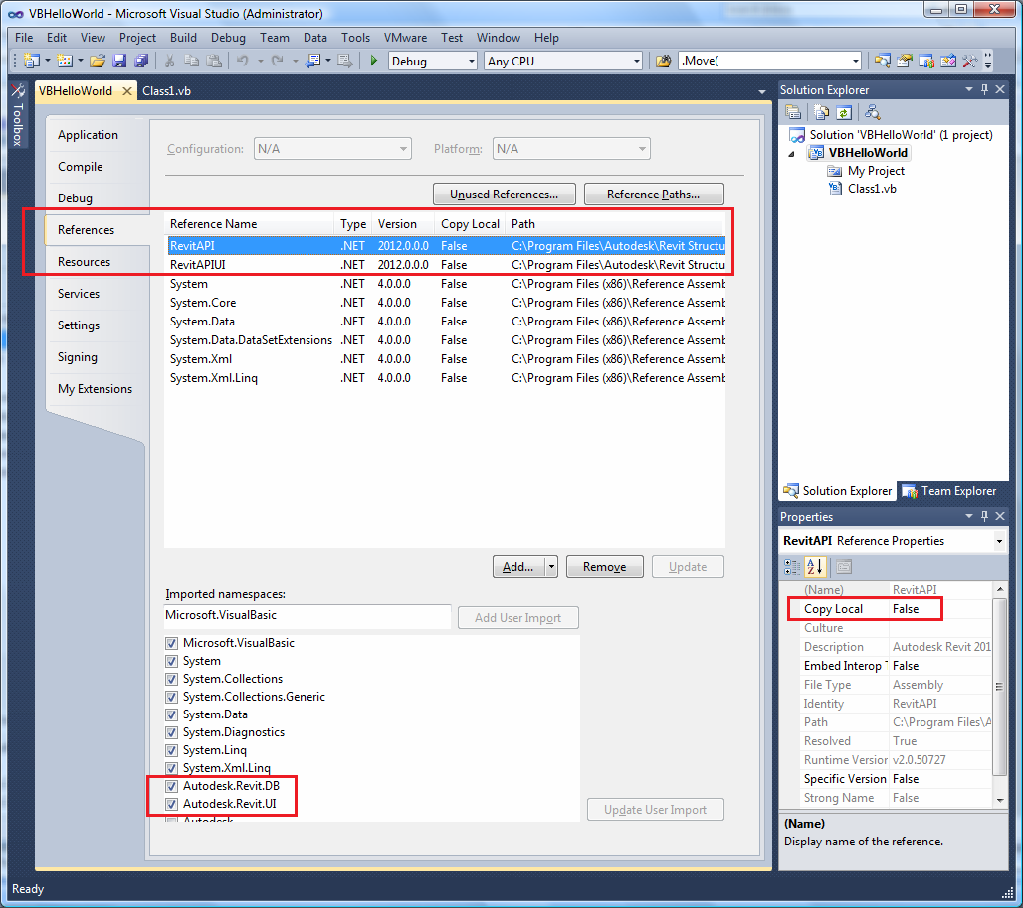
Add Reference and Namespace
VB.NET uses a process similar to C#. After you create the Hello World project, complete the following steps:
- Right-click the project name in the Solution Explorer to display a context menu.
- From the context menu, select Properties to open the Properties dialog box.
- Click the Add button to open the Add Reference dialog box.
- In the Add Reference dialog box, click the Browse tab. Locate the folder where Revit is installed and click the RevitAPI.dll. For example the installed folder location might be C:\Program Files\Autodesk\Revit Architecture 2016\RevitAPI.dll.
- Click OK to add the reference and close the dialog box.
- Repeat steps above to add a reference to RevitAPIUI.dll, which is in the same folder as Revit API.dll.

Figure 173: Add references and import Namespaces
- After adding the reference, you must import the namespaces used in the project. For this example, import the Autodesk.Revit.DB and Autodesk.Revit.UI namespaces.
- To complete the process, click RevitAPI in the Reference frame to highlight it. Set Copy Local to False in the property frame. Repeat for the RevitAPIUI.dll.
In the Properties dialog box, click the References tab. A list of references and namespaces appears.