You can export model data using MS Access or ODBC.
| Drivers | |||||
| Access 2003 x86 | Access 2007 x86 | Access 2007 x64 | |||
| Installs | Windows x86 | Revit x86 | Yes | No | No |
| MS Access 2007 x86 | Revit x86 | Yes | Yes | No | |
| MS Access 2010 x86 | Revit x86 | Yes | Yes | No | |
| Windows x64 | Revit x86 | Yes | No | No | |
| MS Access 2007 x64 | Revit x86 | Yes | Yes | No | |
| MS Access 2010 x64 | Revit x86 | Yes | Yes | No | |
| Windows x64 | Revit x64 | No | No | No | |
| MS Access 2007 x64 | Revit x64 | No | No | No | |
| MS Access 2010 x64 | Revit x64 | No | No | Yes | |
Exporting data using MS Access
- On the Link Revit Model with Database dialog, select MS Access.
- Select a recently used connection, or click Select a new connection to create a new connection.
If you selected Select a new connection, the Select database dialog displays. Browse to the desired location.
Note: When you export a new drawing to an existing database, the Continue ? dialog displays. - Click Export.
During subsequent data export to the same database, only the data from the project is affected so that new fields or tables added to the database remain next to the newly exported data.
Exporting data using ODBC
- On the Link Revit Model with Database dialog, select ODBC.
- Select a recently used connection, or click Select a new connection to create a new connection.
If you selected Select a new connection, the Select database dialog displays. Browse to the desired location.
Note: When you export a new drawing to an existing database, the Continue ? dialog displays.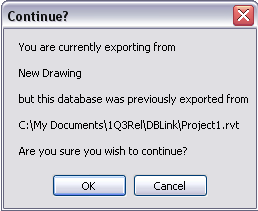
- Click Export.
Creating an ignoretables.xml file to ignore the export of shared parameters and some tables.
- Create the ignoretables.xml file in the following folder: %APPDATA%\Autodesk\Revit\Addins\<release number>.
- Modify the ignoretables.xml. For example:
<?xml version="1.0" encoding="utf-8"?>
<Config>
<Tables file="2_F_local.rvt">
<Table name="MechanicalEquipment"/>
<Table name="MechanicalEquipmentOnWall"/>
</Tables>
<Tables file="LUMC_02.rvt">
<SharedParameters/>
<Table name="RoomAssociations"/>
<Table name="RoomFromToAssociations"/>
<Table name="Walls"/>
<Table name="DoorWall"/>
<Table name="CurtainWallPanelOnWall"/>
<Table name="WindowWall"/>
<Table name="MechanicalEquipmentOnWall"/>
<Table name="PlumbingFixtureOnWall"/>
<Table name="LightingFixtureOnWall"/>
<Table name="OpeningOnWall"/>
<Table name="GenericModelOnWall"/>
<Table name="CaseworkOnWall"/>
</Tables>
</Config>
- "LUMC_02_2011.rvt" means the tables will be ignored only in file "LUMC_02_2011.rvt".
- <SharedParameters/> means the shared/project parameters will be ignored when exporting or importing. Deleting this node will export the shared/project parameters again.
- <Table name=" RoomAssociations "/> means table " RoomAssociations " will be ignored when importing or exporting.
- If one table is removed, be sure to remove the tables that depend on it. Otherwise, warning dialogs will display.