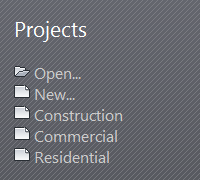
When creating a project from the Recent Files window, you can choose to use a template or default settings as a starting point for the project.
The Recent Files window displays when you start the software. If you are already working in a Revit session, return to it by clicking View tab Windows panel
 User Interface drop-down
 Recent Files.
The Recent Files window can list up to 5 templates under Projects. A project template provides a starting point for a new project, defining settings, styles, and basic information. Templates can simplify project setup, standardize project documentation, and ensure adherence to office standards.
As installed, the software lists one or more default templates. However, you or your BIM manager may have changed or added more templates to the list.

To create a project using a listed template
- Click the desired template.
The software creates a new project, using the selected template as a starting point.
To create a project using another template
- Click New.
- In the New Project dialog, under Template file, do one of the following:
- Select a template from the list.
- Click Browse, navigate to the desired template (an RTE file), and click Open.
- %ALLUSERSPROFILE%\Autodesk\<product name and release>
Revit provides several project templates, which reside in the Templates folder in the following location:
- For Create new, click Project.
- Click OK.
The software creates a new project, using the selected template as a starting point.
To create a project using default settings (no template)
- Click New.
- In the New Project dialog, under Template file, select None.
- For Create new, click Project.
- Click OK.
- In the Undefined System of Measurement dialog, select Imperial or Metric.