In this exercise, you create a roof using the footprint of the exterior walls. You specify an overhang value as you create the roof so that the roof has an overhang.
|
Objectives
- Add a slope-defining roof line.
- Add roof lines with an overhang defined.
- Use Trim/Extend to complete the sketch.
- Attach exterior walls to the roof.
- Modify the roof slope.
Draw the Roof
- Draw a roof line:
- Open project GSG_05_add_roof.rvt.
- Open the 03 - Roof floor plan.
- Click Architecture tab
 Roof drop-down
 (Roof by Footprint).
 - On the Draw panel, click
 (Line).
 - On the Options Bar, verify that Defines slope is selected.
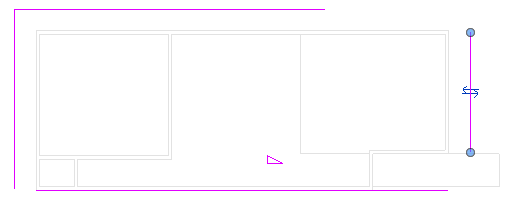
- To draw the first roof segment, begin at the bottom left and trace the exterior edge of the south wall by selecting the left wall endpoint and the intersection of the south and far-east walls.
- Create roof lines with an overhang:
- On the Draw panel, click
 (Pick Walls).
 - On the Options Bar, for Overhang, enter 3', and clear Defines slope.
- In the drawing area, highlight the west wall; when a dashed line is displayed on the exterior of the wall, click to place the roof line. Repeat for the north and east walls.
- On the Draw panel, click
- Complete the roof sketch:
- On the Modify panel, click
 (Trim/Extend to Corner).
 - Select the east roof line, and then select the south roof line. Repeat for the west and south roof lines, and the north and east roof lines.
- On the Mode panel, click
 (Finish Edit Mode).
 The resulting roof uses the default value and has a very high slope, which you correct later in the exercise.
- On the Modify panel, click
Attach Walls to the Roof
- Position the cursor over an exterior wall, press Tab, and click to select the chain of walls (selects all of the exterior walls).
- Press Ctrl, and click to select each interior wall that displays in the underlay of the Entry Level.
- Click Modify | Walls tabModify Wall panel
 (Attach Top/Base).
 - Click to select the roof.
- On the Quick Access Toolbar, click
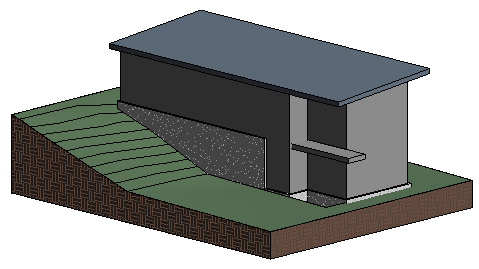
 (Default 3D View).
 Notice that the walls extend to the roof.
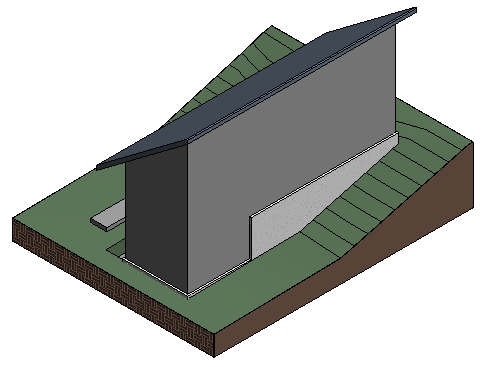
Modify the Roof Slope
- Select the roof.
- On the Properties palette, under Dimensions, for Slope, enter 1"/12", and click Apply.
- Click in the drawing area to deselect the roof.