Use the following workflows, as appropriate, to modfiy the appearance and behavior of SimStudio.
Preferences
In the Preferences dialog, you can select from many options and settings to customize the appearance and behavior of SimStudio. To access the Preferences dialog, click the application menu, as shown, then select Preferences. 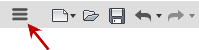
For example, you can choose to see a report of geometry errors during the import process, as well as have SimStudio attempt to fix errors automatically. You can also set the units and display formats, material and appearance options, and graphics options.
Customize your Toolbar
You can expose more commands in your toolbar by stretching the width of the SimStudio window. You can also add or remove commands that display on your toolbar, as well as modify the location of commands in the toolbar.
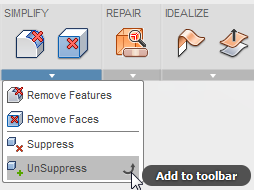
- To add a command, click the panel drop-down arrow, pause the cursor over the appropriate command and select Add to toolbar:
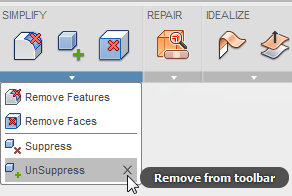
- To remove a command, select Remove from toolbar:
- You can also click and drag commands on the toolbar to change the horizontal order by which they display in the respective panels.
Navigate your Model

Choose from the following and note that you can use mouse shortcuts for some of the commands:
- Orbit: Rotate your current view using the Free or Constrained mode. (Shift + middle mouse button)
- Look At: View faces of your model from a selected plane.
- Pan: Move the view parallel to the screen. (Middle mouse button)
- Zoom: Increase or decrease magnification of your current view. (Mouse scroll wheel)
- Fit: Zoom your current view such that the model geometry fills the graphic window.
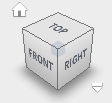
Click the corners or faces of the View Cube to change model orientation. To change view and View Cube settings, right-click on the View Cube or select the down-arrow to access the appropriate settings.
Select Objects
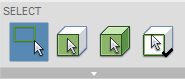
- You can choose to select Edges, Faces, or Bodies. A check mark appears on the active selection priority. Hold the Ctrl or Shift key down while clicking objects to add to the selection set. You can also change selection priority while in the process of creating your set - just release the Ctrl or Shift key, click the new priority, and then continue to select objects after pressing the Ctrl or Shift keys.
- Click the drop-down arrow to choose from different selection methods, selection tools, and selection filters.
Control Object Visibility
You can select objects and make them hidden or visible in the object browser. Expand browser nodes to expose objects and do one or more of the following:
- To select an object, click the appropriate node. The object highlights in the graphics window. To select multiple objects, hold down the Ctrl or Shift keys and select your objects.
- To change visibility of an object, click the lightbulb in the browser node.
