Create a Project, Create a User, and Click Start!
After you double-click the Smoke icon to get started, the Smoke start-up screen appears.
Look at those Project and User fields. If they say "Click the New button", it means you must you must create a project and/or user before you can start.
To create a project and user, and then start Smoke:
- Click the New Projet button. A dialog box with project settings appears. There are a lot of options in this dialog box. Just set up a basic HD project to get started. From the Resolution box, select 1920 X 1080 HD and click Create.
You land back on the Smoke start-up screen.
- Click the New User button. A dialog box with user settings appear. Just type your name in the Name field and click Create. The rest of the default settings are fine for getting started.
You land back on the Smoke start-up screen again.
- Click Start to open up Smoke.
This time you land on the Smoke workspace.
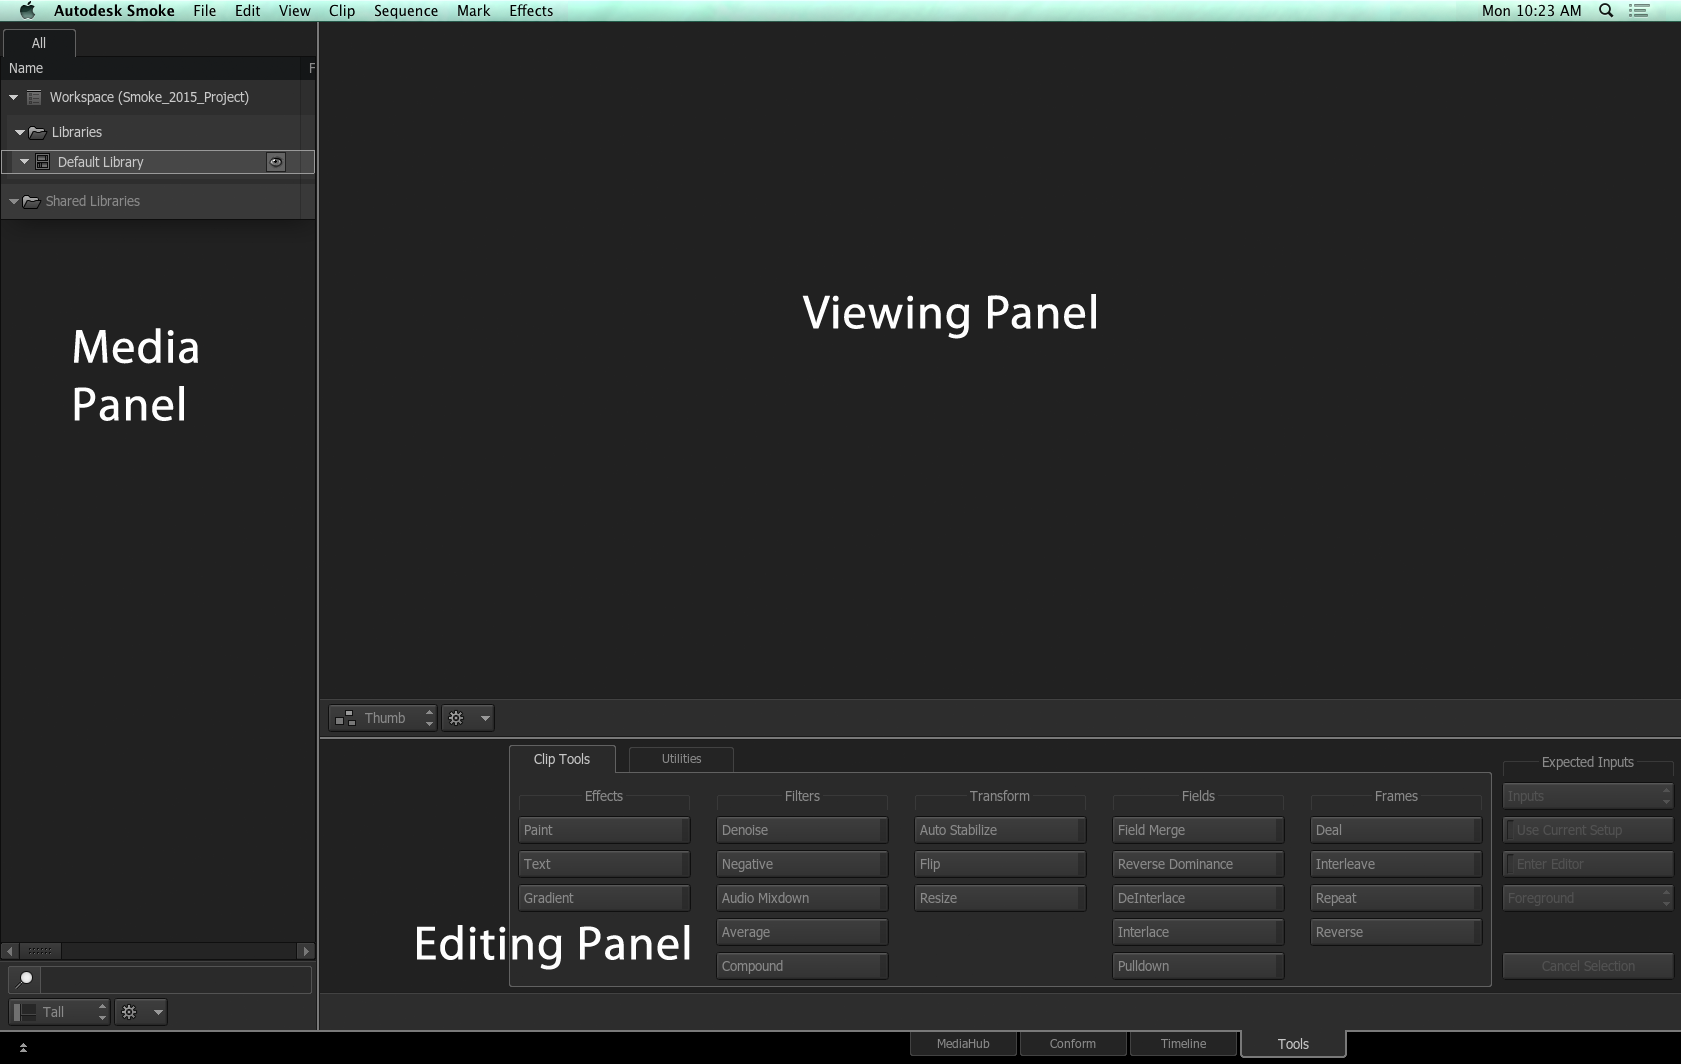
Get Familiar with the Smoke Workspace
- The Media panel
- The Viewing panel
- The Editing panel
Each panel has its own menu bar with commands specific to the tasks you can perform in that space.
Drag and Drop Media to the Media Library
Now that you understand how the workspace is laid out, simply navigate to the location of your media, using the Finder and drag and drop it to the Media Library.
If you have any problems, check out the Supported Media File Formats to make sure the media you want to import is supported.
Get Creative
Explore the editing and effects capabilities of the software.
We have designed learning content to help you on your way.
- To get started editing, learn how to create your first edit in Smoke.
- To get started with effects, learn how to make new sources using the tools in the Tools tab.
- Then build on your effects knowledge and learn how to build procedural composites in ConnectFX.
- Consult the Effects and Tools Reference for a comprehensive list of all the effects you can build in Smoke.