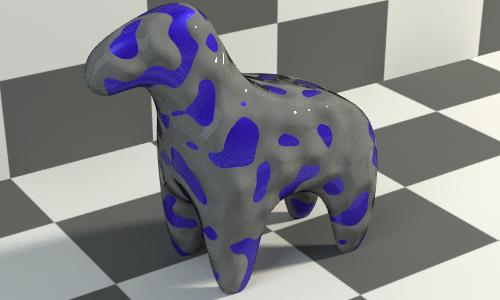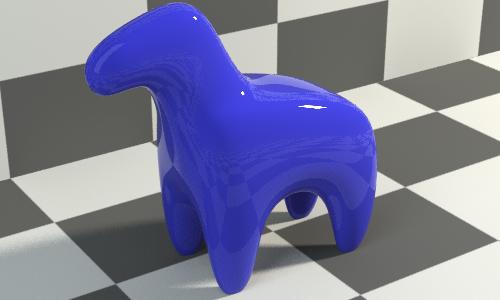
Here is an example of how layering can be done when working directly in the .mi format, and using the layering shaders. The scene is set up with a small toy horse in a checkered environment, and lit by using two mia_portal_lights as "light cards". It is recommended to use physically plausible lighting with the layering shaders, and the portal lights are a good tool for that.
Also make sure to work in a proper linear color space. Images here are corrected with a gamma of 2.2 for display on a standard computer monitor, and tonemapped via mia_exposure_photographic.
Here is our test scene, starting out using a blue tinted mia_material
shader "mia" "mia_material" (
    "diffuse" 0.1 0.1 1.0,
    "reflectivity" 1.0,
    "refr_ior" 1.4,
    "brdf_fresnel" on,
    "mode" 2 # Use all lights
)

material  "HorseMaterial"
    = "mia"
    shadow = "mia"
    photon = "mia"
end material
Renders as follows:

We now want to replace this mia_material with the layering shaders, first building to a similar look, and then going beyond it.
We start by creating the the minimal set of nodes to provide simple diffuse reflection, those being:mila_material node, a mila_layer, and mila_diffuse_reflection :
# A default diffuse shader

shader "diffuse1" "mila_diffuse_reflection" ()

# Layers a single layer referring to our "diffuse1" shader above:

shader "my_layers1" "mila_layer" (
    "layers" [
        {
            "shader" "diffuse1",  # Our diffuse shader
            "weight" 1,           # Layer weight is 100% ...
            "weight_tint" 1 1 1,  # ...and weight tint is "white"
            "on" on               # ...and "on"
        }
    ]
)

# The root node. Right now only accepts the layers above, and does nothing else

shader "root_node" "mila_material" (
    "shader" "my_layers1"
)

# The material

material  "HorseMaterial"
    = "root_node"
    shadow = "root_node"
    photon = "root_node"
end material
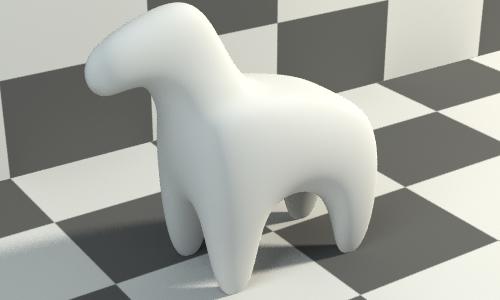
Renders as follows - a diffuse white horse:
shader "diffuse1" "mila_diffuse_reflection" (
    "tint" 0.1 0.1 1.0,      # Added a color to our diffuse node
)
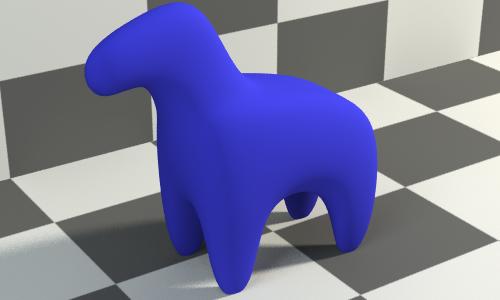
OK, so now we need the reflectivity. If we copy the layer, but simply refer to a reflection layer instead, what will happen?
shader "reflection1" "mila_specular_reflection" ()

shader "diffuse1" "mila_diffuse_reflection" (
    "tint" 0.1 0.1 1.0,      # Added a color to our diffuse node
)

shader "my_layers1" "mila_layer" (
    "layers" [
        {
            "shader" "reflection1", # Our new reflection shader
            "weight" 1,             # Layer weight is 100% ...
            "weight_tint" 1 1 1,    # ...and weight tint is "white"
            "on" on                 # ...and "on"
        },
        {
            "shader" "diffuse1",    # Our old diffuse shader
            "weight" 1,             # (same as before)
            "weight_tint" 1 1 1,
            "on" on
        }
    ]
)
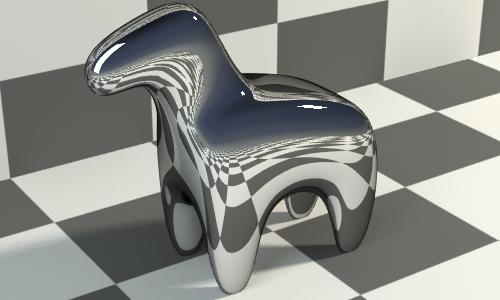
Hey, it became all reflective! Why?
This is because our layer node has it's use_directional_weight set to the default of off, using a simple weighted layer; the mila_layer shader works through the layers top-to-bottom, and assign weights, and letting the remaining weights (100% minus the covering layers weight) propagate to the layers below. Since our reflection layer is at 100%, there is nothing left for the diffuse layer below (100% - 100% = 0%).
If we change the reflection layer weight to 50% instead, our top layer will get 50%, and the next layer also 50% (ie, 100% of the leftover 50%):
    "layers" [
        {
            "shader" "reflection1",
            "weight" 0.5,           # Changed weight to 0.5
            "weight_tint" 1 1 1,
            "on" on
        },
        ...
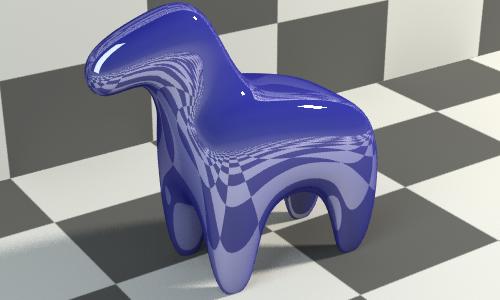
Now we have a 50/50 blend of the two layers, because the top layer was set to 50%, and there was 50% remaining, which got multiplied by the weights of the lower layers (in this case only the 100% diffuse layer weight).
Another way to achieve a 50/50 mix would be to replace the mila_layer with mila_mix. For example, setting the weights back to 100% on both layers and the default setting for mixing is to normalize rather than clamp. Setting both weights to 1 would cause the sum to be 200%. Normalization adjusts down by half (100%/200%) on all layers reducing the weight used on each layer to 50%. That would render the exact same image as above.
However, since we eventually want to simulate a coating - just like the mia_material does, we use the mila_layer, but now with "use_directional_weight" on. We set it up like this:
    "layers" [
        {
            "shader" "reflection1",
            "weight" 1.0,           # Returned to 1.0
            "weight_tint" 1 1 1,
            "use_directional_weight" on,
            "directional_weight_mode" 0,       # Turn on fresnel reflectivity
            "ior" 1.4,      # The fresnel index of refraction
            "on" on
        },
        ...
The result
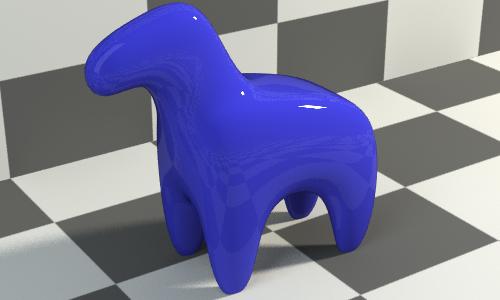
...and we have arrived at something for all practical purposes identical to what the mia_material did.
Lets take this further including arenas where mia_material can not follow.
We start by giving the object more of a "metal" look by:
First change the reflection shader from the default to:
shader "reflection1" "mila_glossy_reflection" (
    "tint" 0.1 0.1 1.0,   # Same as diffuse color
    "roughness" 0.6"       # Raise the roughness
)
Then change how the layer is applied:
    "layers" [
        {
            "shader" "reflection1",
            "weight" 1.0,
            "weight_tint" 1 1 1,
            "use_directional_weight" on,
            "directional_weight_mode" 1,             # Switch to custom curve
            "normal_reflectivity"  0.4,   # Facing reflectivity
            "grazing_reflectivity" 1.0,   # Pretty much always 1.0,
            "exponent"  5.0,   # Pretty much always 5.0
            "on" on
        },
        ...
This gives the following render:
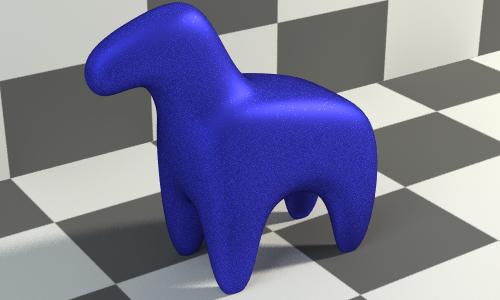
Still nothing mia_material couldn't do... but this is just a metallic glossy material. What if we want to do car paint? Then we need another layer of clearcoat on top. With the layering shaders .... this is trivial.
Lets add another reflective shader: and just pile it on top of the layers:
# A default reflection shader
shader "reflection1_coat" "mila_specular_reflection" ()

shader "reflection1" "mila_glossy_reflection" (
    "tint" 0.1 0.1 1.0,
    "roughness" 0.6
)

shader "diffuse1" "mila_diffuse_reflection" (
    "tint" 0.1 0.1 1.0,
)

shader "my_layers1" "mila_layer" (
    "layers" [
        {
            "shader" "reflection1_coat",
            "weight" 1,
            "weight_tint" 1 1 1,
            "use_directional_weight" on,
            "directional_weight_mode" 0,
            "ior" 1.4,
            "on" off
        },
        {
            "shader" "reflection1",
            "weight" 1.0,
            "weight_tint" 1 1 1,
            "use_directional_weight" on,
            "directional_weight_mode" 1,
            "normal_reflectivity"  0.4,
            "grazing_reflectivity" 1.0,
            "exponent"  5.0,
            "on" on
        },
        {
            "shader" "diffuse1",
            "weight" 1,
            "weight_tint" 1 1 1,
            "on" on
        }
    ]
)
With this result:
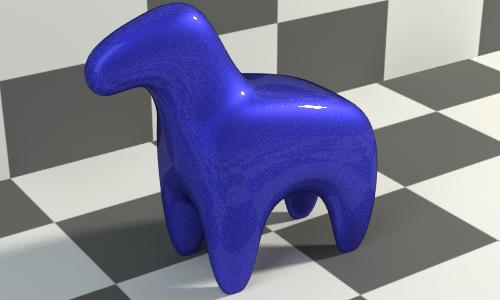
Basically we have re-invented carpaint. A colored diffuse layer plus a colored glossy layer, with a reflective coating on top.
It's just as easy to add yet another reflectivity layer for an additional sheen on the coating layer:
# Add another glossy shader
shader "reflection1_coat2" "mila_glossy_reflection" (
    "roughness" 0.2
)

...

"layers" [
        {  # Add it as another fresnel-weighted layer
            "shader" "reflection1_coat2",
            "weight" 1,
            "weight_tint" 1 1 1,
            "use_directional_weight" on, "directional_weight_mode" 0,
            "ior" 1.4,
            "on" on
        },
        {
           ...
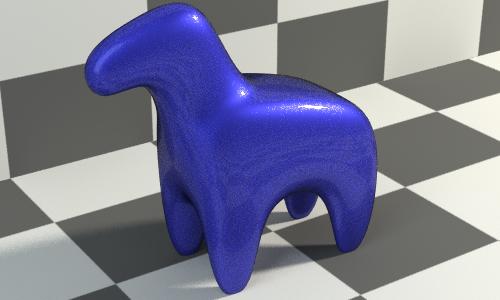
It's subtly different, but there is additional bloom around the highlights.
shader "top_material_diffuse" "mila_diffuse_reflection" (
    "tint" 0.3 0.3 0.3
)

...

"layers" [
        {
            "shader" "top_material_diffuse",
            "weight" 1.0,
            "weight_tint" = "noise_mask",           # some texture mask
            "use_directional_weight" off,
            "on" on
        },
        {
        ...
This gives us the following result:
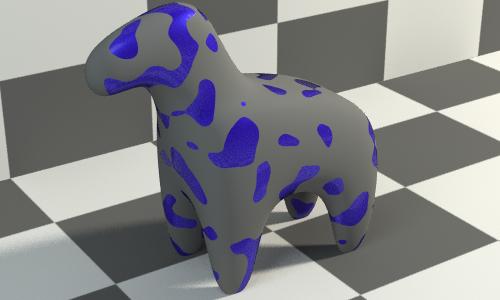
Note that this renders faster - the layering shaders are smart enough to only do the diffuse gray shading on the points where only the diffuse gray is visible. That would not be true if the materials had been mixed naively with simple multiplier- and add-nodes.
If we also have a bump map that matches our mask texture, we can apply this as the normal for the gray diffuse layer like so:
"layers" [
        {
            "shader" "top_material_diffuse",

            "bump" = "noise_bump",    # Some matching bump map

            "weight" 1.0,
            "weight_tint" = "noise_mask",
            "use_directional_weight" off,
            "on" on
        },
        {
        ...
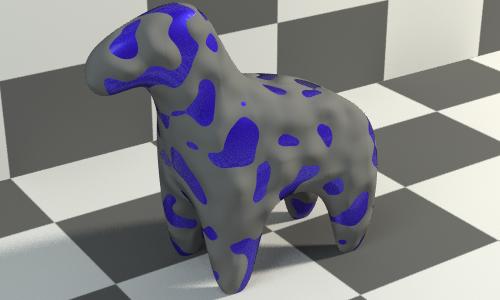
Now it looks like gray mud on the object. Lets try to make it look more like a gray goopy fluid, by adding a layer of fresnel reflectivity on top of the gray; simply use a fresnel reflected layer re-using the same mask and bump maps:
# A default reflection shader
shader "top_material_coat" "mila_specular_reflection" ()


...

"layers" [
        {
            "shader" "top_material_coat",
            "bump"  = "noise_bump", # Same bump map
            "weight" 1,
            "weight_tint" = "noise_mask", # Same mask
            "use_directional_weight" on, "directional_weight_mode" 0,
            "ior" 1.4,
            "on" on
        },
        {
        ...
Voilà! - gray slime:
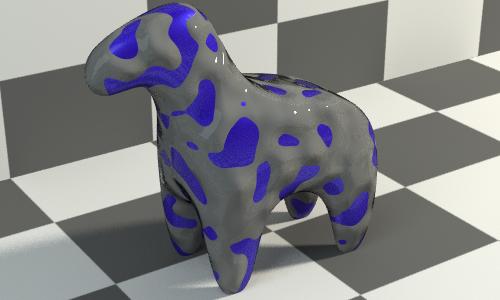
Of course this can be changed into strawberry jam by changing the color to red lowering the weight of the diffuse toplayer, perhaps something like this:
shader "top_material_diffuse" "mila_diffuse_reflection" (
    "tint" 0.2 0.02 0.02
)

...

        ...
        {
            "shader" "top_material_diffuse",
            "bump"  = "noise_bump",
            "weight" 0.5,
            "weight_tint" = "noise_mask",
            "use_directional_weight" off,
            "on" on
        },
        ...
This change gives this render:
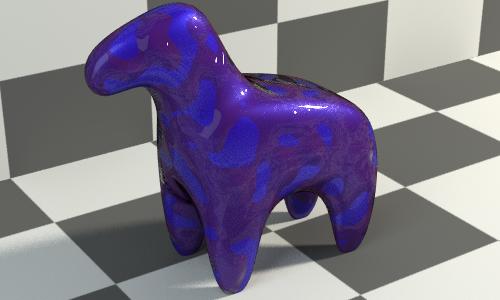
It is very important to understand that the mila_* layering is logical, not physical, this means that to show more of the underlying layer, the weight of the covering layer must be reduced. One should not make the layer itself transparent. If one does that, one will see into the object, and not to the underlying layer!
If we test this by simply swapping out our diffuse layer for a default transparency shader instead, we will see the result:
shader "some_transparency" "mila_transparency" ()

...

        ...
        {
            "shader" "some_transparency", # Swapped out diffuse for transparency
            "bump"  = "noise_bump",
            "weight" 1.0,
            "weight_tint" = "noise_mask",
            "use_directional_weight" off,
            "on" on
        },
        ...
...will give this result:
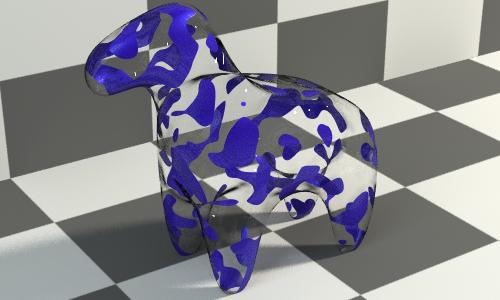
So notice how it looks like glass with the metallic blue paint parts showing only in spots. This is because the transparency is logically above the blue paint layers, and when at a higher weight takes precedent over the blue.
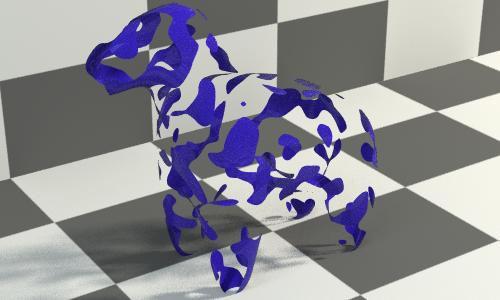
This can often be used as a feature for cutout transparency, for example. Note that this is different than a cutout for visibility. Since we see a thin glass horse on top of the cutout spots, we still simulate barely visible model.
However, the mila_material does have a visibility input for the material to simulate object visibility. In other words, one can use a cutout opacity map to control whether or not one should consider this an object hit. Often a card opacity is used similarly for leaves of a tree. The depth buffer will also be correctly written out, as well as any matte color in the extra color slot. The following image shows the difference.
shader "some_transparency" "mila_transparency" ()

...

        ...
        {
            "shader" "top_material_coat",
            "bump"  = "noise_bump",
            "weight" 1,
            "weight_tint" = "noise_mask", # Same mask
            "use_directional_weight" on, "directional_weight_mode" 0,
            "ior" 1.4,
            "on" off, # Turn off top coat
            ...
            "shader" "some_transparency"
            "bump"  = "noise_bump",
            "weight" 1.0,
            "weight_tint" = "noise_mask",
            "use_directional_weight" off,
            "on" off, # Turn off transparency
        },
        ...
shader "root_node" "mila_material" (
    "shader" "my_layers1",
    "visibility" = "inverted_noise_mask" #opacity rather than transparency
)
Up until now we used a single large layers node just stacking everything. Sometimes it's easier and more convenient to use multiple layers nodes. For example, if we go back to the "gray goop on top of blue paint, from above....

...it is currently created as the following list of layers (top to bottom):
If we want we could split this out into two layers node that feed a third layers node that mixes between the "gray goop" material and the "blue paint" material. This makes the organization more logical and you only need to apply the mask- and bumps once, instead of on multiple layers.
A complete listing of the material done in hierarchical fashion follows here.:
# This is the complete "gray goop" material

shader "top_material_coat"    "mila_specular_reflection" ()
shader "top_material_diffuse" "mila_diffuse_reflection" ( "tint" 0.3 0.3 0.3 )

shader "top_layers" "mila_layer" (
    "layers" [
        {
            "shader" "top_material_coat",
            "weight" 1,
            "weight_tint" 1 1 1,
            "use_directional_weight" on, "directional_weight_mode" 0,
            "ior" 1.4,
            "on" on
        },
        {
            "shader" "top_material_diffuse",
            "weight" 1.0,
            "weight_tint" 1 1 1,
            "use_directional_weight" off,
            "on" on
        }
    ]
)

# This is the complete "blue paint" material

shader "reflection1_coat2" "mila_glossy_reflection" ( "roughness" 0.4 )
shader "reflection1_coat"  "mila_specular_reflection" ()
shader "reflection1"       "mila_glossy_reflection" ( "tint" 0.1 0.1 1.0, "roughness" 0.6 )
shader "diffuse1"          "mila_diffuse_reflection"    ( "tint" 0.1 0.01 1.0 )

shader "paint_layers1" "mila_layer" (
    "layers" [
        {
            "shader" "reflection1_coat2",
            "weight" 1,
            "weight_tint" 1 1 1,
            "use_directional_weight" on,
            "directional_weight_mode" 0,
            "ior" 1.4,
            "on" on
        },
        {
            "shader" "reflection1_coat",
            "weight" 1,
            "weight_tint" 1 1 1,
            "use_directional_weight" on,
            "directional_weight_mode" 0,
            "ior" 1.4,
            "on" on
        },
        {
            "shader" "reflection1",
            "weight" 1.0,
            "weight_tint" 1 1 1,
            "use_directional_weight" on,
            "directional_weight_mode" 1,
            "normal_reflectivity"  0.4,
            "grazing_reflectivity" 1.0,
            "exponent"  5.0,
            "on" on
        },
        {
            "shader" "diffuse1",
            "weight_tint" 1 1 1,
            "weight" 1,
            "on" on
        }
    ]
)

# This layers the two different materials together to create
# "gray goop covered blue paint"

shader "my_layers1" "mila_layer" (
    "layers" [
        {
            "shader" "top_layers",
            "bump"  = "noise_bump",      # Bump ONLY goes here
            "weight_tint" = "noise_mask",      # Mask ONLY goes here
            "weight" 1,
            "on" on
        },
        {
            "shader" "paint_layers1",
            "weight_tint" 1 1 1,
            "weight" 1,
            "on" on
        }
    ]
)
The resulting render is identical to the one above:
