統合フェーズ 1d: ビジュアル デバッギングを設定する
Navigation Lab のライブ ビジュアル デバッギング機能は、統合が正しくなされていることと、Gameware Navigation の全体的な使い方が間違っていないことを保証するために非常に重要です。
- ビジュアル デバッギング システムを開始/停止するには、World::StartVisualDebug() メソッドと World::StopVisualDebug() メソッドを使用します。
- VisualDebugServer::NewFrame() メソッドを呼び出して、メインのゲーム ループで各フレームの開始点をマークする必要があります。これにより Navigation Lab に保留メッセージが送信され、ビジュアル デバッグ システムによって保持される現在フレーム インデックスが増やされます(または設定されます)。
例: [Tutorial_FirstIntegration.cpp からのコード]
bool MyGameWorld::Initialize()
{
    ...
    const KyUInt32 databaseCount = 1;
    m_world = *KY_NEW Kaim::World(databaseCount);

// Visual debugging is disabled in Shipping builds. Even though the symbols and functions are available, they do nothing.
// Guarding this code is not necessary, but is recommended in order to prevent useless computations.
#ifndef KY_BUILD_SHIPPING
    // Create a configuration object for the visual debugging server
    Kaim::VisualDebugServerConfig visualDebugServerConfig;

    // Set up its class members
    const KyUInt32 serverPort = Kaim::VisualDebugServerConfig::DefaultServerPort();
    visualDebugServerConfig.UseNavigationLab(serverPort);
    visualDebugServerConfig.SetWaitOnStart( Kaim::VisualDebugServerConfig::DoNotWaitOnStart );

    // Activate visual debugging
    KyResult startResult = m_world->StartVisualDebug(visualDebugServerConfig);
    if (KY_FAILED(startResult))
    {
        return false;
    }
#endif
    ...
}
...

void MyGameWorld::Update(float deltaTimeInSeconds)
{
    m_world->GetVisualDebugServer()->NewFrame(m_gameFrameIdx);
    ++m_gameFrameIdx;
    ...
}
...

void MyGameWorld::Destroy()
{
    ...
    m_world->StopVisualDebug();
    m_world = KY_NULL;
}
テスト
ビジュアル デバッギング システムが動作していることをテストするには:
- ゲームを起動します。
- Navigation Lab を起動します。
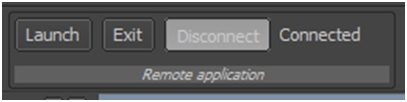
- Navigation Lab で左上にある Remote Application ツールボックスの Connect ボタンをクリックします。
表示されたダイアログ ボックスで、ゲームを実行しているホストの IP アドレス (または Navigation Lab をゲームと同じコンピュータ上で実行している場合は localhost) を入力します。ゲームのコードに、ビジュアル デバッギング システム用に設定したポート番号と同じものを入力します。最後に、ダイアログの Connet をクリックし、接続を設定します。
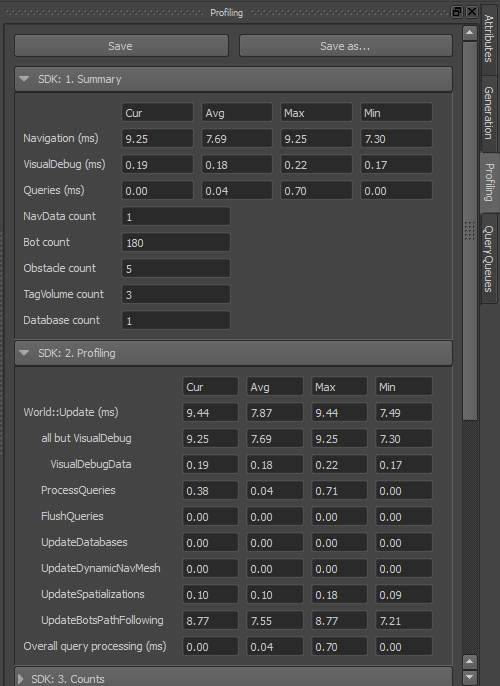
Navigation Lab とゲームとの接続が正常に終了した場合:
 特に明記されている場合以外は、この作業は、Creative Commons 表示 - 非営利 - 継承 3.0 非移植ライセンス のもと認可を受けています。 Autodesk Creative Commons FAQ (英語版) を参照してください。